

Vinteo Desktop Client Settings
After installing the Vinteo Desktop client (hereinafter referred to as VD), detailed installation and configuration instructions are available at the following link. You need to launch the client and perform the initial settings for the server address and authentication by filling in the fields in Step 2 of the “Connection Settings”. You will start from this step immediately if there are no issues with audio and video devices.
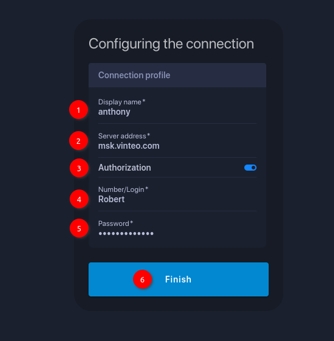
The numbers in the illustration correspond to the steps of the algorithm:
- Enter the address of the target server where a WS-type account has been created. If the address is correct, a check mark will appear.
- Enter the subscriber’s name/nickname.
- Select the “Authorization” option.
- Enter the subscriber number (this will be the number “100” from the subscriber addition example).
- Enter the password.
- This settings block depends on the user’s needs.
- Click the “Done” button. It will become active and turn blue if the entered data is correct.
Other settings can be changed later. If you still have issues with the devices (absence or unavailability), the application will redirect you to Step 1 of the “Connection Settings” page, where you can select available devices or choose to work without them. Troubleshooting for both the web client and the software client is described below in the section “Errors and Their Solutions”.
Errors and Their Solutions
While using the client, various situations may arise that prevent normal operation. Some of them can be resolved automatically by the client, which will notify you, while others require your participation, which will also be indicated. Below are examples of situations and their solutions.
Situation 1
The system lacks a webcam and microphone
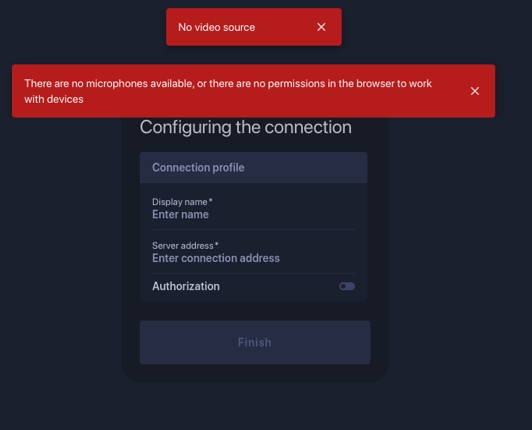
Web client response
On the first launch, the client will open the “Device Setup” panel, automatically set the operating modes to “No camera” and “No microphone”, and display an error message: “No video source”, “No available microphones”. During subsequent launches, the program will also notify you of the absence of sound and video capture devices in the system.
There are several options for further action:
- Close the warning, click “Next”, and continue working without a webcam and microphone. In the conference, other participants will see only a placeholder image (similar to the avatar image, which can be replaced with your photo). You will be able to see and hear the conference, send messages in the chat if it is enabled, and share presentation content if needed.
- Connect a webcam or a microphone only; then you will be able to communicate with conference participants.
Situation 2
The webcam was assigned, but it is currently being used by another application
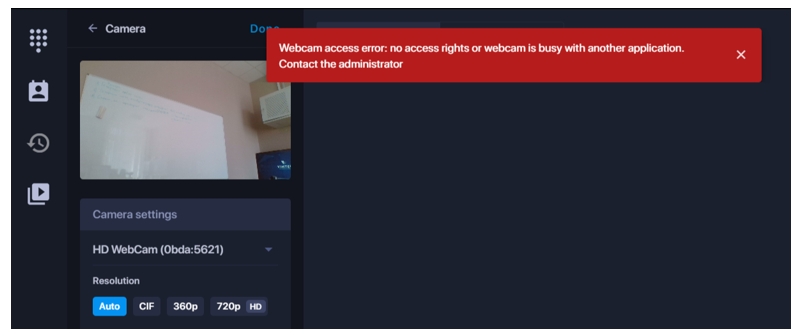
VD response when only one webcam is available
When launching or restoring the VD application, it will open the “Device Setup” panel, automatically switch to “No camera” mode, and display the following message:
There are two options for further action:
- Close the warning and continue working without the camera.
- Close the warning, find and close the application using the camera. The selected camera will be automatically restored, and you can continue working.
VD response when multiple sources are available
In the example, the camera “HD Webcam” is selected as the source (first source), while the camera “Logitech Webcam C920” is available in the system (second source). When launching or restoring, VD will open the “Device Setup” panel, automatically switch to the second source, and display the following message:
There are two options for further action:
- Close the warning and continue working with the second video source.
- Close the warning, find and close the application using the camera, minimize and restore VD. The selected camera will be automatically restored, and you can continue working.
How to find the application using the camera or microphone:
- For Windows 10: Settings → Privacy → Camera or Microphone
- For Windows 11: Settings → Privacy & Security → Camera or Microphone
Situation 3
Access to the webcam and/or microphone is blocked by the OS
Program response:
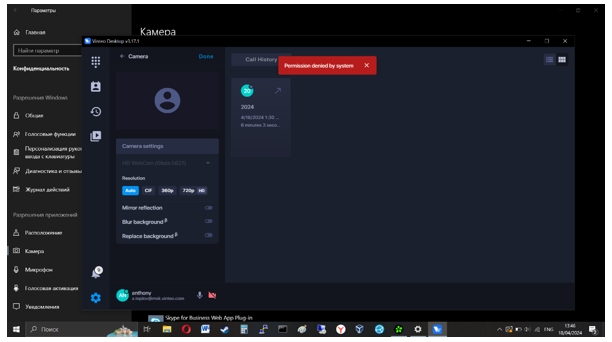
When launching or restoring VD, the “Device Setup” tab will open and display the following message:
“No system permissions to use the camera or microphone”
There is only one solution to this issue, since the action cannot be performed: close the message, grant permission to use the camera and microphone in the OS privacy and security settings, minimize and restore the application, and continue working.
To grant camera and microphone access in Windows 10, go to Settings → Privacy → Camera or Microphone, and in Windows 11, go to Settings → Privacy & Security → Camera or Microphone. On this page, you need to check both the overall device access permission and the permission for the video conferencing client.