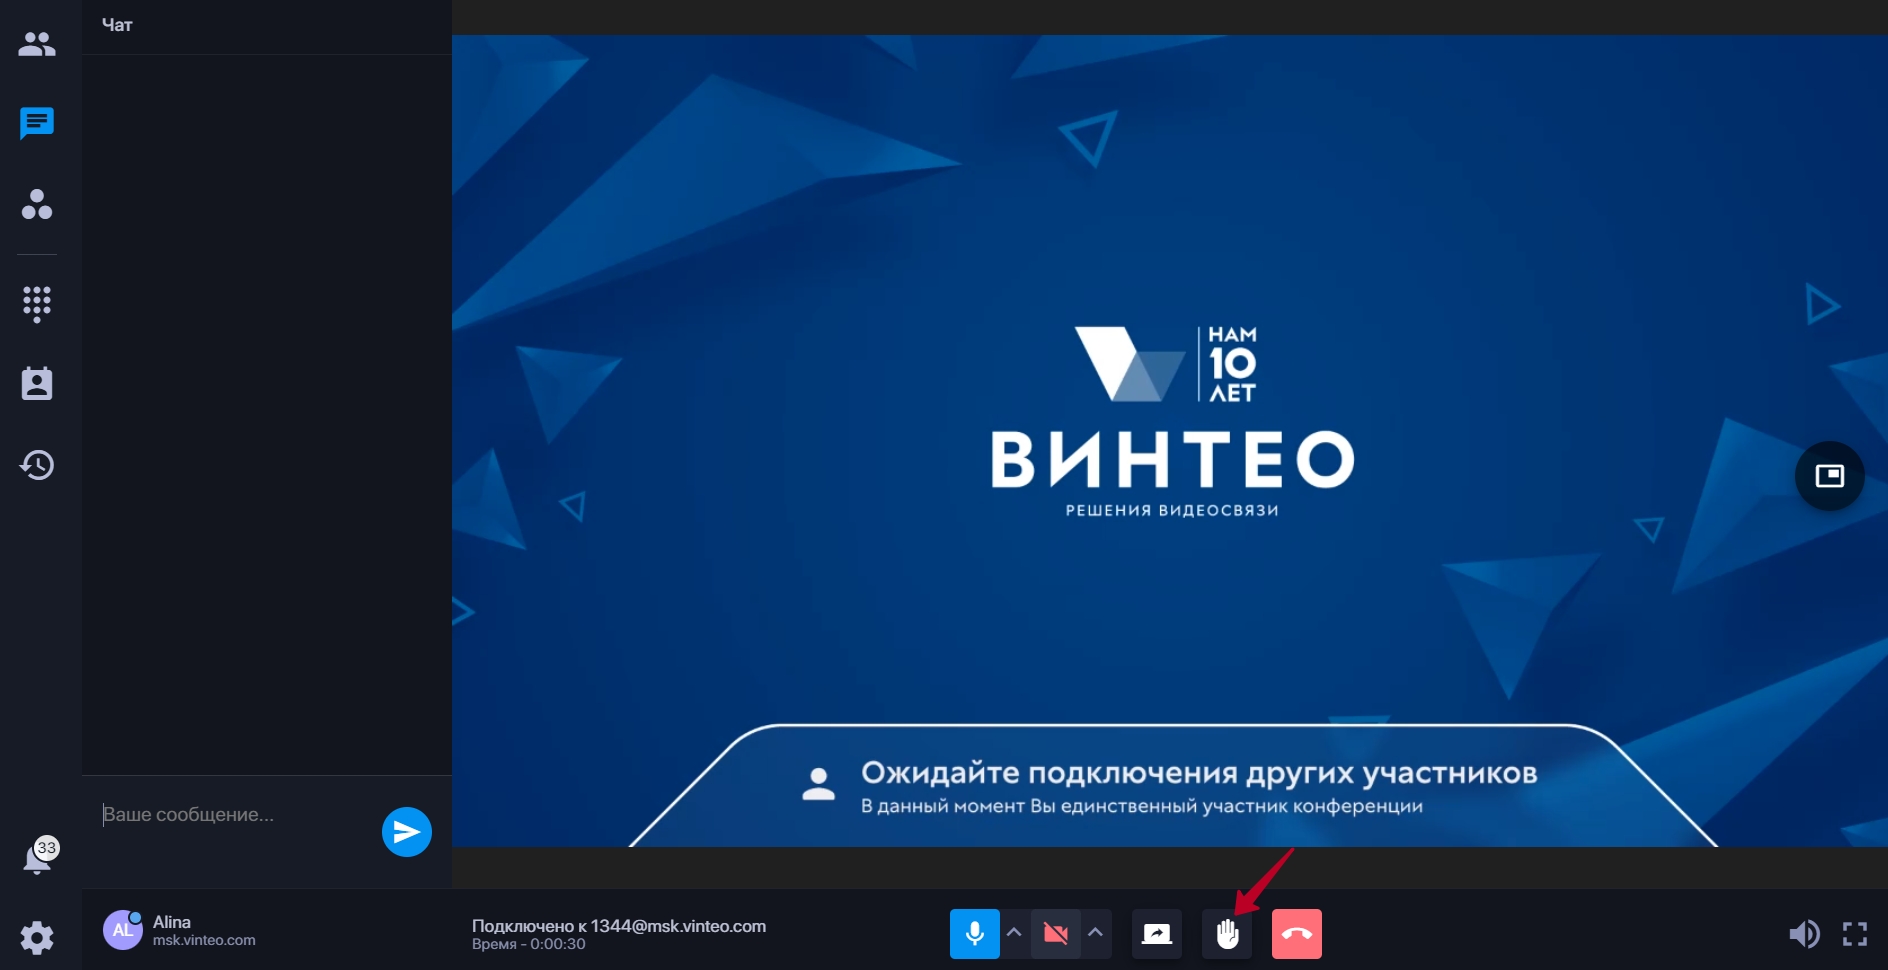
Description of functionality when making a call
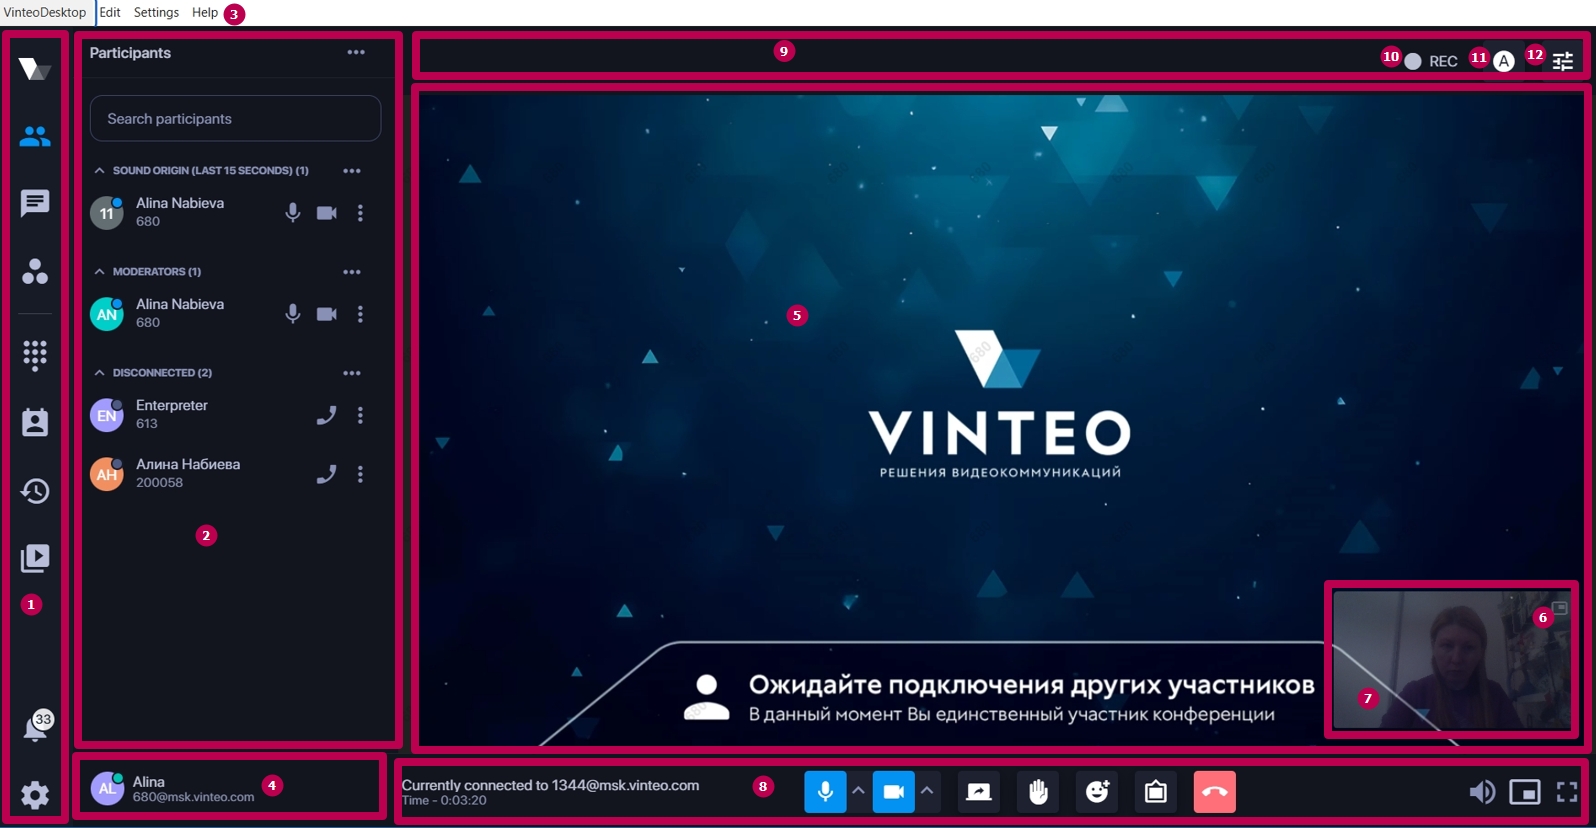
- navigation bar;
- functional panel;
- system menu which is displayed when pressing the Alt key (its functionality is described in detail in the section “Main functions of the application in standby mode”);
- panel with information about settings and connection status to the server (its functionality is described in detail in the section “Main functions of the application in standby mode”);
- the bar on the right side where the video stream from the server is displayed;
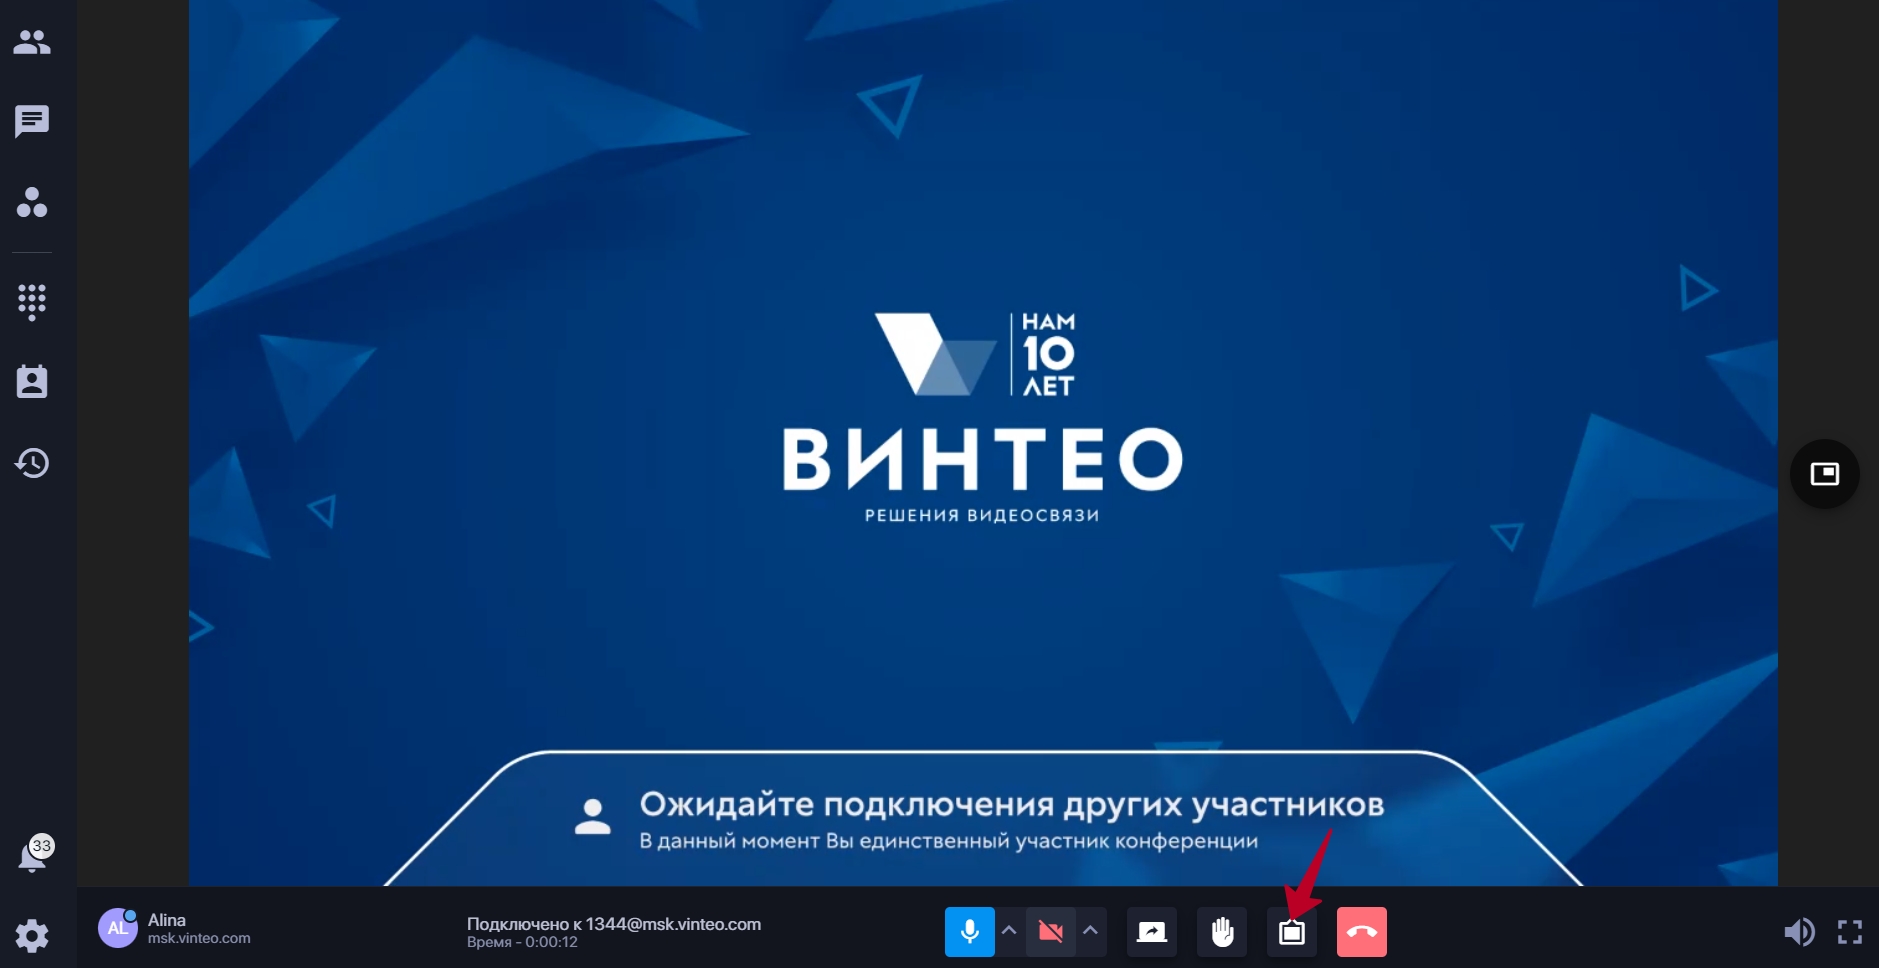
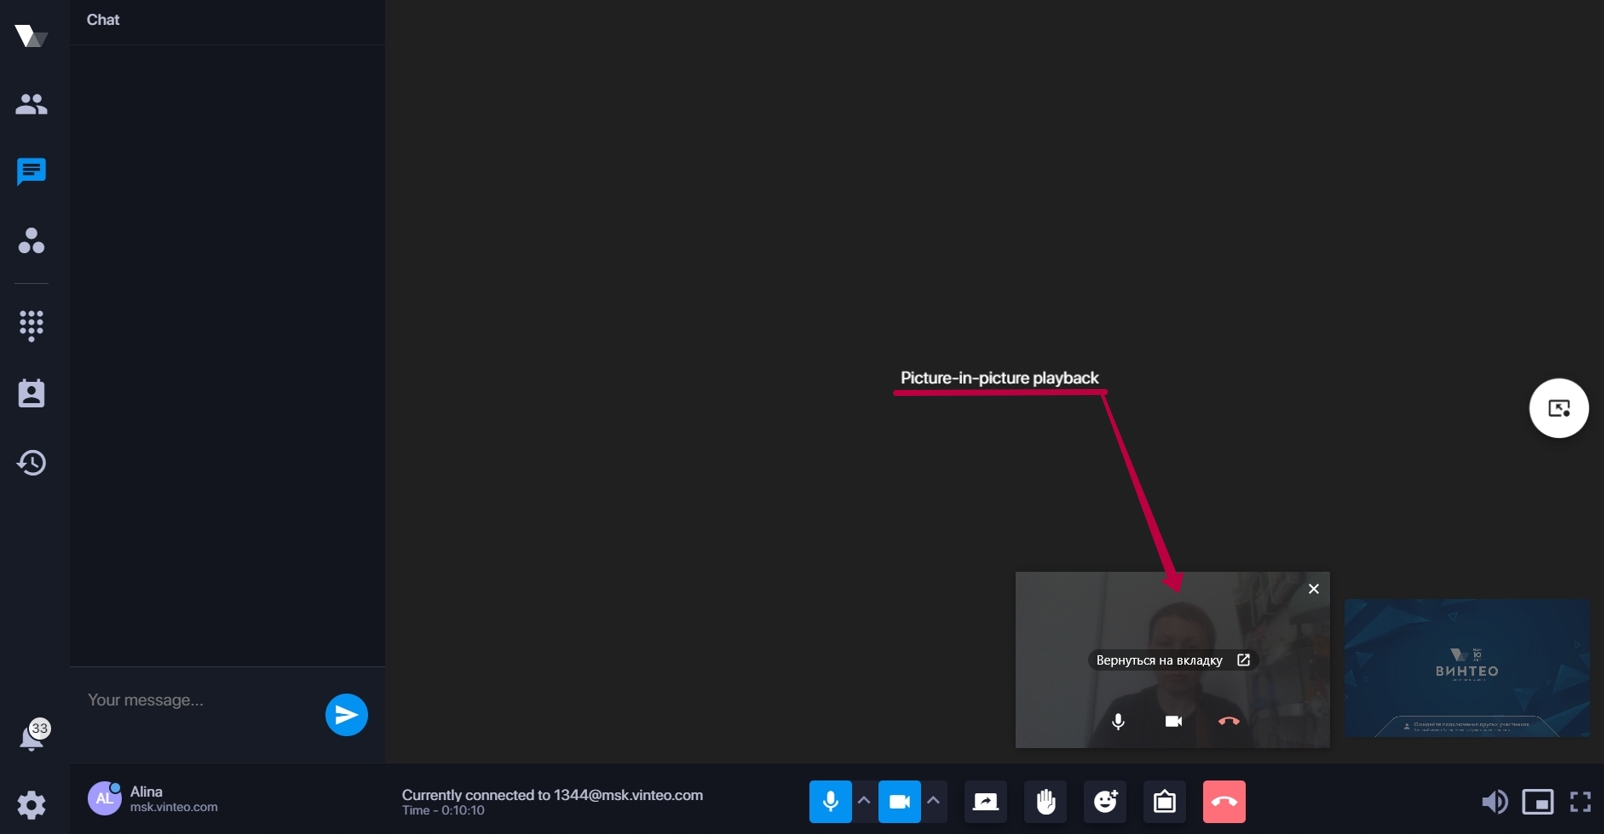
- The “Enter/Exit Picture in Picture” button in the middle part of the screen displays a thumbnail image transmitted from the server to the lower right corner of the desktop. The image can be moved or left in any area of the screen on top of other windows. To expand the image to full screen hold down the Shift key before clicking the Picture-in-Picture button;
- the area in which the image from the local camera is displayed;
- call control panel;
- the moderator panel with settings that can be changed during a call; it has the following buttons:
- conference recording button; recording will start immediately after pressing the button;
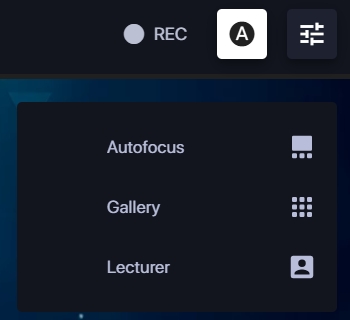
- the button that allows you to change the conference layout in a call and broadcast;
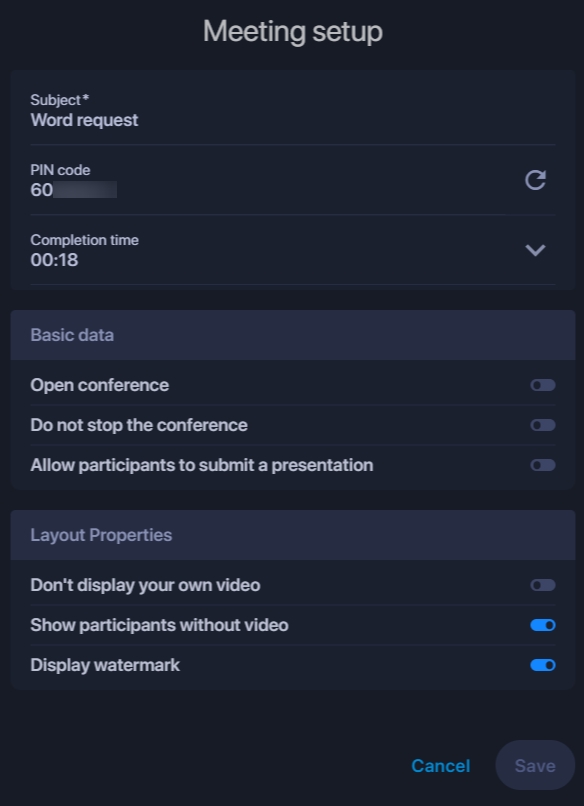
- the button that provides access to the settings of the currently active conference.
The “Completion time” field displays the end time of the conference; the moderator can change it during the meeting. 10 minutes before the end of the conference the notification will appear warning you of its end.
Hovering over the speaker icon displays a volume control for audio playback during an active call.

When you turn on the “Picture in Picture” mode you can control the call: turn on/off the microphone and camera and accept/hang up the call.
By pressing the “Participants” button you can close the submenu during a call and if necessary call it with the same button.

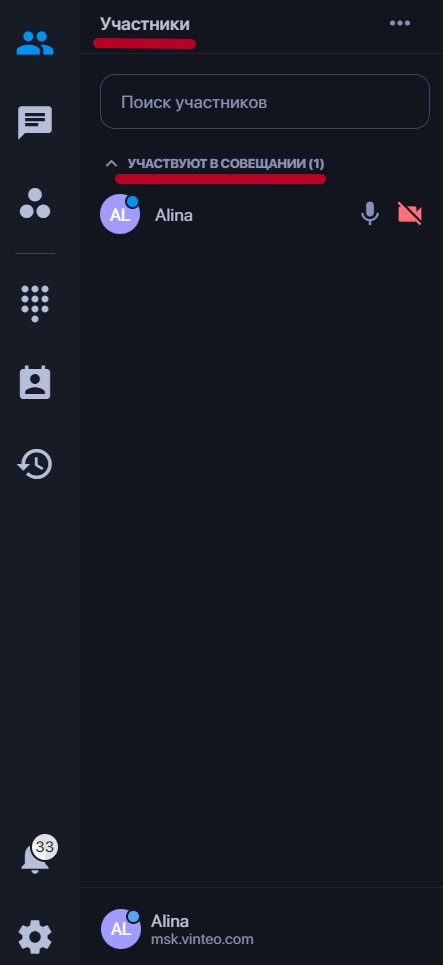
“Participants” button
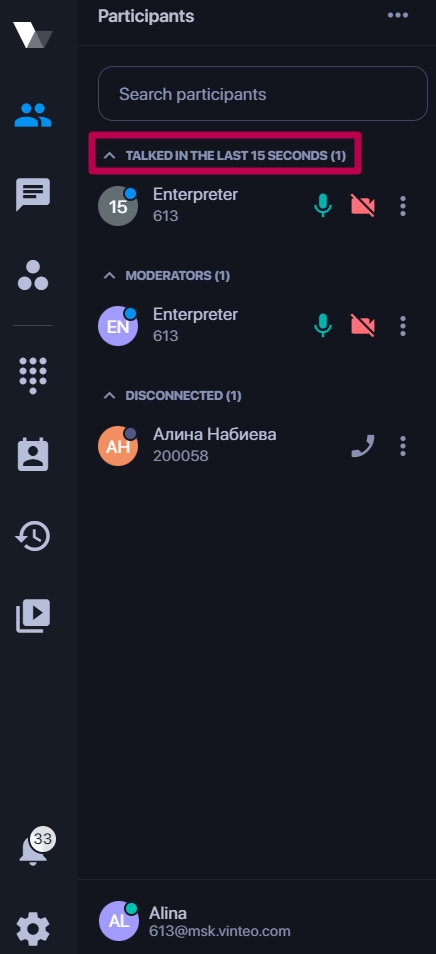
When making a call the “Participants” button is displayed in the system menu which opens the list of participants; there is the indication of the activity of the microphone, camera and outgoing sound, as well as the button […], which opens additional functionality:
- copying the link to join the conference;
- invitation to the conference via E-mail;
- adding a participant;
- adding a participant from contacts.
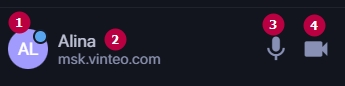
At the bottom of the function panel a participant entry is displayed which consists of:
- avatar containing a status indicator;
- an account’s name and number which are visible to other conference participants;
- buttons to turn on/off an account’s microphone;
- buttons to turn on/off an account’s camera.
The participant’s entry also displays the labels: “Lecturer” for the moderator when assigning the participant as a lecturer as well as “Presentation” if the participant starts the presentation.
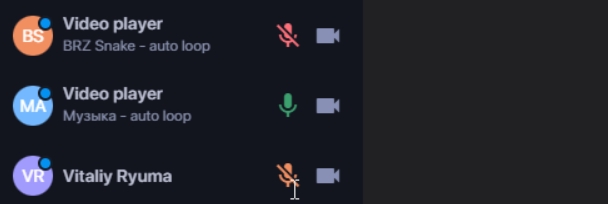
When the microphone and camera are disabled on the server their icons become red and when disabled in Vinteo Desktop the icons become orange as shown in the figure.
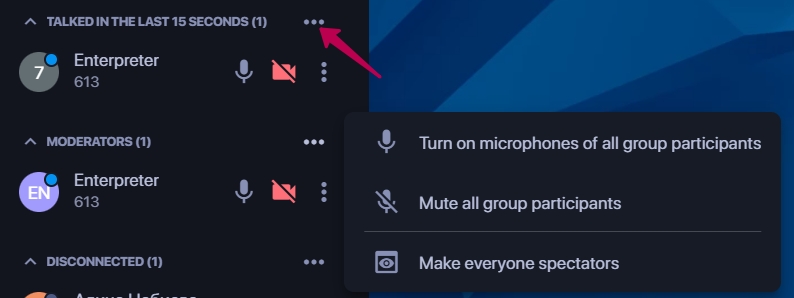
Participants whose microphone has been active for the last 15 seconds are highlighted in a separate group. Their number is displayed. Disabled participants are also highlighted.
The moderator has access to advanced functionality; he can control participants’ microphones, mute a participant and remove a participant from the conference.
The moderator can also manage a group of participants: turn on/off microphones and cameras, transfer participants to spectators. To do this the moderator needs to click on the additional menu button of the required group; the window with access for management will be displayed.
The moderator has access to advanced functionality; he can manage microphones, participants’ cameras, disconnect a participant, remove from the conference and also determine whether the participant will be displayed in the conference mosaic.
“Chat” button
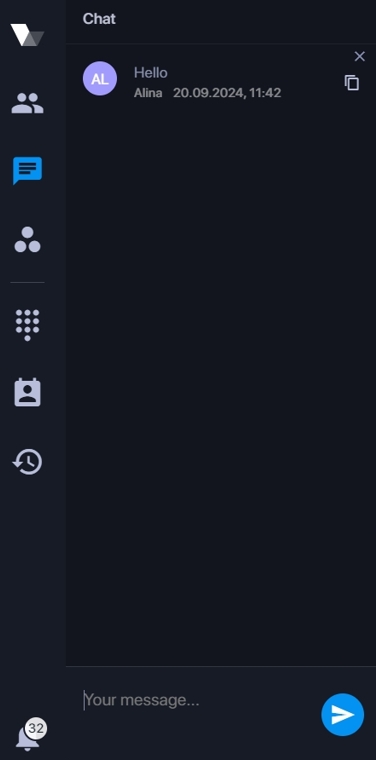
When you make a call the “Chat” button appears in the system menu opening the chat.
Chat is active if the “Chat” toggle is activated in the conference settings (webcast settings - HLS tab - “Chat” toggle). On the “Chat” tab you can send a message to the chat, delete your message by clicking on the cross to the right of the message and also copy the message. The moderator can delete all messages in the chat.
“DTMF command entry” button

This functionality provides the ability to send DTMF signals in invent mode to manage conferences on cascade servers or to enter a PIN code.
“Dialing” button
The description of the functionality of the “Dialing” button can be found in Dialing button of the Main functions of the application in standby mode section.
“Address directory” button
The description of the functionality of the “Address directory” button can be found in “Address directory” button of the Main functions of the application in standby mode section.
“Call history” button
The description of the functionality of the “Call history” button can be found in the “Call history” button of the Main functions of the application in standby mode section.
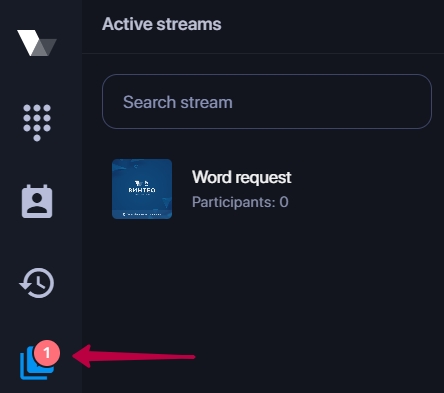
“Active broadcasts” button
To organize a webcast you must activate this functionality in the conference settings. After this you can see the notification about an active broadcast. The number of active broadcasts will also be displayed.
Active broadcasts are displayed only to participants added to the conference by the administrator.
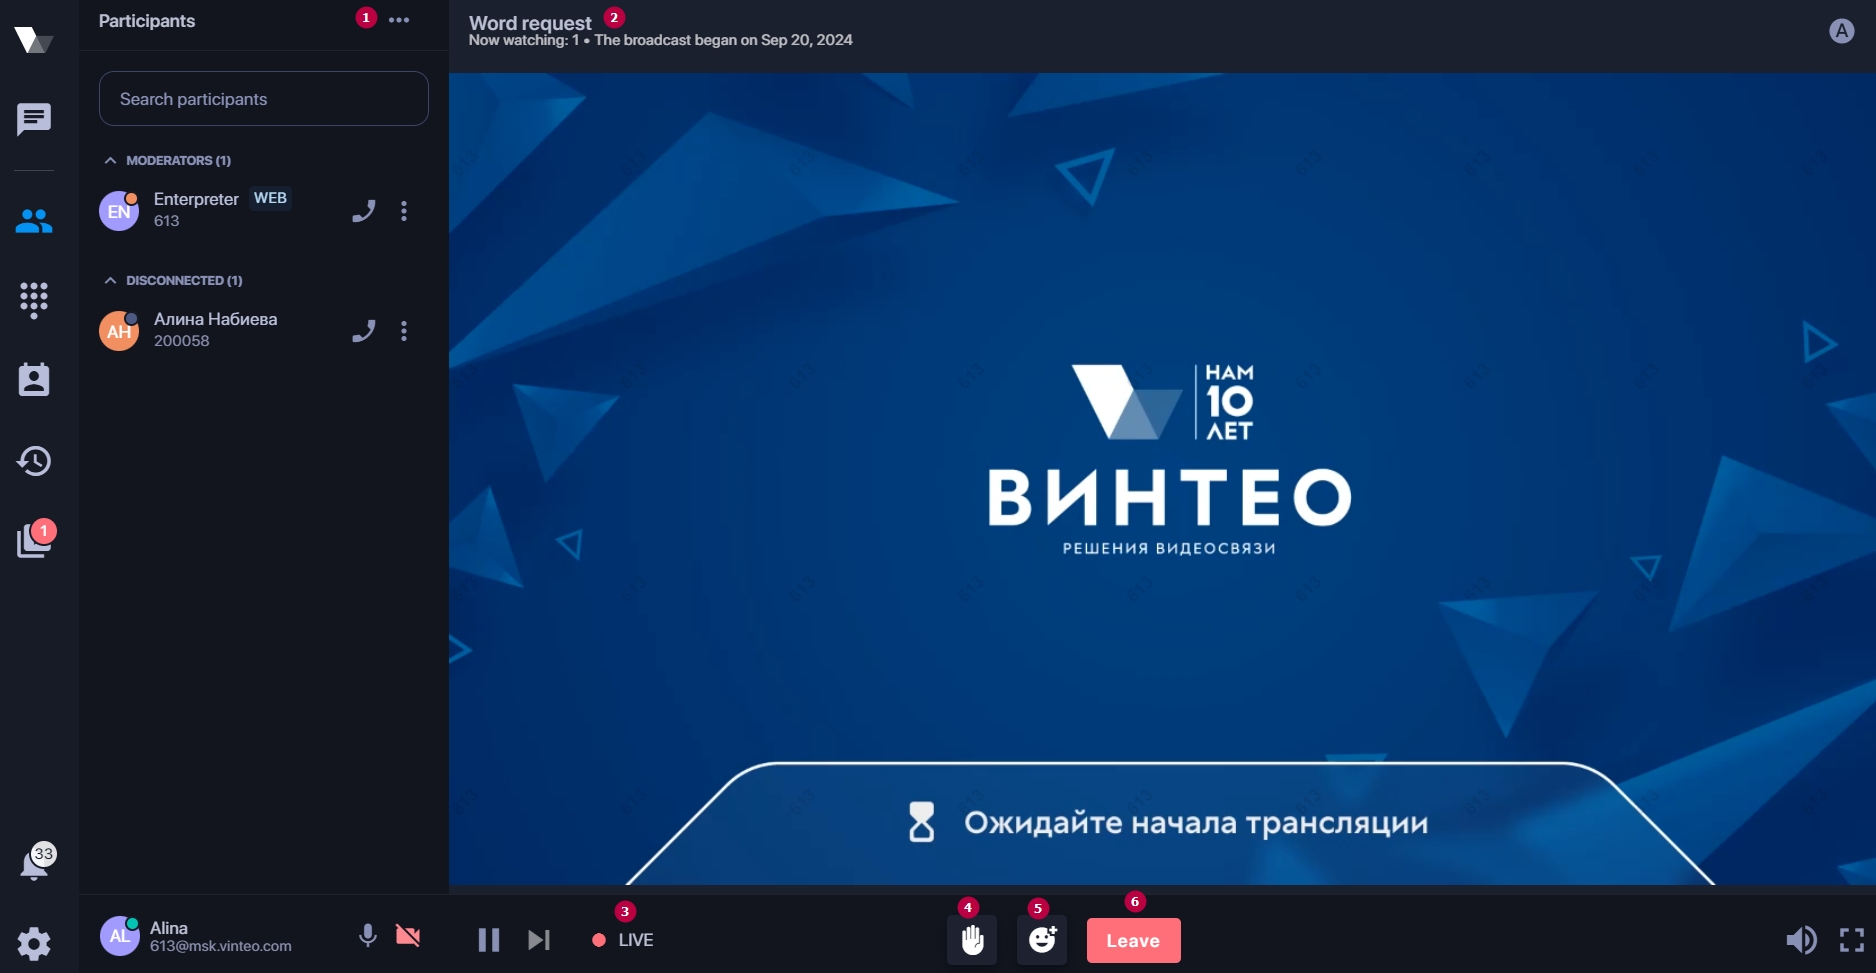
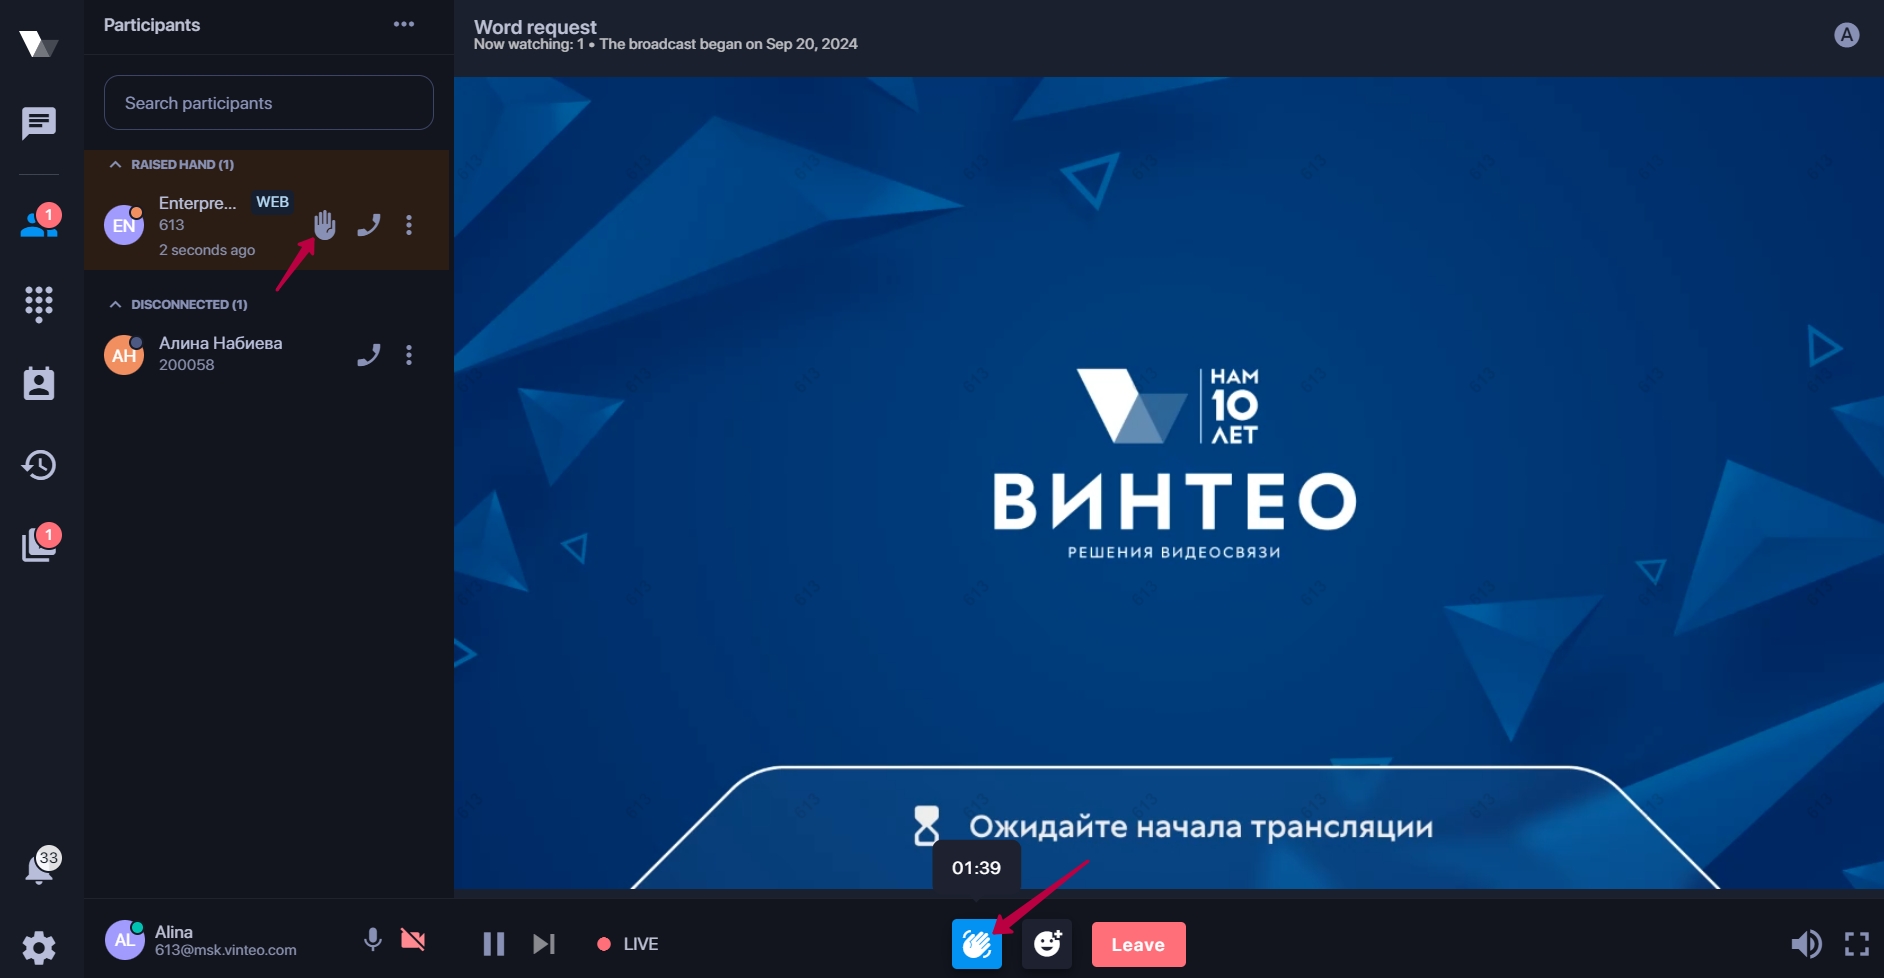
The active call button for moderators will change its name to “Active stream” and additional functionality will appear.
- additional functionality button (action menu) allowing you to add participants during the broadcast;
- stream statistics showing how many participants are watching the broadcast and when it started;
- indicator that the stream has started;
- “Word request” functionality;
When a word is requested the moderator will receive a notification to provide the word in the form of a “palm” pictogram. The same pictogram will appear in the participant entry.
The functionality is described in detail in the article “Word request”.
- reaction button;
- “Leave” button which allows a participant to disconnect from the broadcast.
Statistics
Statistics are available by clicking on the connection information.
The functional panel provides access to statistical data on incoming and outgoing audio and video streams; also contains event encoding, information on the number of sent and received packets, codecs, bitrate, etc.
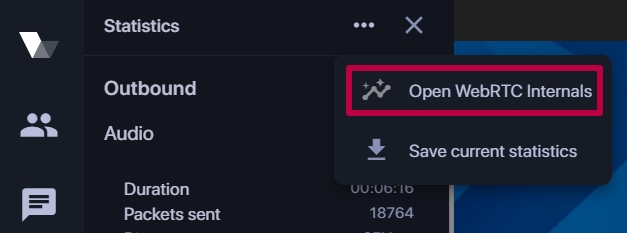
The additional menu button allows you to view debugging information about WebRTC after clicking the “Open WebRTC Internals” button as shown in the figure.
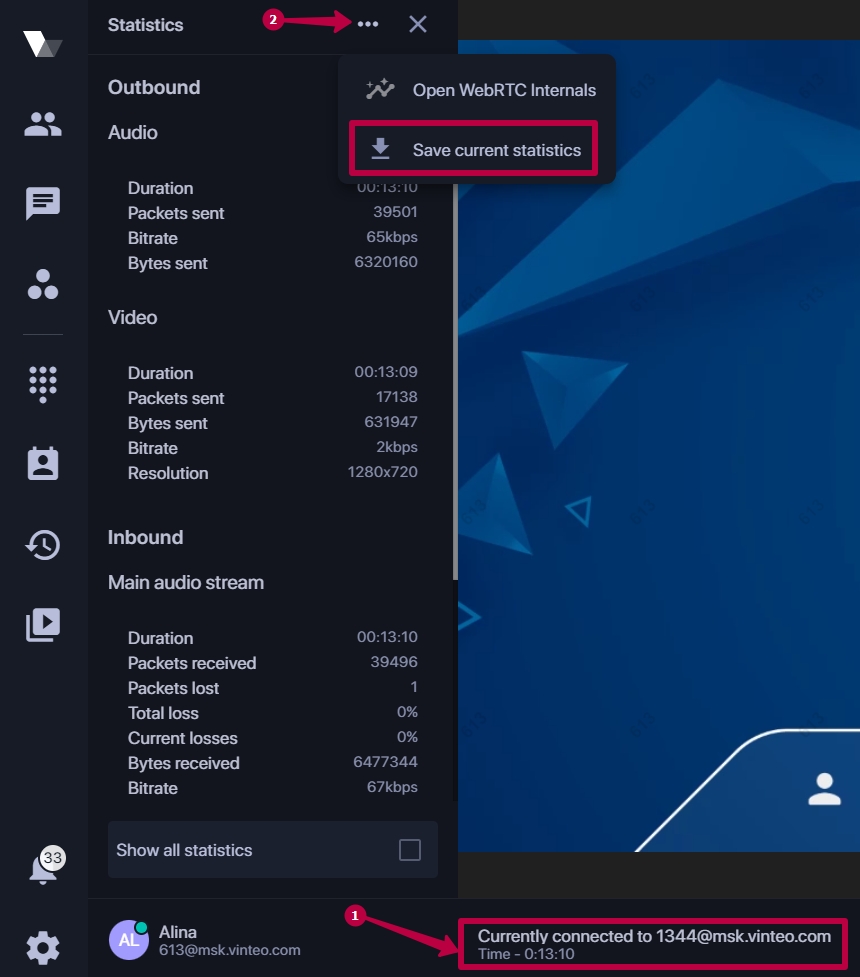
Statistics saving
To save statistics to a file you must be connected to the conference. Then you need to click on the connection information; click the additional menu button and “Save current statistics” button as shown in the figure.
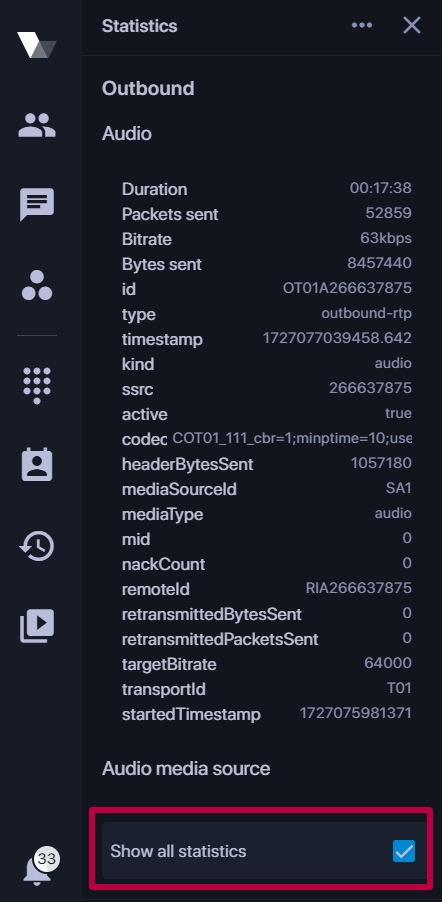
The “Show all statistics” toggle gives access to extended statistics.
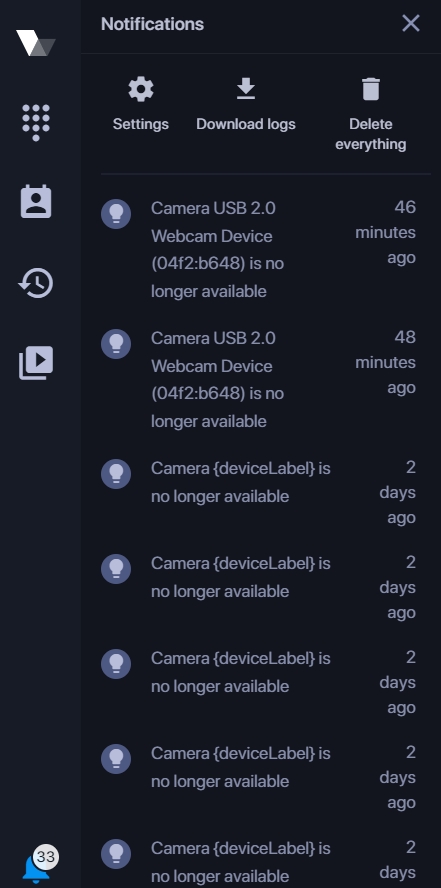
“Notifications” button
The “Notifications” button is located at the bottom of the function bar. This button has an indicator showing the number of notifications.
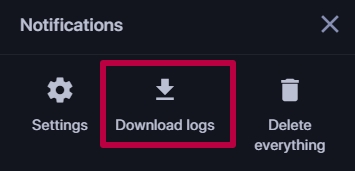
Notifications are located in the list on the functional panel. At the top of the functional bar there are three buttons: “Settings”, “Download logs” and “Delete everything”.
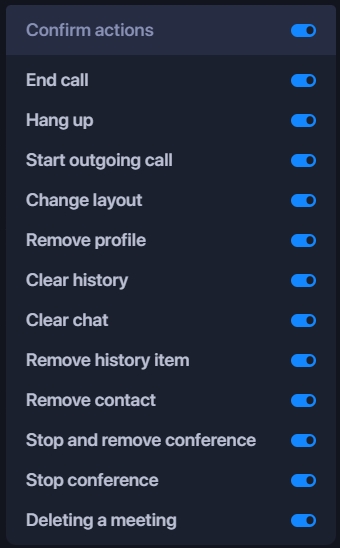
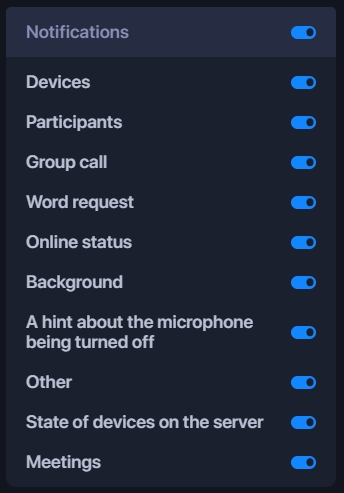
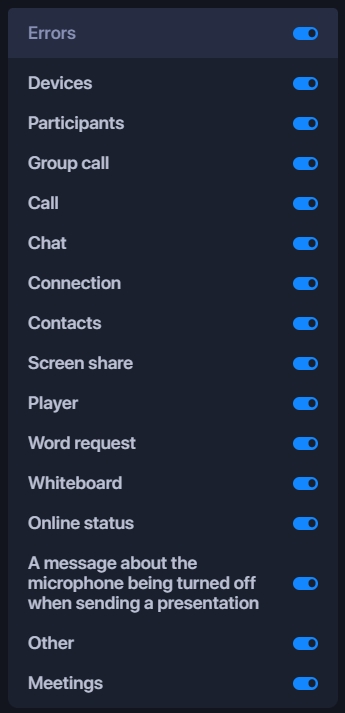
The “Settings” button allows you to set the following notifications:


At the bottom of the functional panel there is the notification counter: received and unread.
Logs saving
You can download and save logs and notifications by clicking the button at the top of the functional bar.
“Settings” button
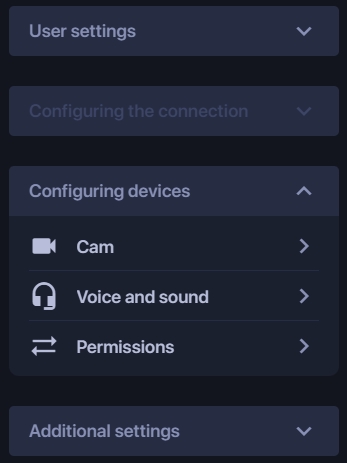
The “Settings” button at the bottom of the navigation panel opens four tabs on the function bar: “User settings”, “Configuring the connections”, “Configuring devices” and “Additional settings”.
The “Configuring the connections” tab is inactive in call mode and connection settings cannot be changed.
The “Configuring devices” tab allows you to change the camera, resolution or audio sources in the call mode.
Control in call mode
During an active call at the bottom of the window there is the control panel that contains information about the current connection:
- which conference and which server an account is connected to;
- connection time to the server.
- on/off microphone button;
- microphone settings;
- on/off camera button;
- camera settings;
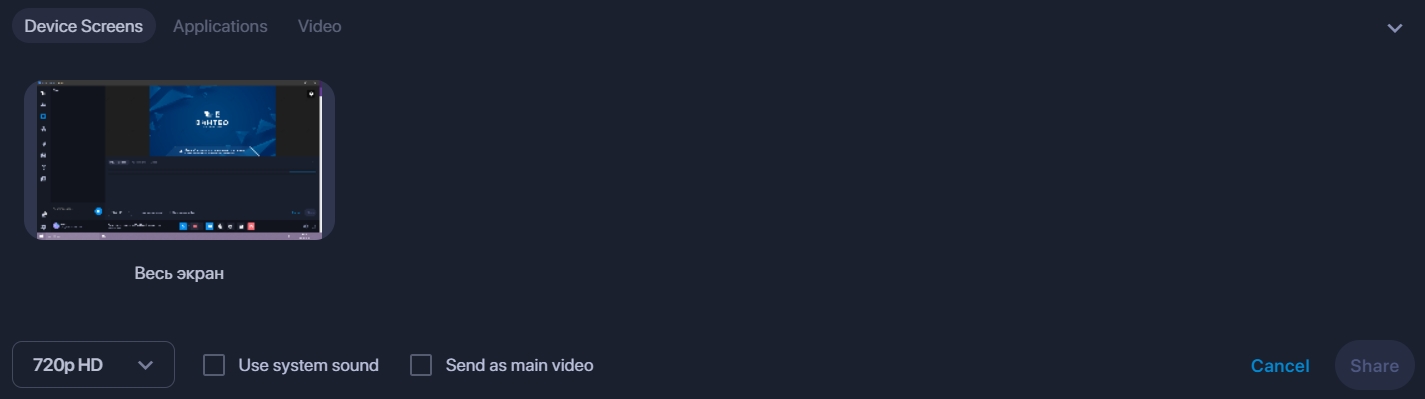
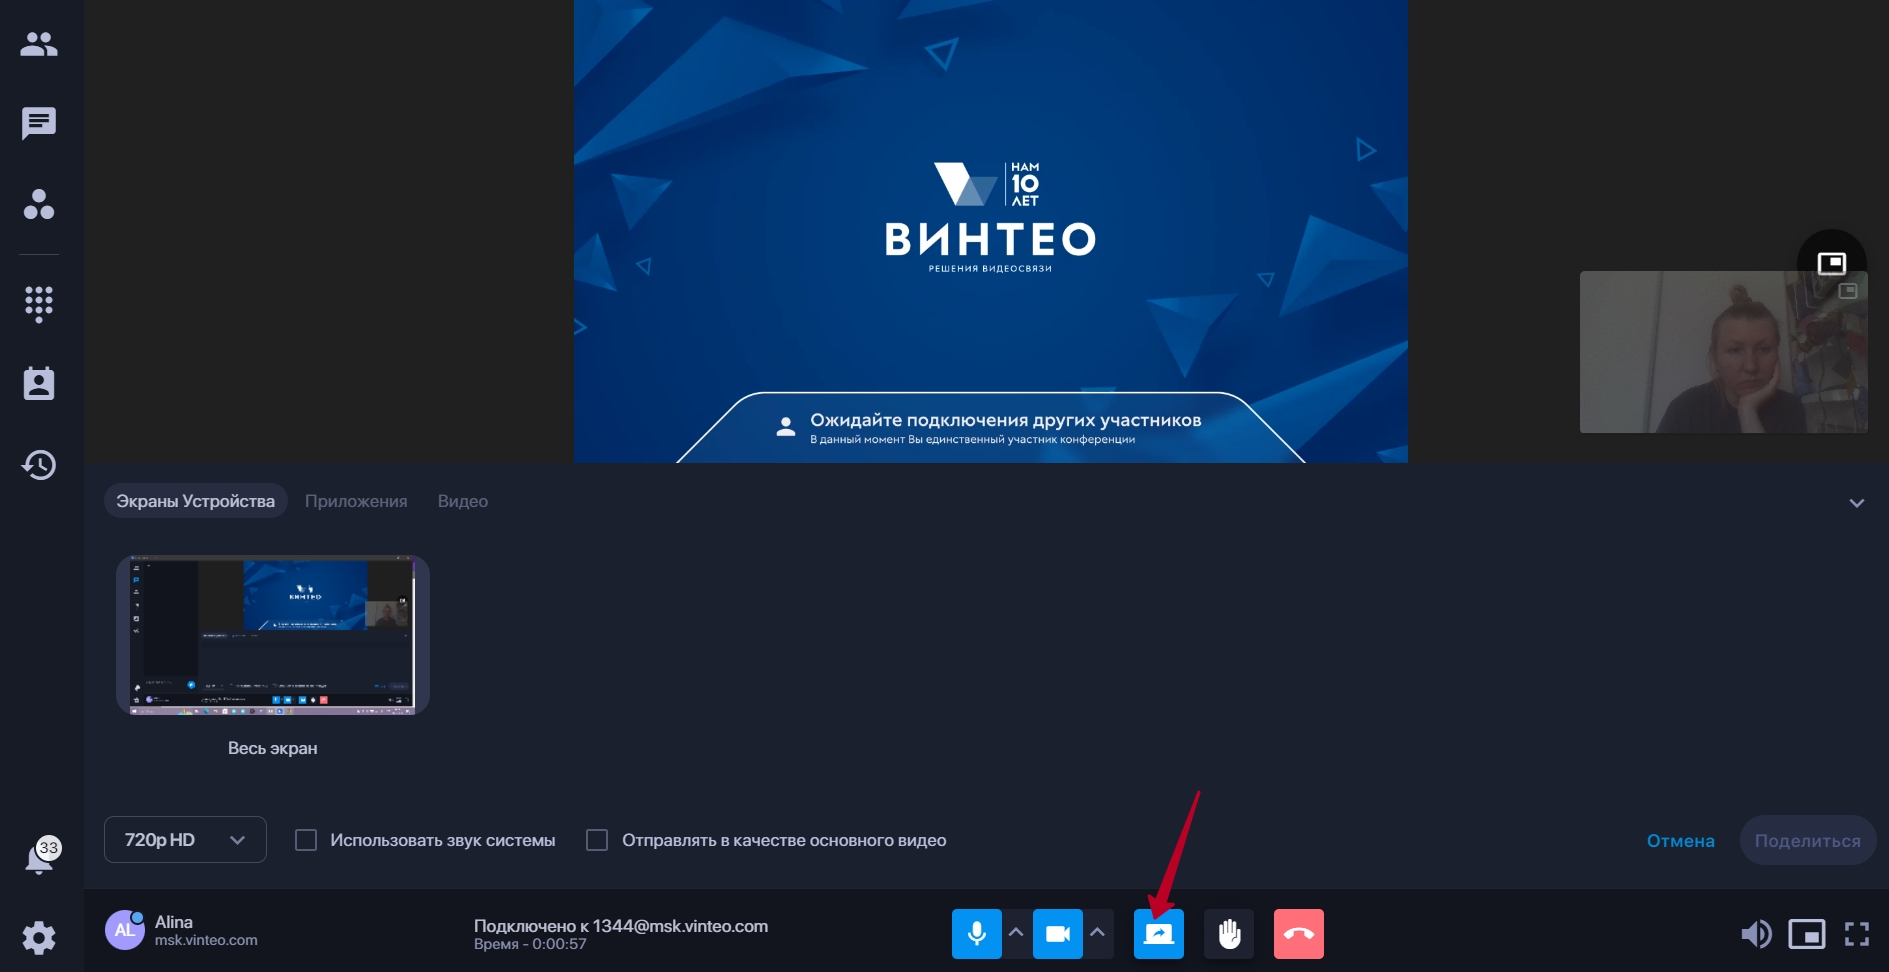
- “Screen sharing” button for showing a presentation. The button calls up a functional panel with a choice of source: device screens, applications or video;
- word request button; the functionality is described in more detail in this article;
- the button that allows you to select and send reactions;
- whiteboard functionality button; described in detail here;
- end call button;
- volume control;
- sound on/off button;
- “Show/Hide own video” button displays/hides the image from the local camera;
- “Full screen/Normal screen” button expands video to full screen mode/collapses video to window.
Screen sharing
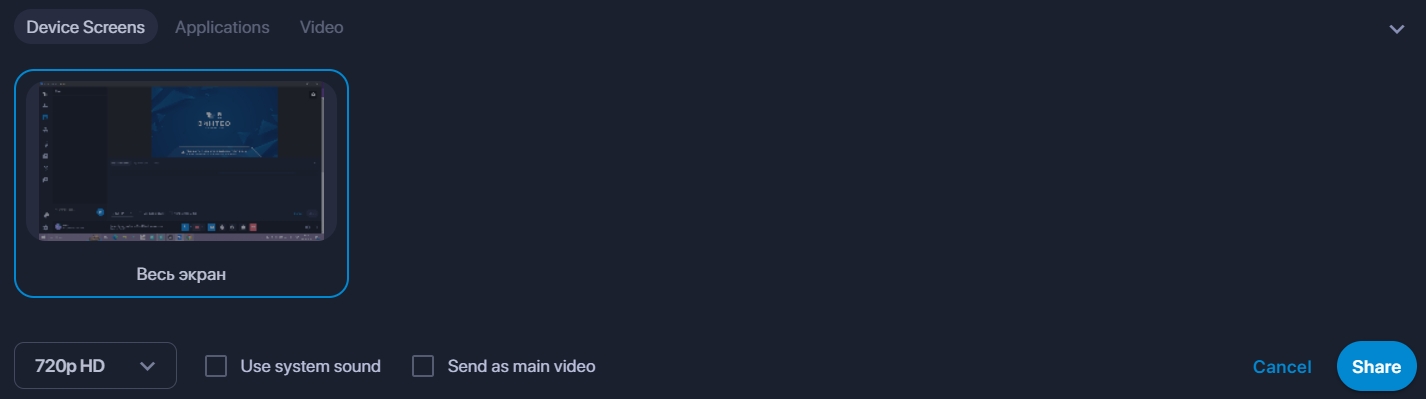
To select a presentation source define it in the corresponding tab on the functional panel. To show a video select it in the file explorer with resolutions: .ogv,.mp4,.mpeg,.avi,.webm,.3gp. Then click the “Share” button.
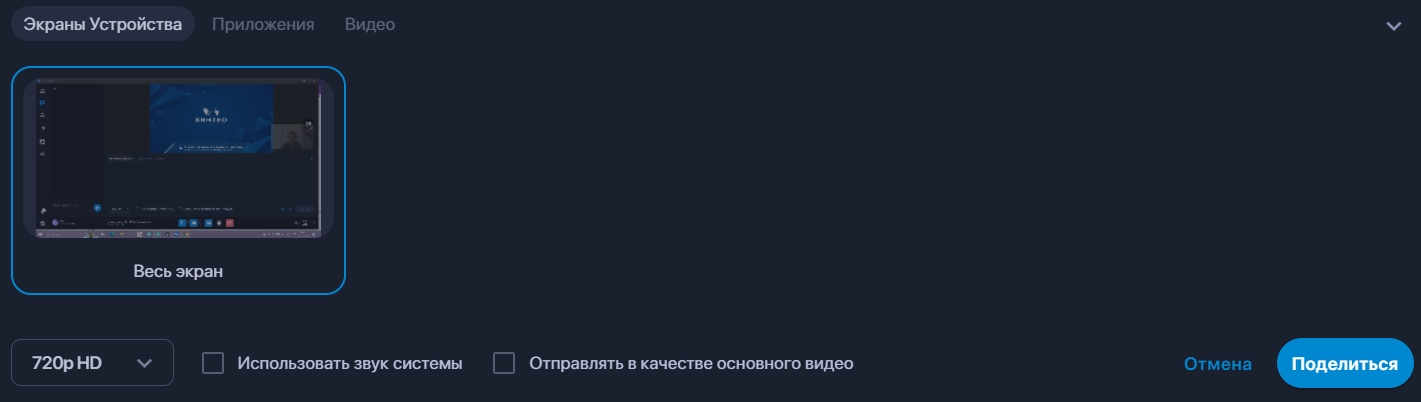
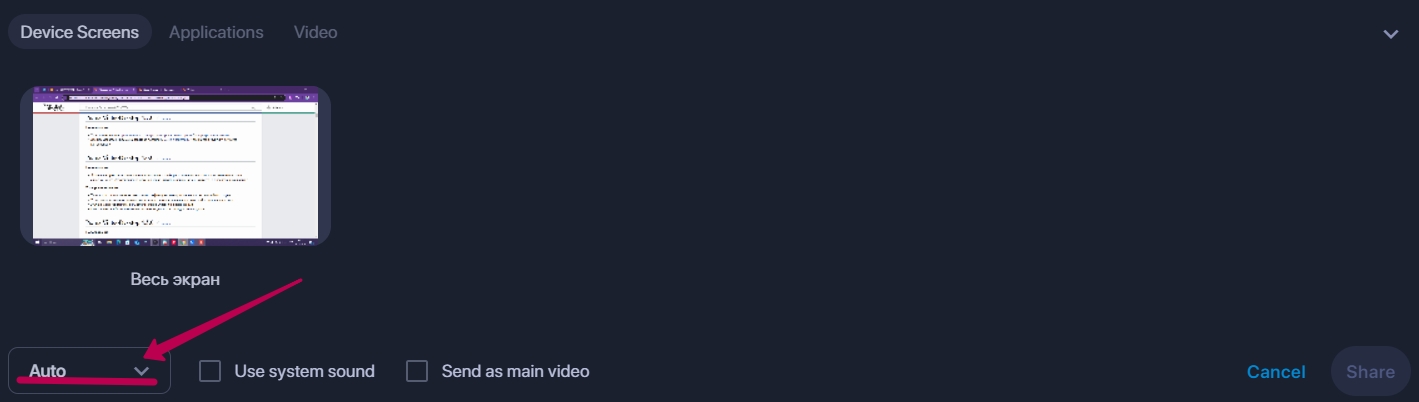
When you select a presentation source you will see options to select a resolution, “Use system audio”, and “Send as main video”.
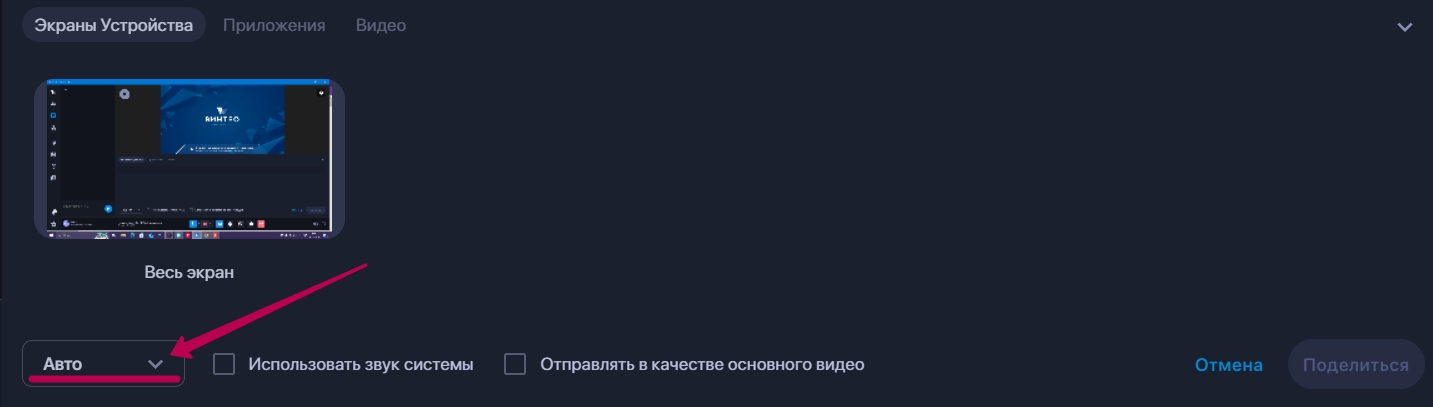
When you first install Vinteo Desktop the screen sharing will start in “Auto” mode by default. In this mode the program will automatically send to the server the resolution corresponding to the presentation source.
If you need to redefine the resolution you can manually select the required mode, for example, set 720p (HD) or 1024p (FullHD); then the presentation will be sent to the server with the selected resolution.
The program will remember this choice and will apply it in the future. To return to automatic selection of the sent resolution depending on the source you must select the “Auto” mode again.
“Use system sound” is the checkbox that when used turns off the desktop sound and sends sound from the presentation source to the conference thus making it possible to start a screen demonstration and open, for example, a video on YouTube. The receiving party will hear the sound of this video.
When the checkbox is activated the sound from the microphone will continue to come through unless it is turned off.
Limitation: using system sound is only available for Windows 10.
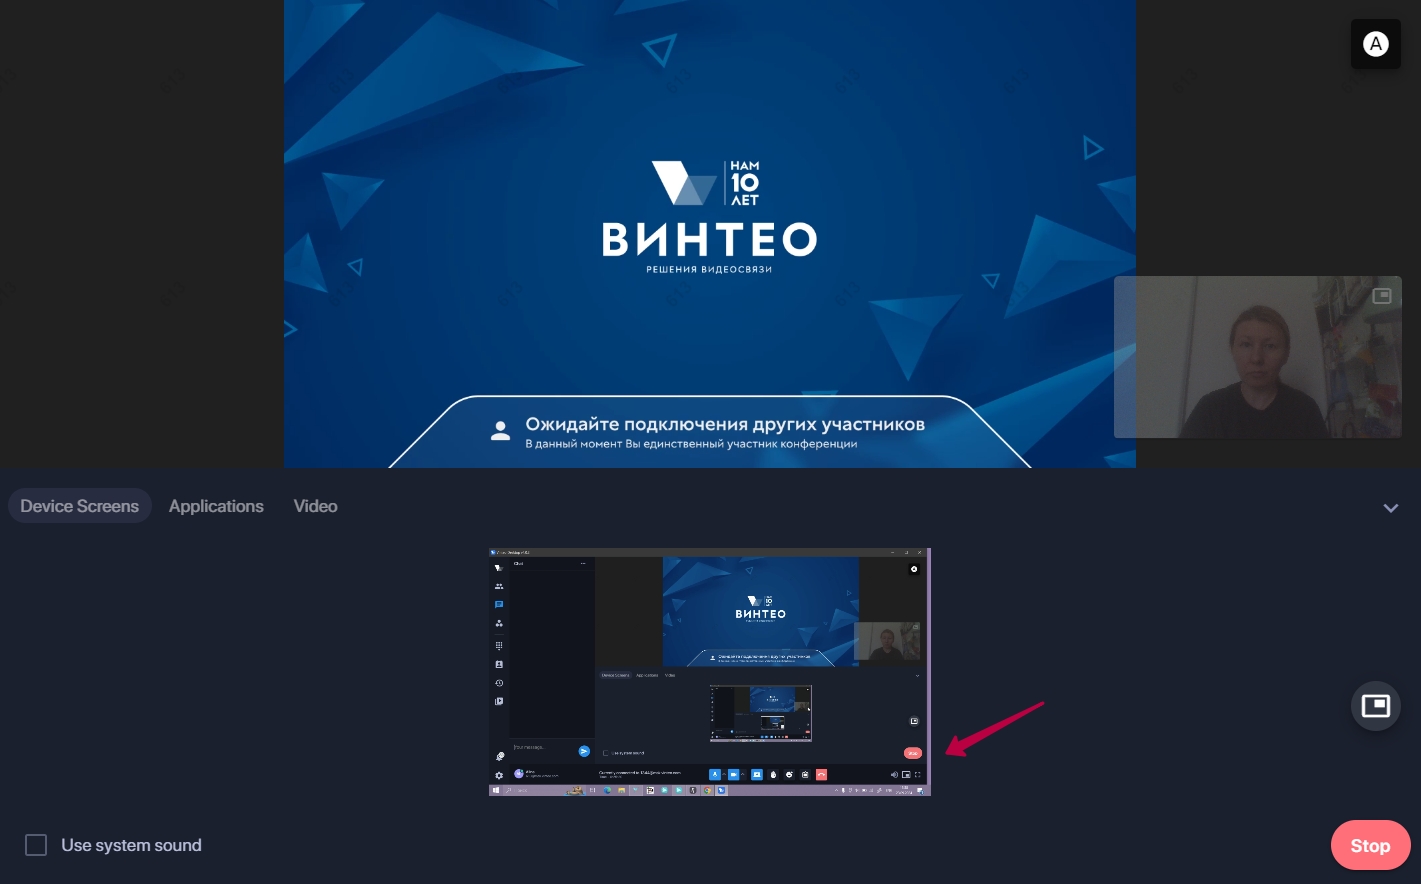
The indicator that the screen is being shared is the window at the bottom of the screen.
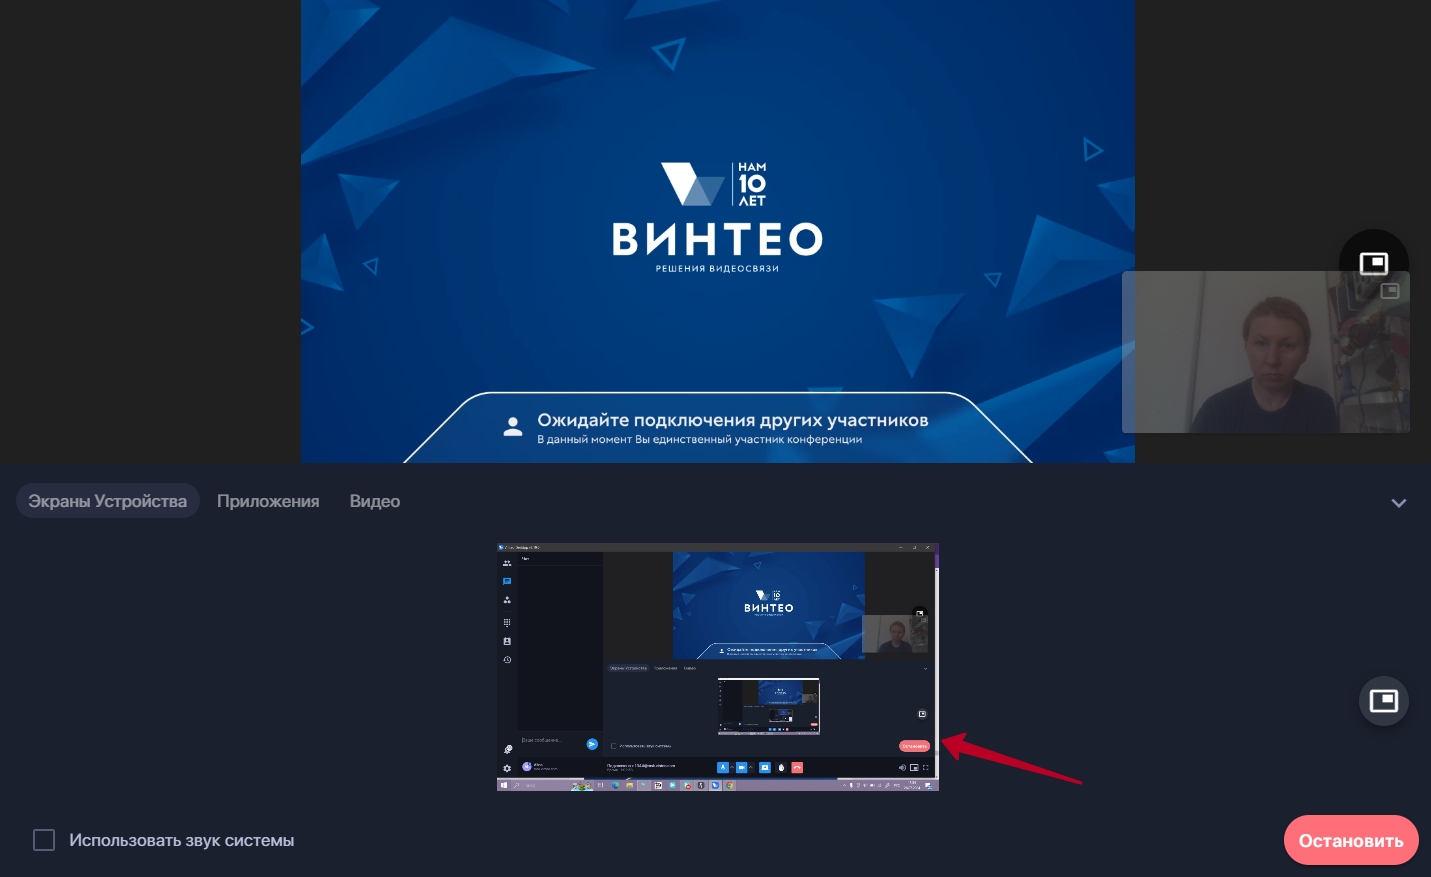
You can end the screen sharing by clicking the “Stop” button.
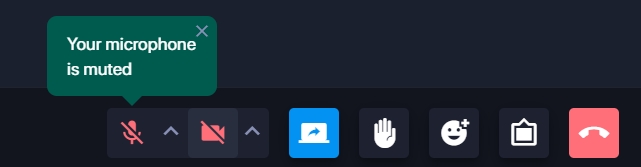
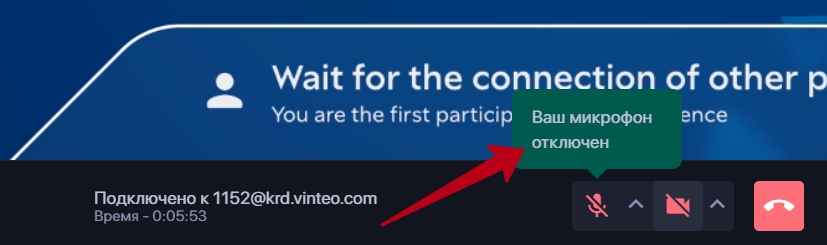
If your microphone is muted during a presentation the control panel will display the message “Your microphone is muted.”
In full screen mode the control panel becomes visible when you hover the cursor over the bottom of the screen. In full screen mode the Esc key allows you to return to the windowed mode of the application.
“Spectators” functionality
A detailed description of the “Spectators” functionality is provided in this article.
After assigning a participant as a spectator in the conference settings on the server, in the desktop, on the “Participants” tab, the group “Participating in the meeting” is automatically created with a counter of participants with the “Spectators” status.
“Word request” functionality
To use the word request functionality Vinteo Desktop must be version 3.17.2 or newer.
To work with the functionality you need to activate the “Allow participants to request word” toggle in the conference settings on the server. The description of working with the functionality is provided in this article.
In Vinteo Desktop this functionality is located on the call control panel (the button in the form of a palm).
After a participant requests word the moderator needs to confirm the request within 2 minutes. After this time the word request will be automatically rejected.
When the moderator confirms the word request the participant will receive a notification about it.
“Whiteboard” functionality
The “Whiteboard” functionality appeared in desktop version 3.19.0.
The “Whiteboard” functionality is located on the call control panel. It is activated in the conference settings on the server. The functionality description is provided in this article.