

Connection Setup
To join a conference via a link, you only need to specify the display name. The “Conference number” field is filled in automatically.

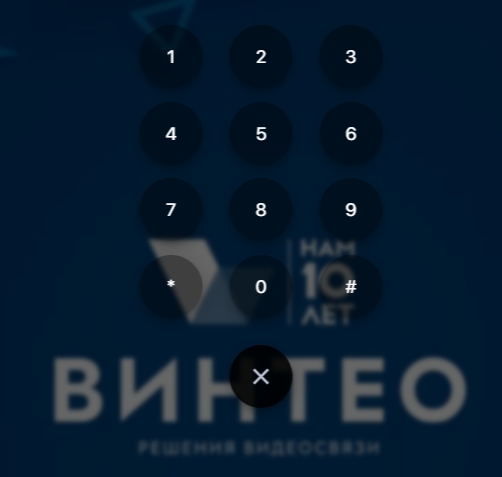
If the conference is closed, you must enter the participant name and then, in the window that opens, enter the PIN code and press #.
On subsequent launches of the web client, the connection data will be filled in automatically.
Device Settings
The settings window opens by clicking the arrow to the right of the device icon.
In this window, you can select the camera, the required resolution, and audio input/output devices.

- The microphone selection field allows you to choose a microphone from the list. Below the “Microphone” label there is a sound level indicator that shows input activity;
- “Echo cancellation” is a setting that enables echo removal from transmitted audio to improve voice quality. Echo cancellation is enabled by default. “Noise suppression” is a toggle that removes background noise;
- In the “Audio settings” section, you can select a speaker and adjust the volume level.
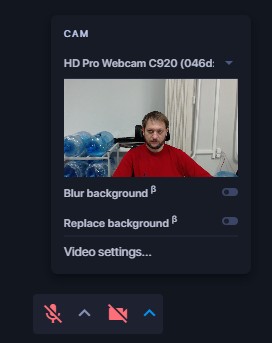
- Camera selection from the list;
- The “Resolution” field allows you to specify the video resolution. The “Auto” resolution setting sets the resolution to 720p. If this resolution is not available, the application will select a lower one;
- Background blur and background replacement with an image.
Web Client Interface
- “Participants” tab — clicking it opens/closes the side panel;
- “Chat” tab (available if chat is enabled in the conference broadcast settings on the “Conference Management” → “Web Broadcasting” → “Settings” page) and the “Participants” tab;
- “Participant search” — filters participants by number;
- Participant management panel;
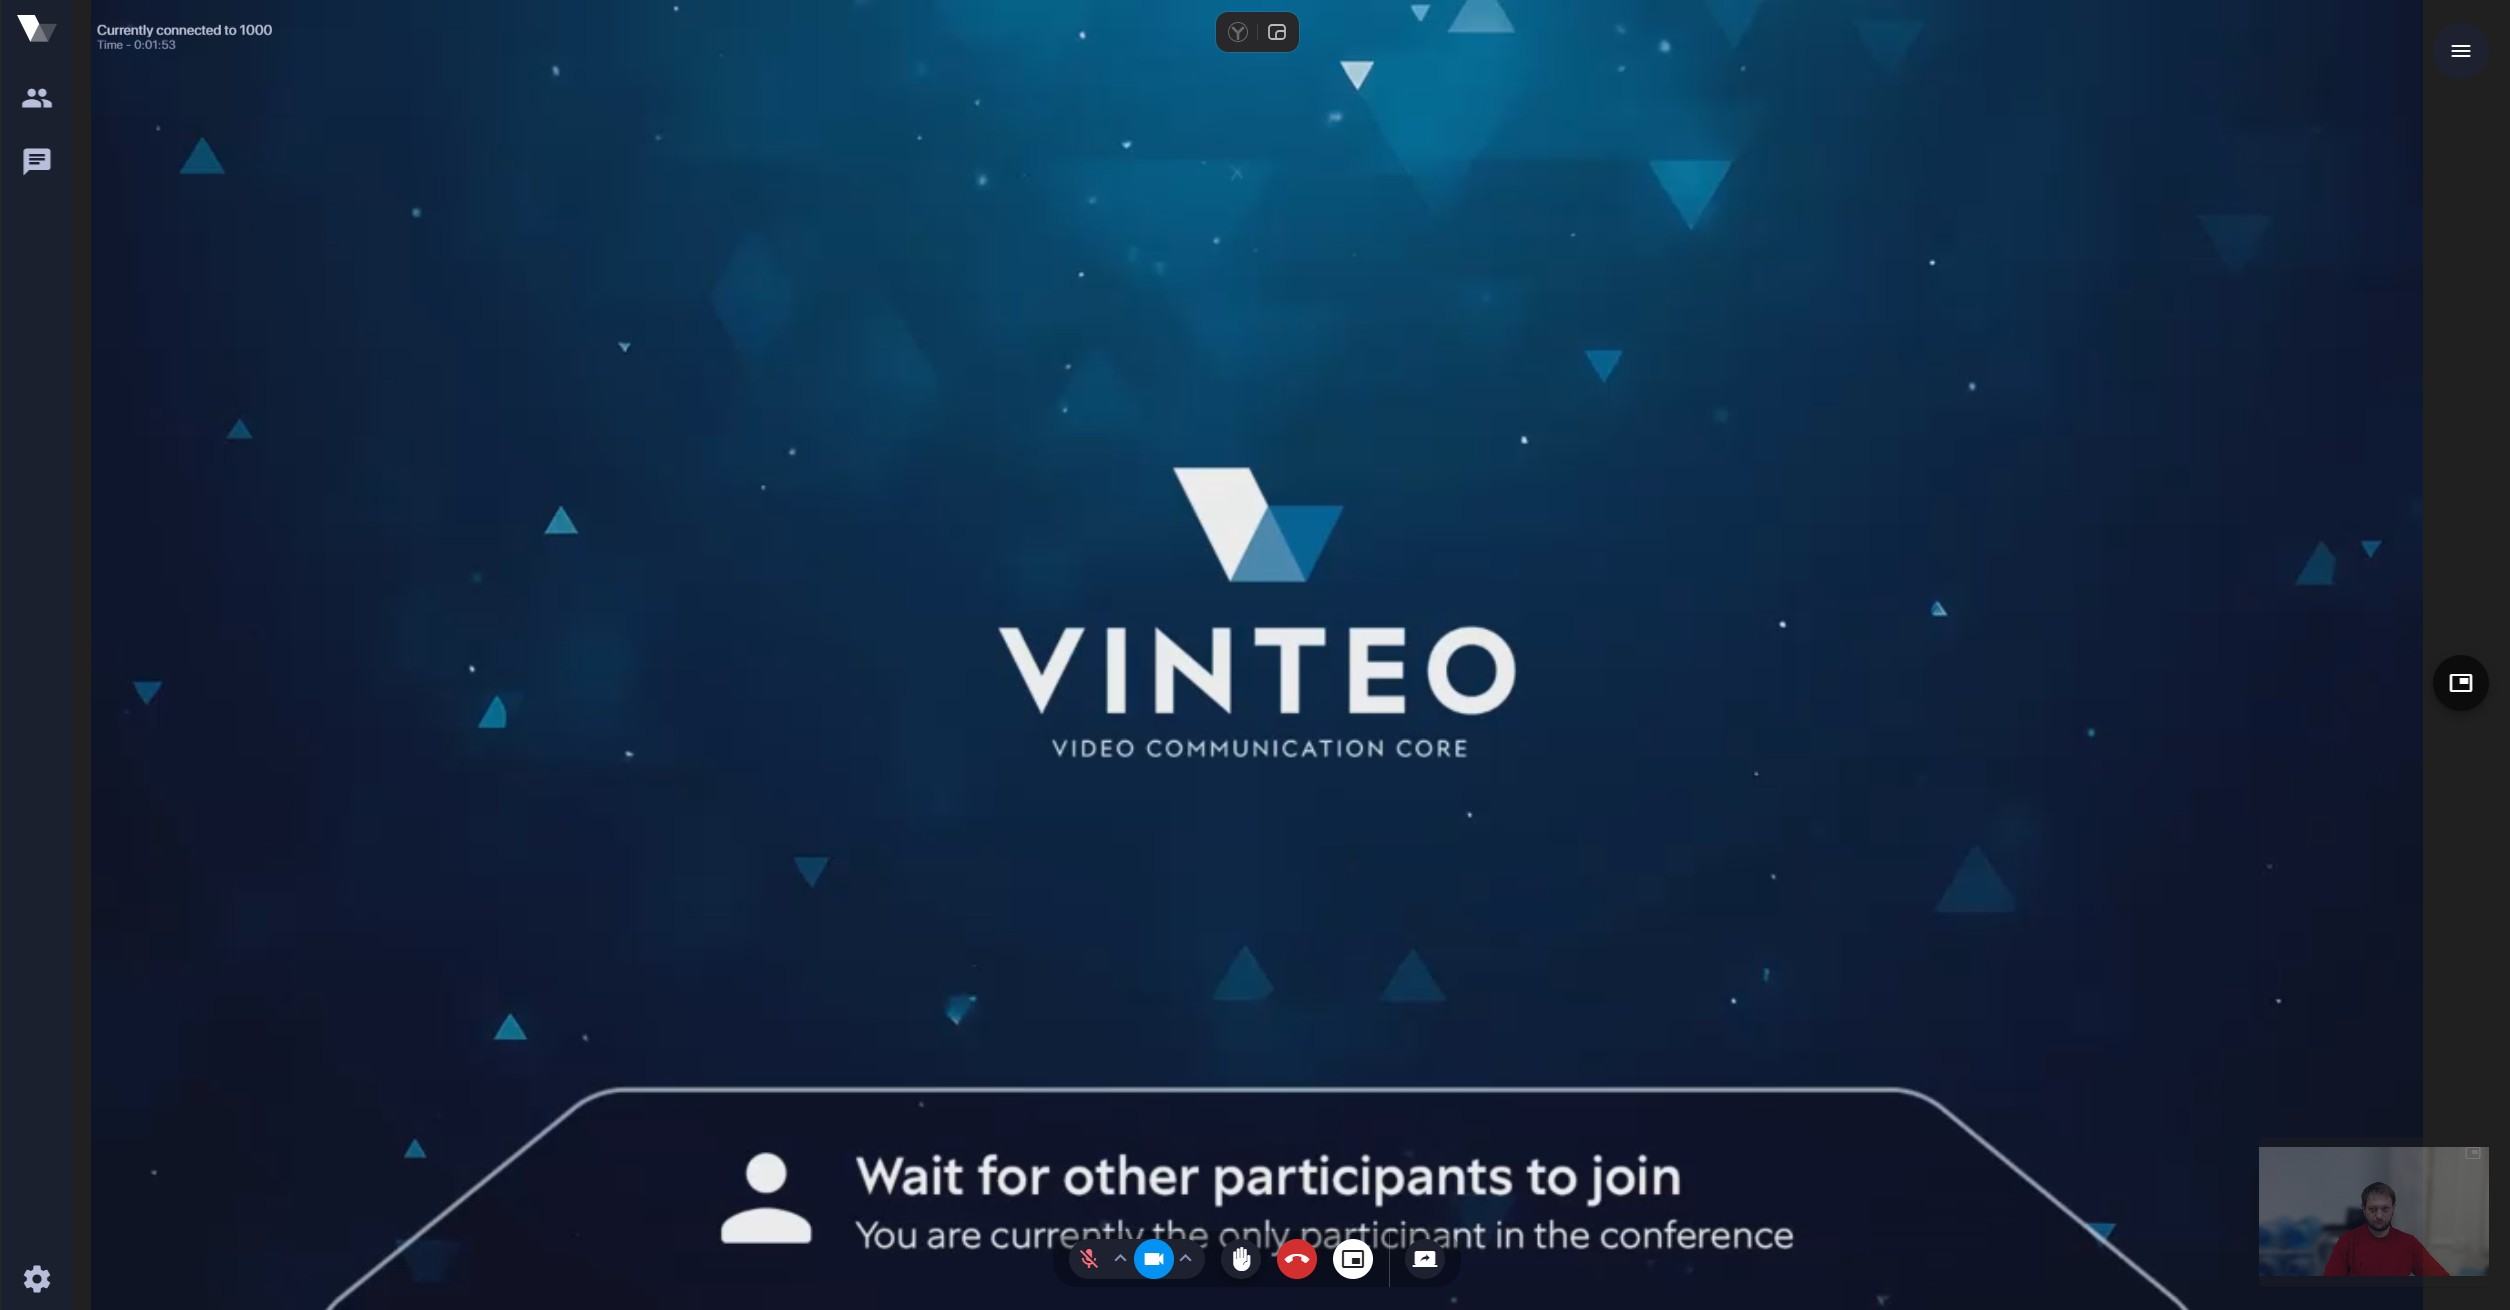
- Microphone on/off button;
- Camera on/off button;
- End call button;
- Audio channel management button;
- Button to hide/show your own video;
- Screen sharing button;
- Button to copy the link for joining the current conference, including via Email and Gmail;
- Language selection button;
- Hamburger button that opens the additional menu.
- Fullscreen video button;
- Button displaying technical connection parameters (available only in the Chrome browser);
- “Screen sharing” — button that allows sharing the entire main screen, a specific application window, or a browser tab (available only in the Chrome browser).
“Share tab audio” — a checkbox which, when enabled, disables audio from the client and sends audio from the presentation source to the conference. This allows you to start screen sharing and open, for example, a YouTube video. The receiving side will hear the audio from that video.
The checkbox is available only when sharing a browser tab.
-
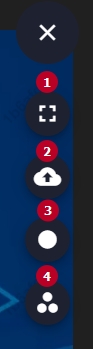
“Show file presentation” — button that allows presenting a *.pdf file to conference participants;
-
Conference recording on/off button (available only to the moderator);
-
Button that opens/closes the web client settings window.
-
The “Picture-in-Picture” (PiP) playback button minimizes the conference video and moves it to the lower-right corner of the screen by default. The PiP window can be dragged to any position on top of other windows. It is excluded from capture during desktop sharing. It can be closed without leaving the conference and restored to its default state. It also allows ending the call and enabling/disabling the camera and microphone;
-
Participant’s own camera video (video source). When hovering the cursor, it loses transparency. When clicked, the screen is split into two parts: the conference video and the participant’s camera. Clicking one of them makes it the main video on the screen, while the other switches to PiP mode.
The web client interface for the moderator differs from the standard one by the presence of the “Participants” tab, which allows the moderator to call and end calls with invited participants, enable/disable their microphones, and track disconnected users.
Managing Participants via the Web Client
Each participant entry consists of:

- An avatar containing the participant’s name and status indicator:
- blue — currently in the conference;
- green — conference participant registered on the server;
- gray — conference participant not currently registered on the server;
- yellow — lecturer;
- red — participant disconnected from the conference.
- Account number (name) visible to others and displayed in the conference watermark;
- Microphone on/off button;
- Call / end call button.
Screen Sharing
The control panel contains a screen sharing button.

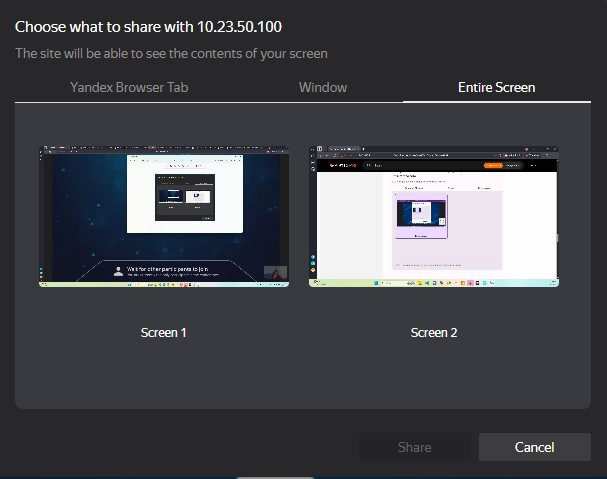
Clicking this button opens a window with three options: sharing the entire screen, sharing an application window, or sharing a Chrome browser tab.
When sharing the entire screen, you can enable the “Picture-in-Picture” mode and minimize the browser window. The conference video with participants will be moved to a reduced semi-transparent PiP window in the lower-right corner by default (it can be moved across the screen) on top of other windows. The PiP window is excluded from screen capture.
In the example below, the following actions were performed:
- screen sharing selected;
- “Picture-in-Picture” mode enabled;
- Chrome browser window minimized;
- a document opened in Adobe Reader in “Fullscreen mode”.
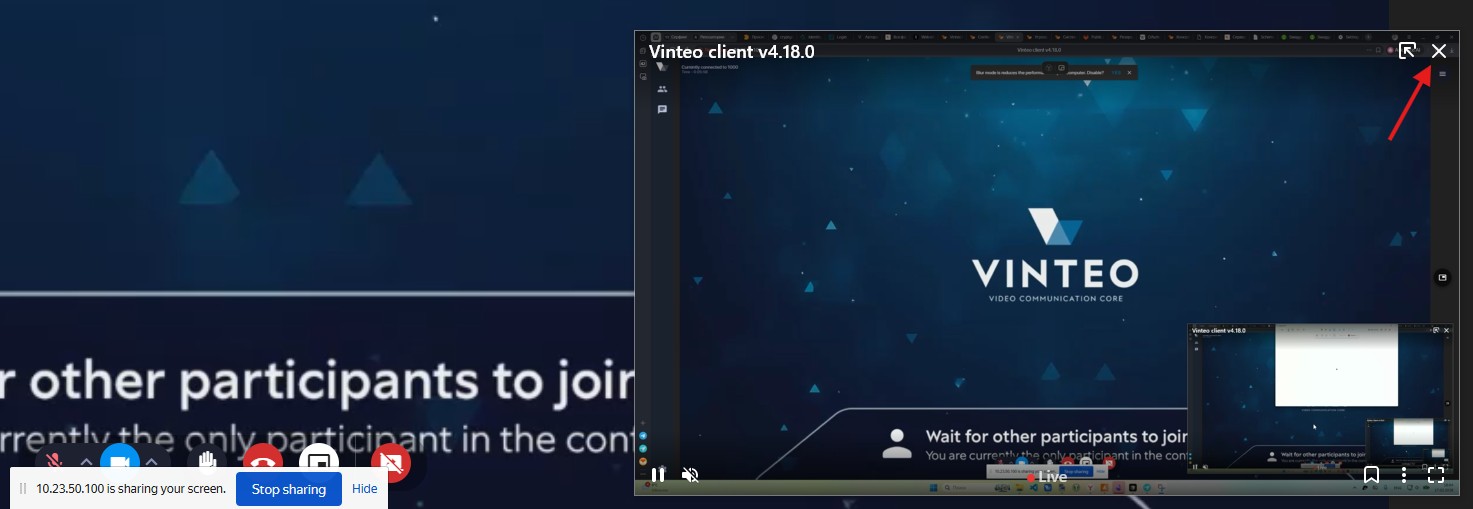
- The button to disable “Picture-in-Picture” mode restores the minimized browser window with the web client back to the screen, closing the conference PiP while keeping the participant PiP;
- The button to close the PiP without disconnecting from the conference. To return the web client window to the desktop, you must restore the minimized browser window from the taskbar;
- “Stop sharing” — a browser notification indicating active screen sharing, with a button to stop sharing;
- “Hide” — button to hide this browser notification.
Ending Screen Sharing
- Using the “Stop sharing” button in the browser notification;
- Using the “Stop sharing” button on the bottom control panel.
To stop sharing a Chrome browser tab, click the “Stop” button. Only the content of the web page highlighted with a blue frame is broadcast to the conference.
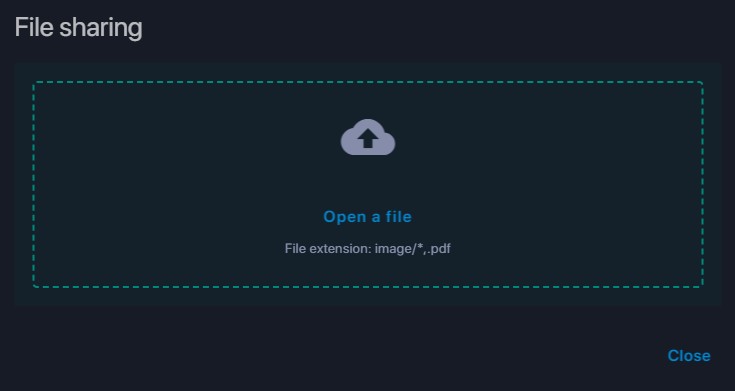
File Presentation
To present a file, click the “Show file presentation” button in the additional menu in the upper-right corner of the screen, select a file with the *.pdf or *.JPEG extension in the file explorer, and start the presentation.
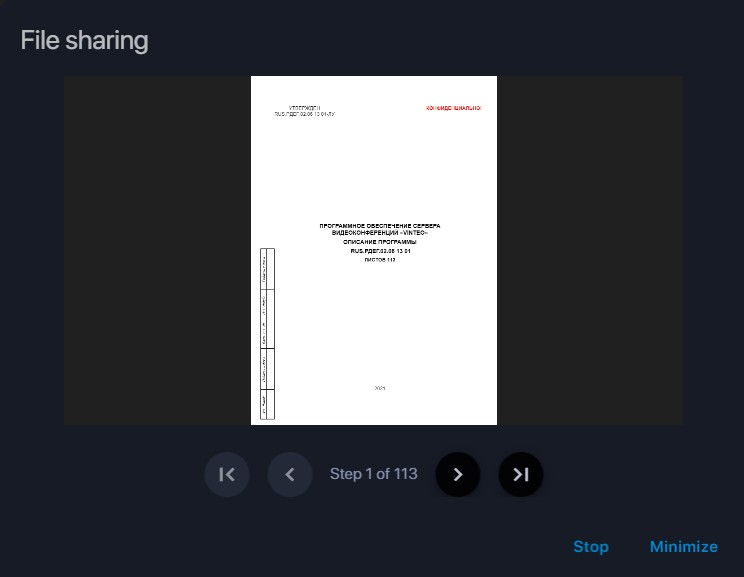
- “Stop” — stops the broadcast and prompts you to reopen the file;
- “Minimize” — moves the image from the center to the upper-left corner, reducing its size while preserving functionality.
Conference Recording
By clicking the “Record” button in the additional functionality menu, the moderator can start recording the current conference. Clicking the button again stops the recording.
Special attention should be paid to scheduled conferences, as a stopped conference is deleted and the moderator loses rights to the assigned conference number, and therefore to its recordings. For this reason, recordings should be downloaded before the conference ends, or the administrator should be informed of the need to create a conference with the same number and assign the subscriber as moderator or transfer the recording to the subscriber.