

The page is visually divided into three parts:
- Information section
- Navigation section
- Main section
- Appendix 1
Information section
The information section is located in the upper right corner and displays the current conference status, CPU load, license information, conference running time, and provides access to several functions:

Quick dial
Allows you to call a participant not from the address book, but by IP address or SIP/H.323 URI, and choose the participant’s resolution, channel bandwidth, and frame rate.
The participant will remain connected until the call ends and will not be saved in the conference participant list, but the same participant can be called multiple times during the conference.
Add participant
Allows selecting a participant from the list and adding them to the conference, adding a group of participants, or moving participants from other conferences. Only participants and groups visible to the moderator in the address book are available.
To add a participant of type “SIP(uri)”, there is one condition: before adding the participant “name@domain”, a gateway with the “From domain” field filled in must be created on the server. After adding the participant, a “Direction” = name is automatically created in this gateway and the participant appears in the address book as type “Loop”.
To add an existing participant, use the “Search” field and select the required participant. After creating the participant, you can call them by pressing the “Add” button.
When adding a participant to the conference, you can call them immediately. To do this, enable the “Call participant” toggle and then press “Add”.
To move a participant from another active conference: select the conference from the list, then select the participant from the “Participants” list and press “Add”. The participant will be called automatically. To add a group of participants, select multiple participants in the “Group” list and press “Add”. Participants will be called automatically.
Player
Allows adding previously uploaded video files. Select the required file in the “Video file” list, enable “Enable repeat” if needed, and press “Add”. Without repeat enabled, the video will play until the end and then disconnect from the conference.
Video stream
Allows adding streaming video from various sources using HTTP and RTSP protocols. To add a stream, enter a descriptive name in the “Stream description” field, paste the stream URL in the “Stream URL” field, and press “Add”.
Example: for connecting CCTV Beward camera streaming video, use a URL in this format:
rtsp://XXX.XXX.XXX.XXX:YYY/user=[user]&password=[password]&channel=1&stream=[stream]
Using the “@” symbol in the password is not allowed.
- XXX.XXX.XXX.XXX – device IP address
- :YYY – RTSP port configured on the device (default: 554)
- User – administrative user with viewing permissions
- Password – administrative user password
- Stream – stream number (0 = main stream)
Message
The Message button in the upper right corner allows sending messages to the conference.
Sending a message
- Click the envelope icon – a modal window will open;
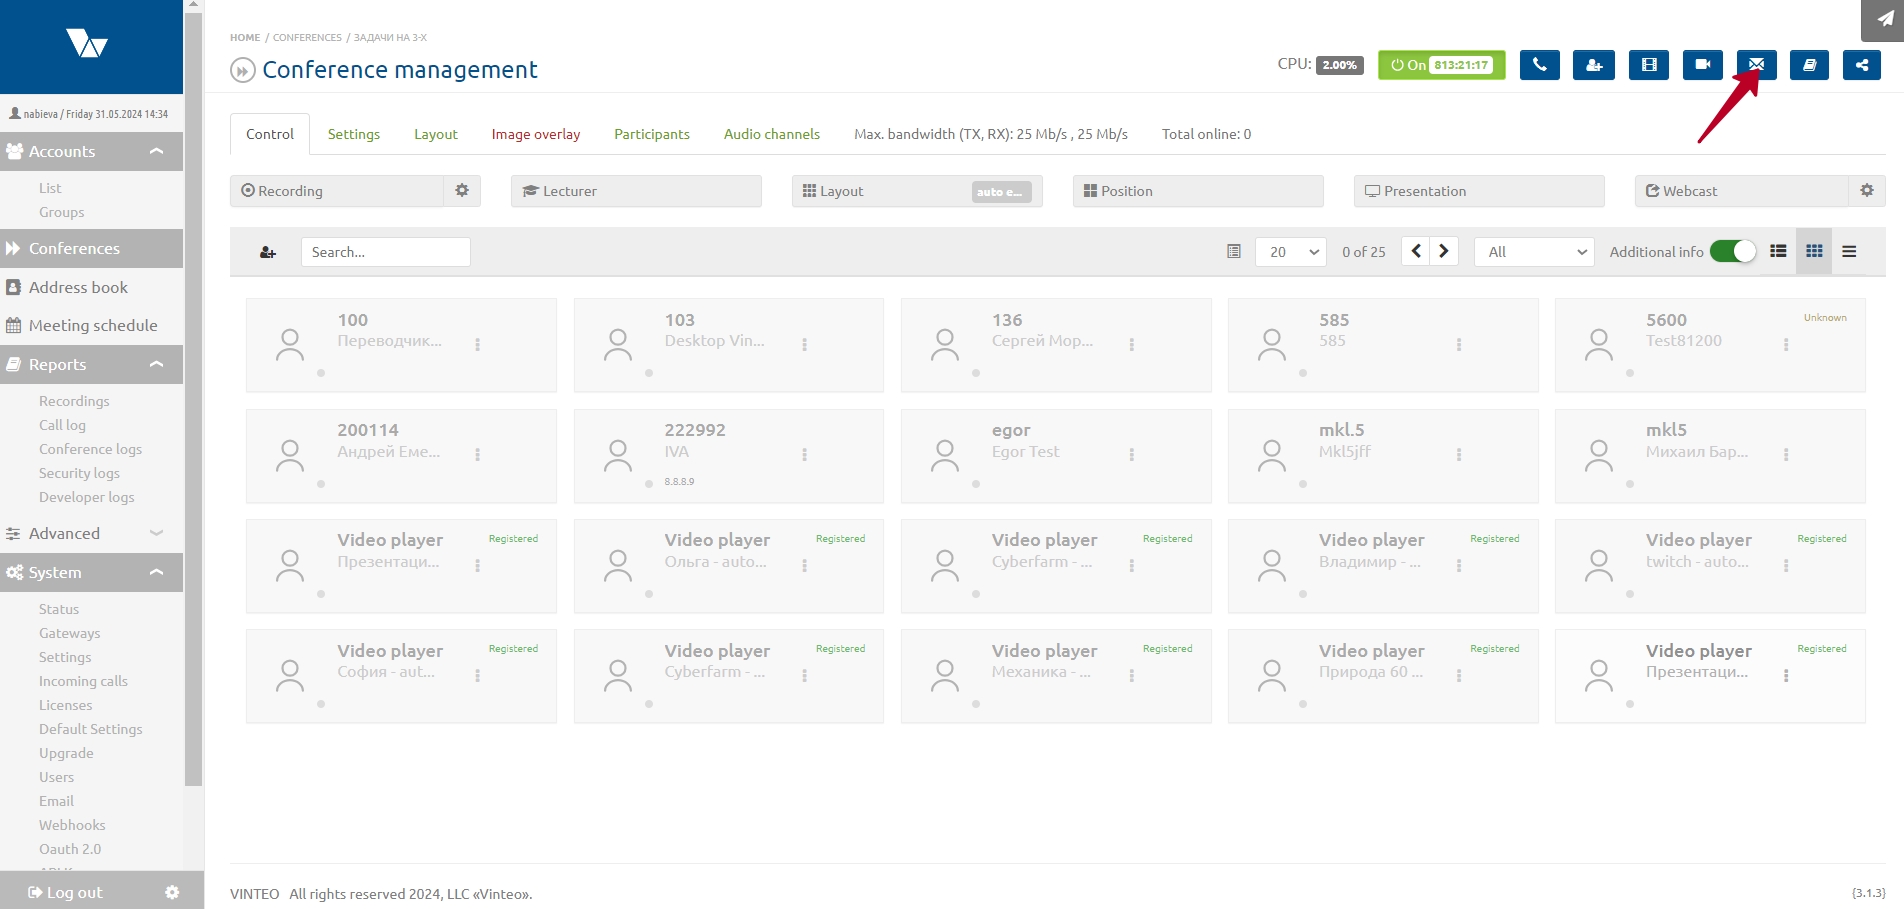
- Enter the text in the “Message” field (max length 500 characters);
- Press Send.
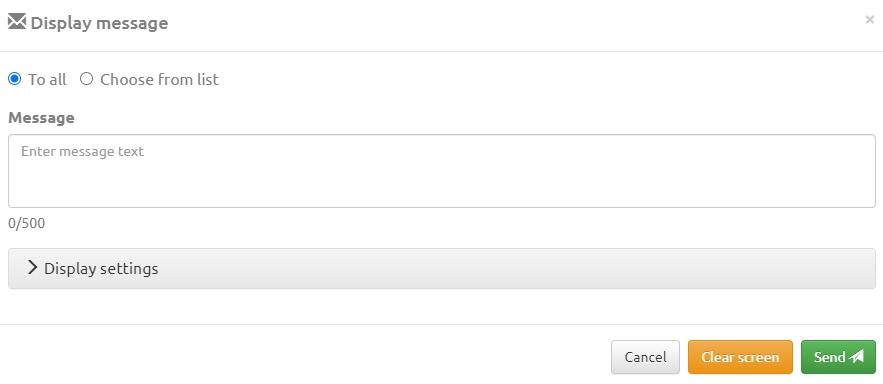
Canceling a sent message
This function removes the displayed message from the screen.
- Click Clear screen – the message disappears.
Sending a message to one or several selected participants
This function allows sending a message to selected participants only.
To do this:
- Set the filter to Select from list. A Participants block and a search field will appear;
- In the Participants list, check the box next to the participant(s) to whom the message should be sent. If there are more than 4 participants, the list becomes scrollable;
- Enter the text in the “Message” field;
- Press Send.
Message display settings
This functionality allows using different message styles and creating templates. This is useful if the message might blend with the video or if you need to emphasize it.
To change message styling, click Display settings, which expands an additional settings block.
Here you can set:
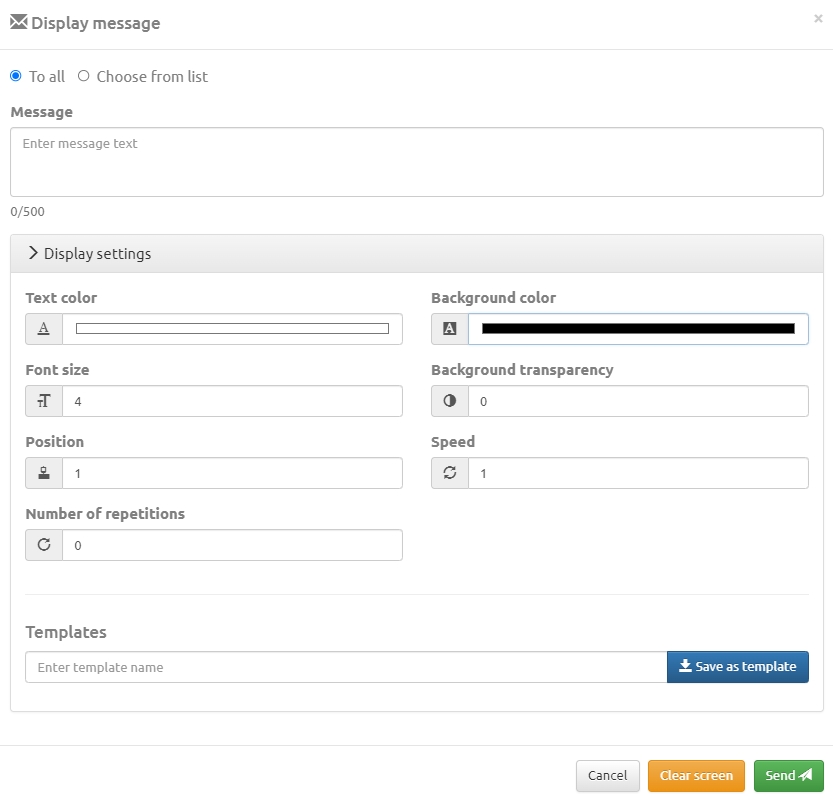
- text color
- font size
- position
- number of repeats – the message is displayed the specified number of times + once. If set to “0”, the message is displayed once
- background color
- background transparency
- speed
Adding a template
To add a template, set all display parameters, enter a template name, and click Save as template.
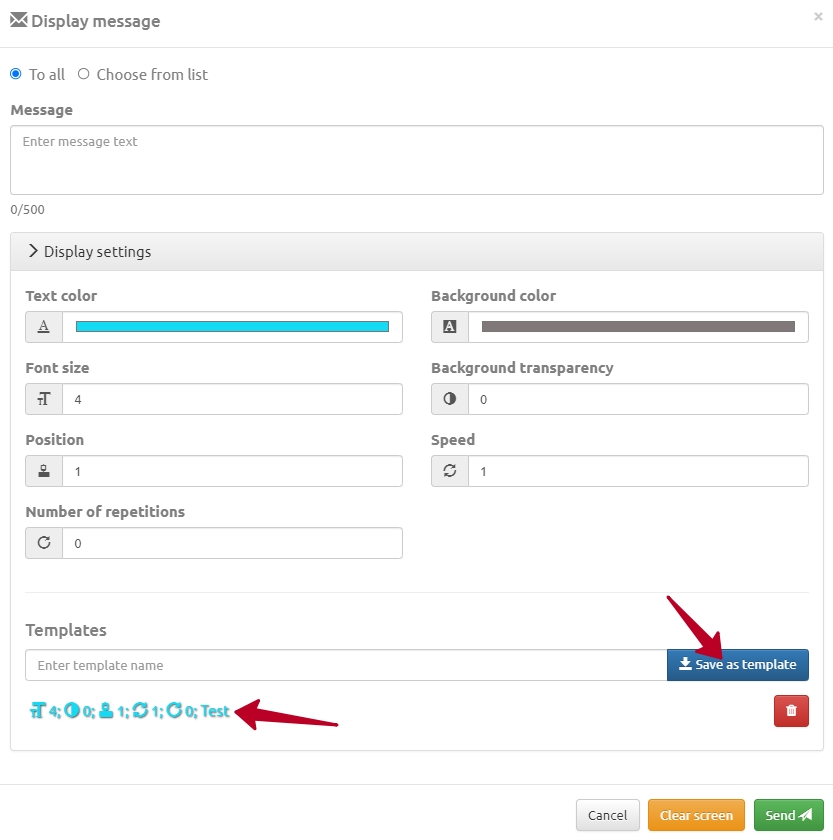
All configured parameters will appear below. A trash icon is displayed next to each template for deletion.
Saving message text and style
A template may contain text and style or only style. You can send a message without entering text by clicking a template that already includes text and display settings.
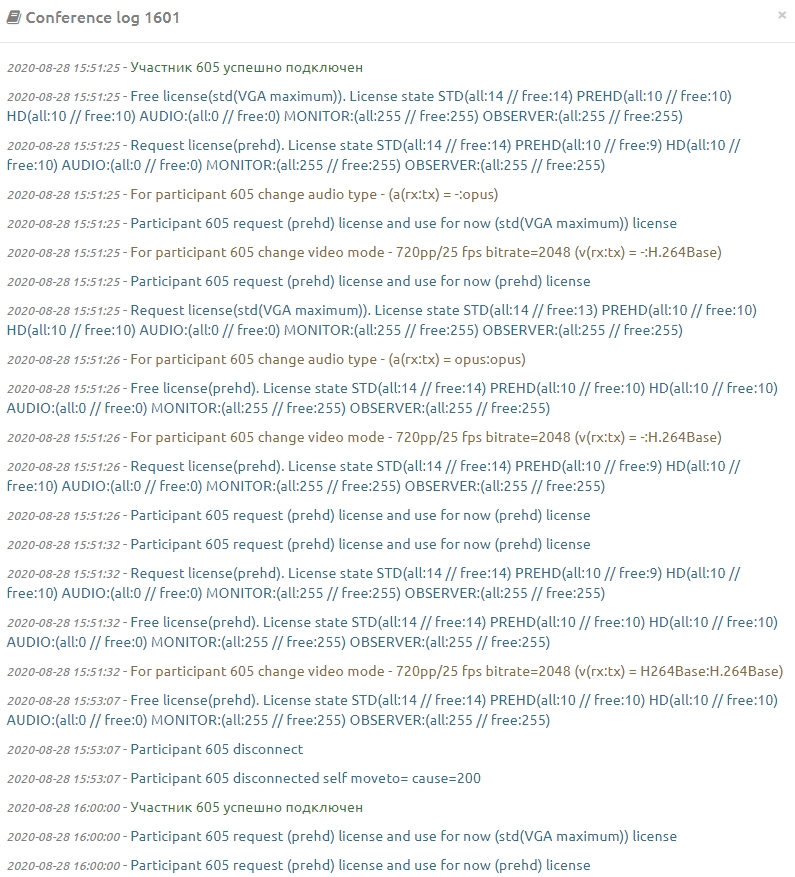
Conference log
Pressing this button opens a log window and allows viewing all conference actions and participant calls.
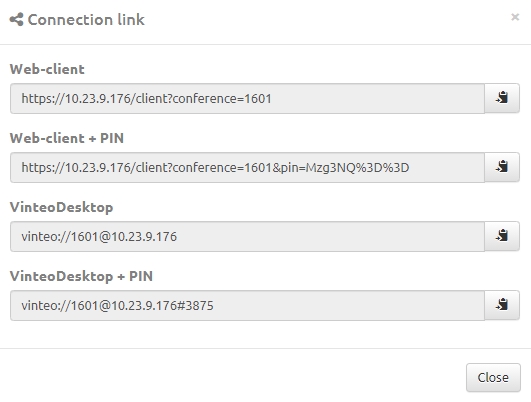
Connection links
Pressing this button opens a window with links to the web client and VinteoDesktop, with and without PIN. The moderator can manually send these links to participants. Links with a PIN allow joining the conference without entering the PIN manually.
Chat tab
The Chat tab appears in the upper right section if the Chat toggle is enabled in the Webcast settings.

Press Save to apply the settings.
To display chat statistics, click Online participants.

Auto Attendant tab
The Auto Attendant tab appears in the upper right section when calling a disabled or non-existent conference number.

The tab contains a link that opens the Move to conference window.
Press Confirm to move the participant to the conference, or Disconnect to disconnect them from the server.
The window shows the caller’s number.
Navigation section
The navigation section is located under the information section and contains the following tabs:
- Settings
- Layout
- Image overlay
- Participants
- Audio channels
It also displays the maximum channel bandwidth (sum of bitrate values for all added participants), the number of connected participants, and the conference expiration time (if set).
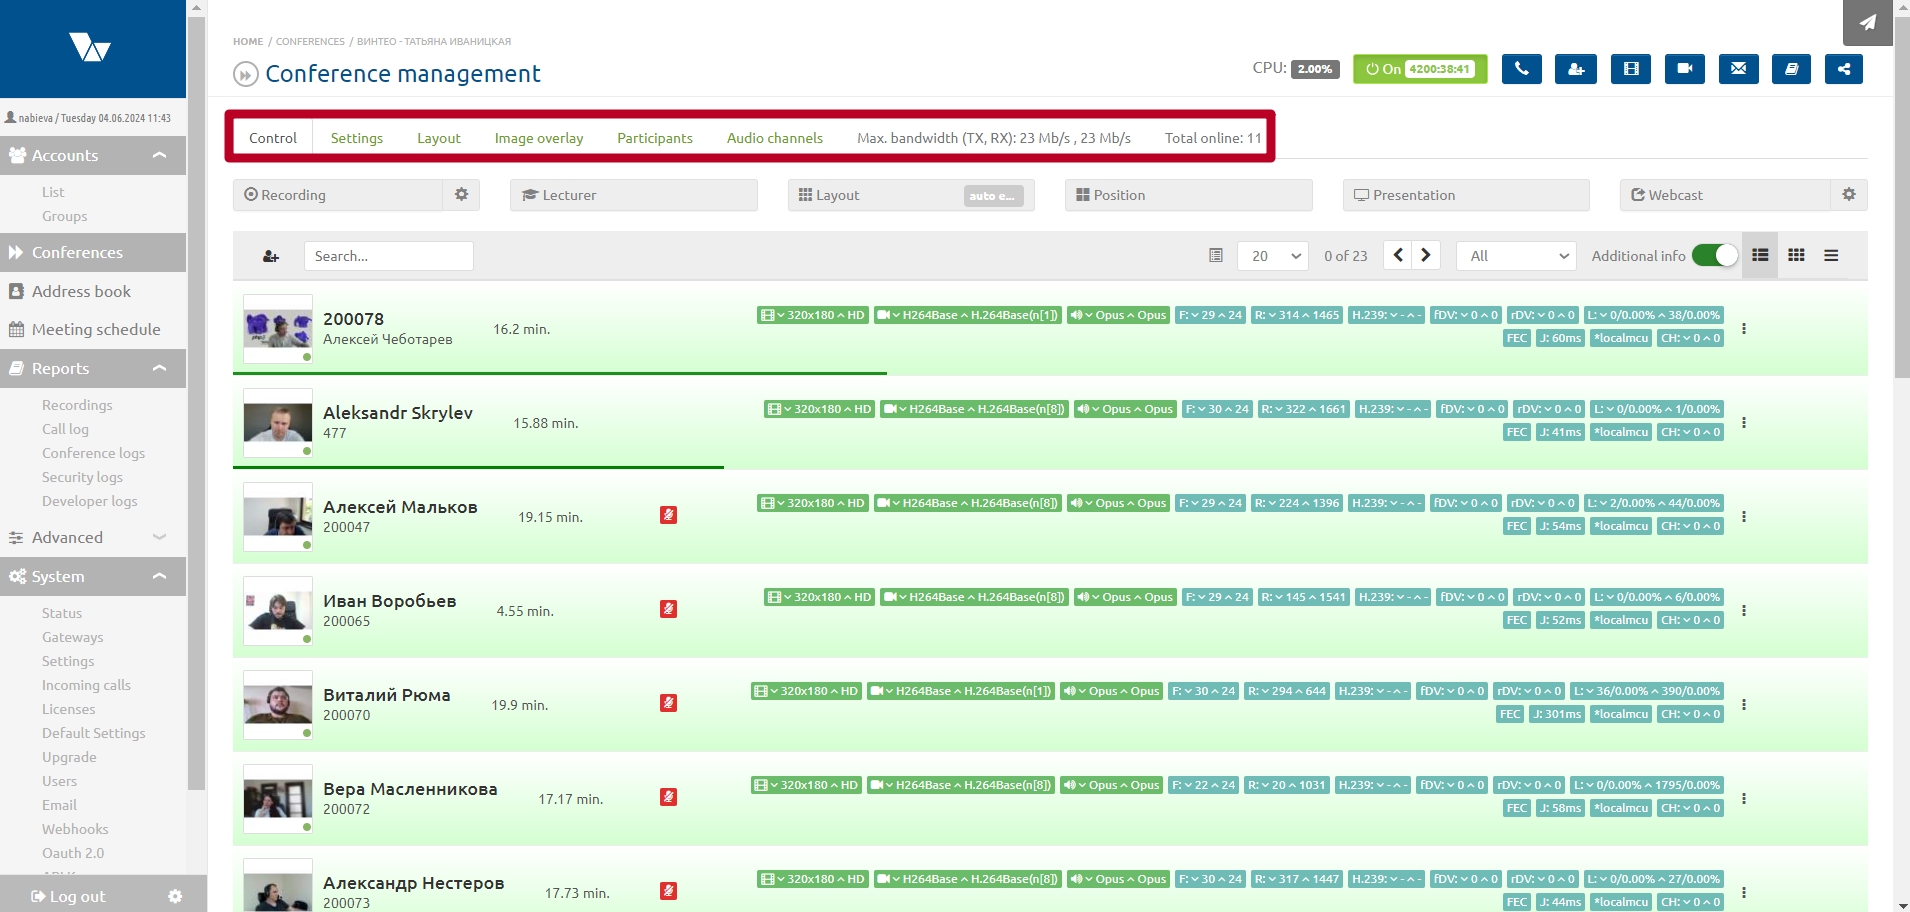
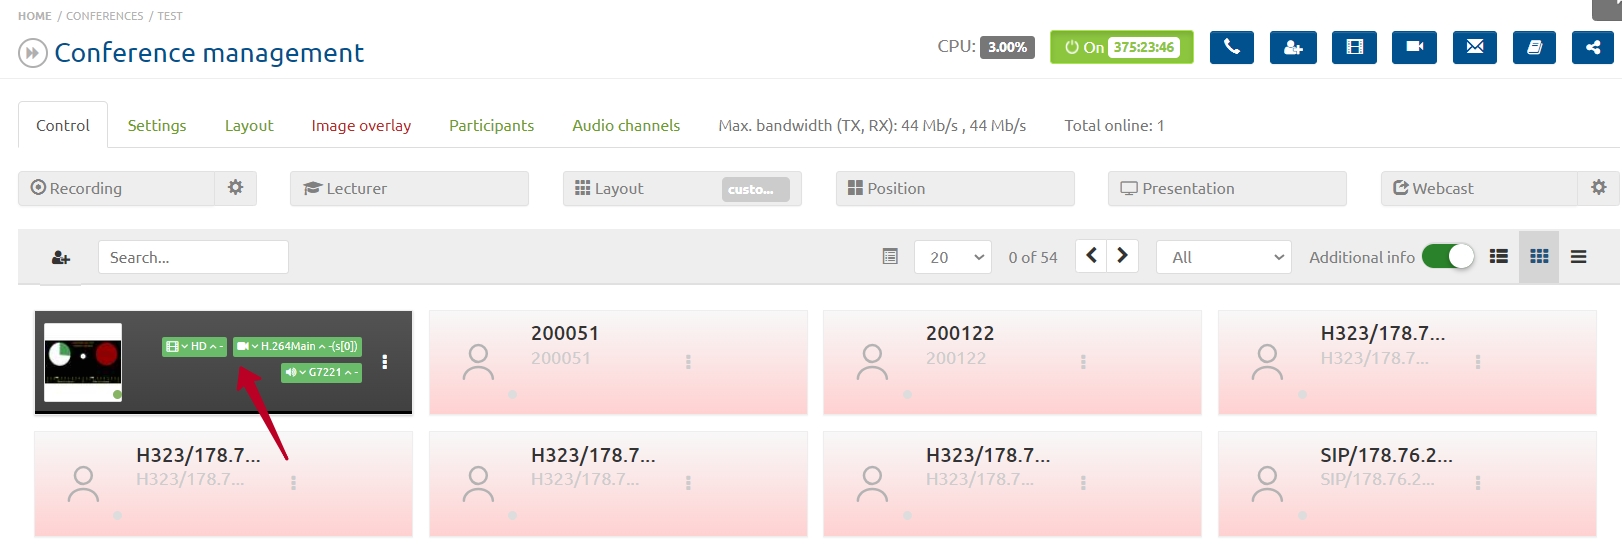
Main section
The main section is located below the navigation section and allows viewing the participant list, conference end date and time, and quick access to:
- Recording
- Lecturer
- Mosaic
- Positioning
- Presentation
- Webcast
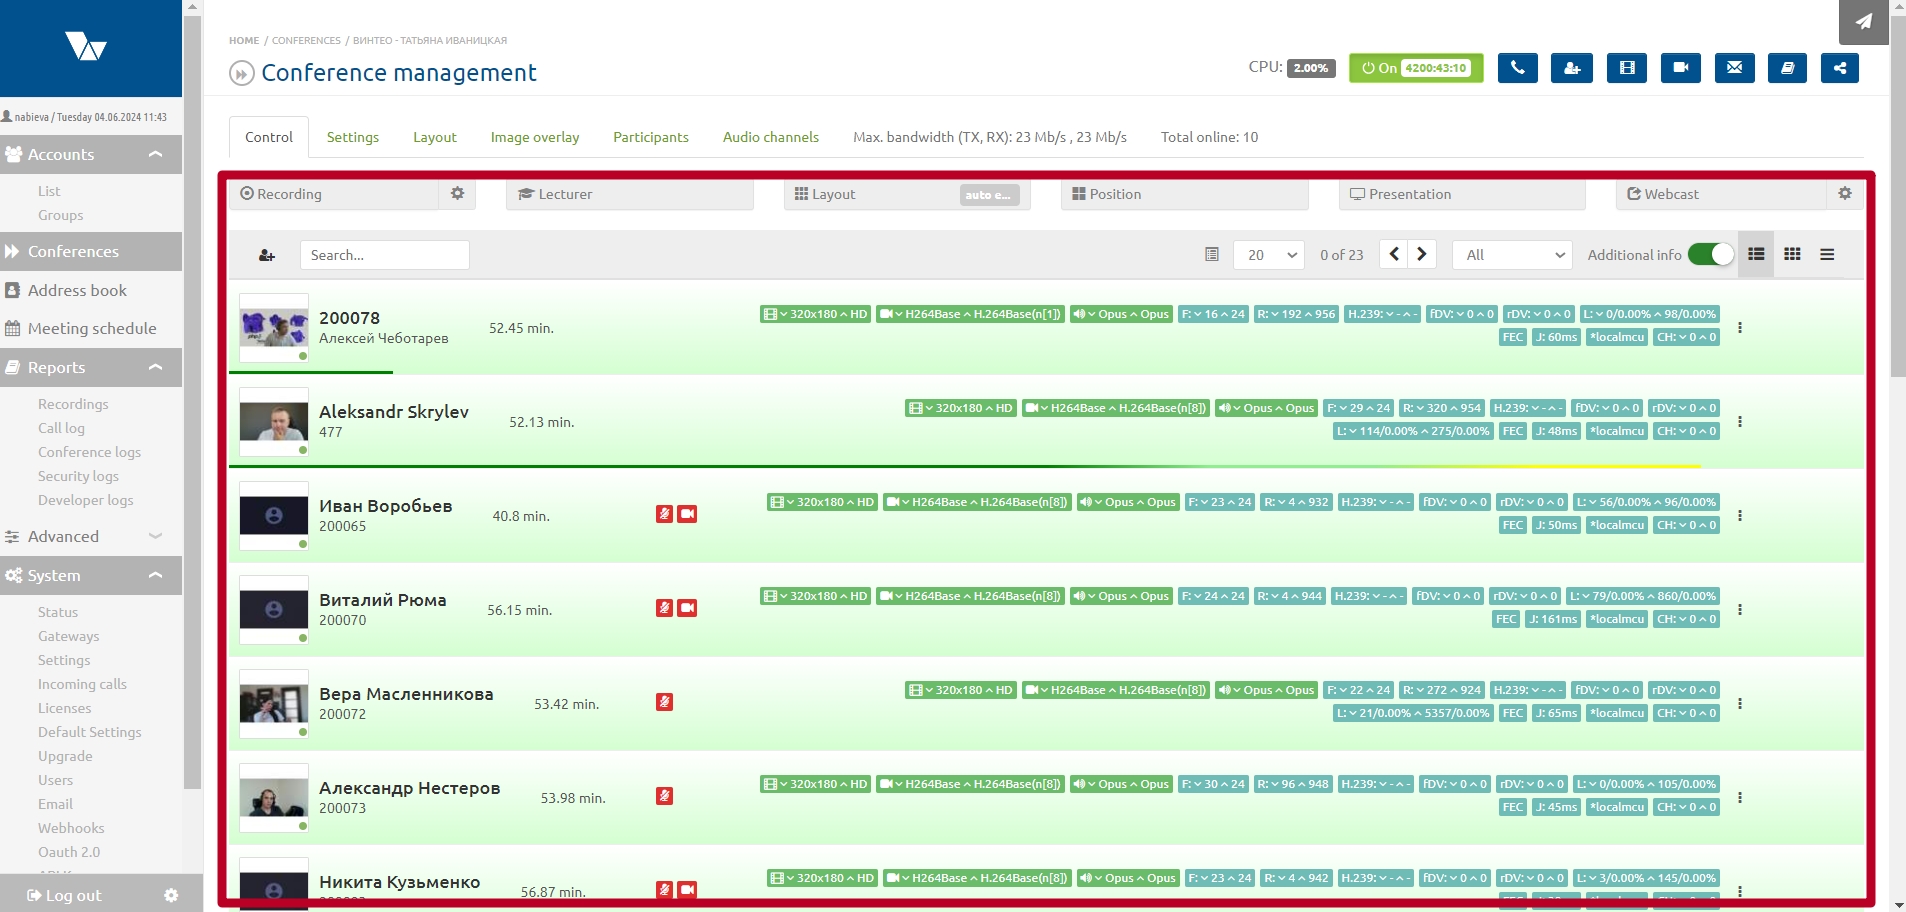
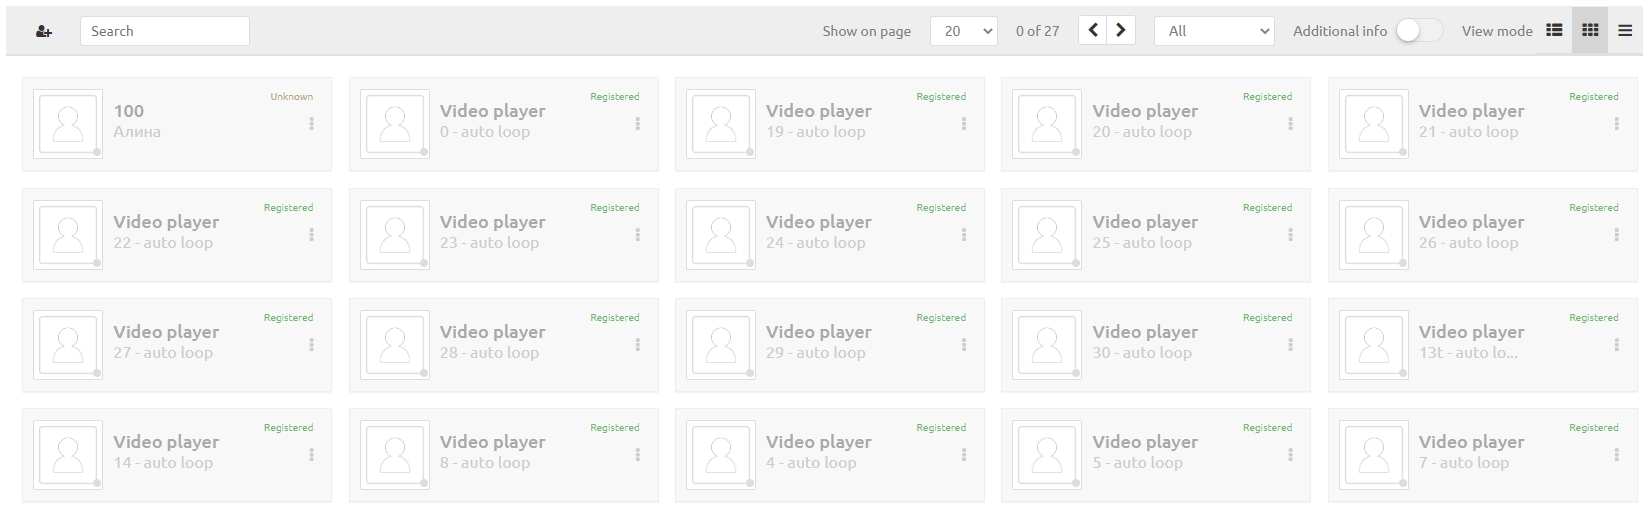
The main section also contains a panel for sorting, filtering, and other options:

- Add participant – opens the modal window for adding a participant;
- Search field by name or participant number;
- Pagination – select how many participants are displayed per page;
- Left number – count of records on previous pages; right number – total number of records;
- Page navigation – move to next/previous page;
- Status filter:

- All (static) – filters participants by number;
Conference participants include actual participants, assigned participants (e.g., video files), and anonymous participants.
- All (connection time ascending) – sorts by connection duration ascending;
- All (connection time descending) – sorts by connection duration descending;
- Online – shows only active participants, excluding “requested floor” assigned participants and disconnected participants;
- Offline – shows inactive participants, including assigned participants who never connected and participants who disconnected after connecting;
- Participants – shows only connected participants;
- Spectators – shows only participants connected as spectators;
- Request floor – shows only assigned participants who requested the floor while watching the webcast;
- Disconnected – shows only participants who were connected and then disconnected;
- On screen – shows participants displayed in the current layout panels;
- On all screens – shows participants displayed in all layouts (including personal layouts);
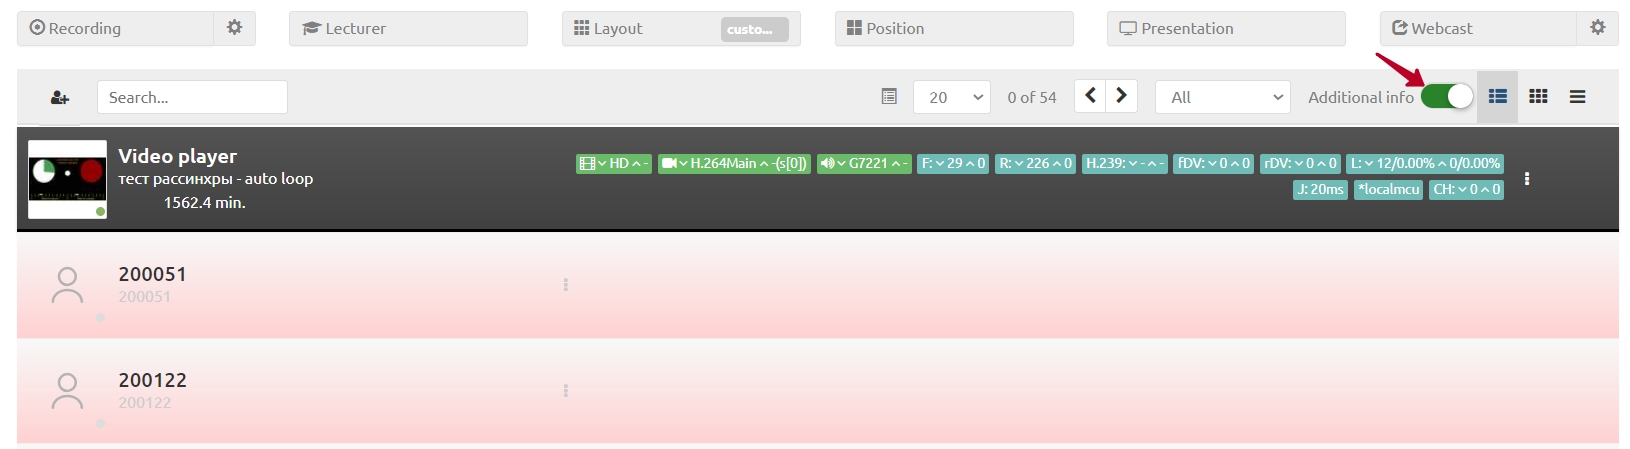
- Additional information toggle – shows extra connection parameters;
- Display modes – row, tile, or compact list.
Recording
The Recording button is split into two parts. The left part turns recording on/off, the right part opens recording settings. When recording is enabled, the system waits for participants; when participants appear, recording starts automatically with default or previously saved settings. Recording does not start if there are no participants and will stop when the last participant leaves (unless recording is manually stopped). After turning the conference off and back on (or after a 12-hour timeout), recording will be enabled again.
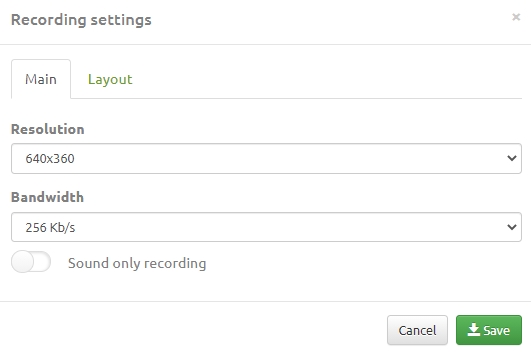
Recording settings include:
- Resolution – recording video resolution (default: conference resolution);
- Bitrate – maximum recording bandwidth;
- Record audio only – switch between video+audio or audio only;
Video and audio are recorded by default. The “Record audio only” rule is applied only after saving the recording.
- Protocol recording – enables audio recording of each participant for meeting minutes.
On the Layout tab you can choose between using the selected conference layout or automatic layout distribution.
The list of available layouts is described in Appendix 1.
Lecturer
This button toggles Video Selector mode. When enabled, the button displays the current lecturer participant ID.
Mosaic
The page has two tabs:
- Mosaic – manage the mosaic type and the number of displayed participants (layout list in Appendix 1).
- Presets – displays saved presets. More on presets is described in a separate article.
The Show positions checkbox shows the occupied positions on saved presets.
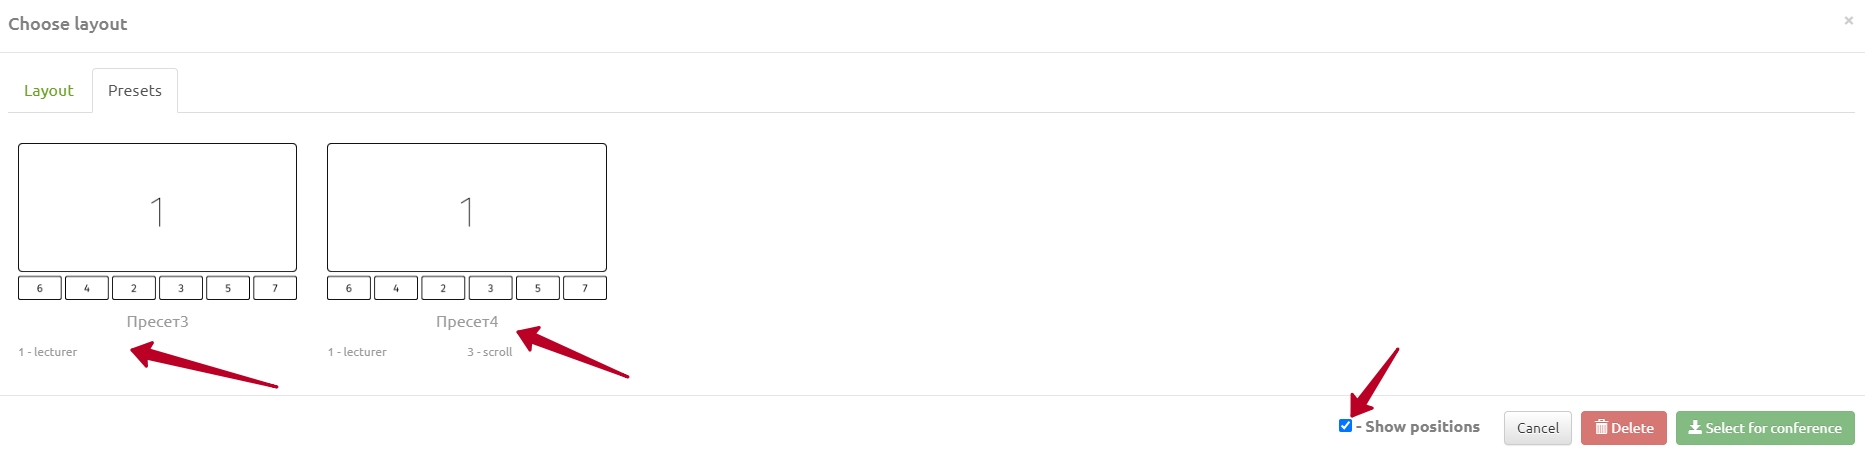
To apply a preset, select it and click Select for conference.
To delete a preset, select it and click Delete.
Positioning
This button opens a modal window with the selected numbered layout and the current list of participants occupying the positions. The layout changes online when participants are moved.
Presentation
This button enables/disables the presentation video stream from preconfigured sources.
If at least one frame of the presentation was shown, that frame will be displayed instead of the participant video.
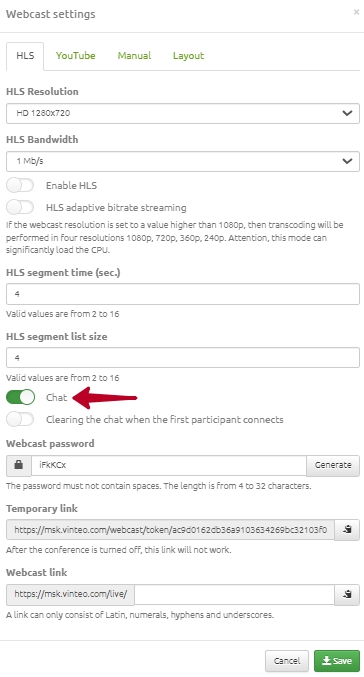
Webcast settings
The Webcast button is split into two parts. The left part turns the webcast on/off, the right part opens webcast display settings. On the HLS tab you can configure:
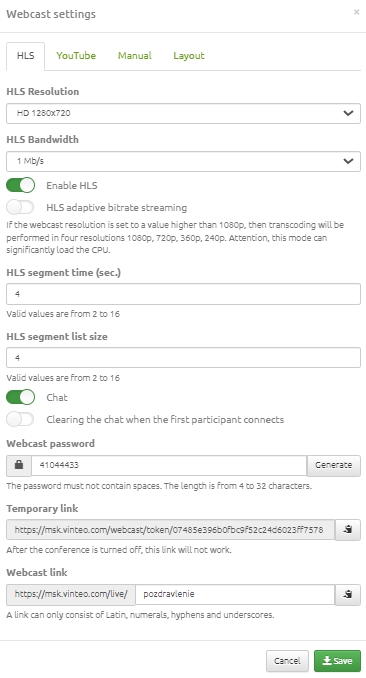
- HLS Resolution – webcast resolution
- HLS Bandwidth – webcast bitrate
- HLS – enable/disable HLS streaming
- Adaptive bitrate – allows the server to choose the best resolution and the client to request a stream based on connection quality
- HLS segment time (sec.) – segment duration (default 4, range 2–16)
- HLS segments count – number of segments in the playlist (default 4, range 2–16)
To reduce peak network load during unicast broadcasts with many viewers, increase segment time and segment count. This increases latency but reduces network spikes.
- Chat – enable/disable text chat display on the webcast screen
- Clear chat on first participant connection – enable if the conference is always on; clears previous chat history
- Webcast password – optional password to protect the webcast
- Temporary webcast link – link containing an access key. If chat is enabled, viewers can participate after entering a nickname.
- Webcast link – permanent link editable by the moderator/administrator. Only Latin letters, digits, hyphen, and underscore are allowed.
On the YouTube tab you can configure:
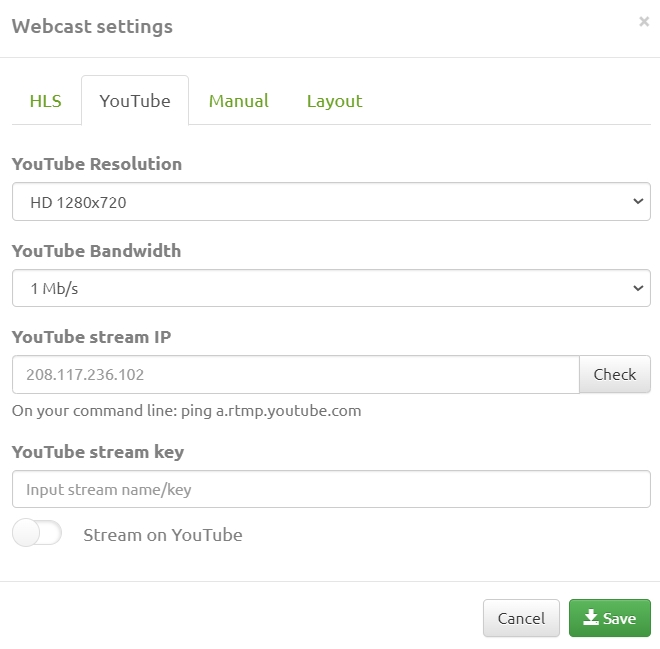
- YouTube Resolution – resolution for YouTube streaming
- YouTube Bandwidth – bitrate for YouTube streaming
- YouTube RTMP server address – RTPM server address
- YouTube stream key – key from the video encoder settings
- YouTube streaming – enable/disable YouTube broadcast
To obtain the RTMP server address and stream key, open the YouTube Dashboard.
On the Positioning tab you can change participant placement for recording or keep automatic layout.
On the Custom mode tab you can configure:
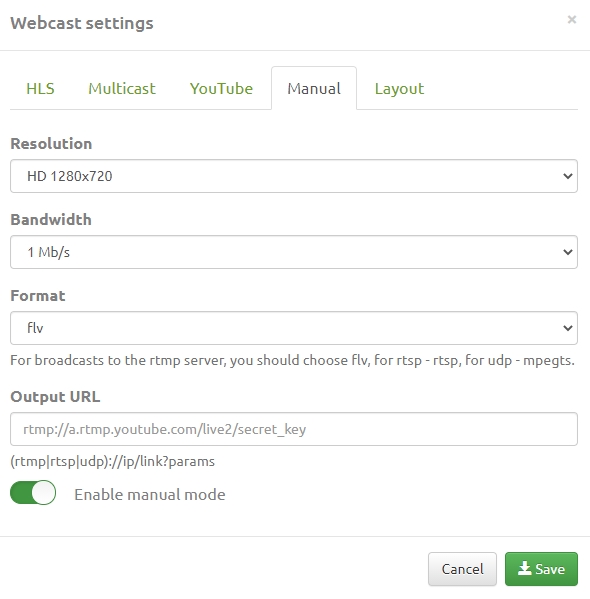
- Resolution – streaming resolution
- Bandwidth – streaming bitrate
- Format – choose flv for RTMP, rtsp for RTSP, mpegts for UDP
- URL – target server URL
On the Layout tab you can choose between Use selected conference layout or Use conference default layout.
Available layouts are listed in Appendix 1.
Conference end time
The conference end time can be set during scheduling or while the conference is running. To change the end time, open the Ends on [Date], [Time] tab.
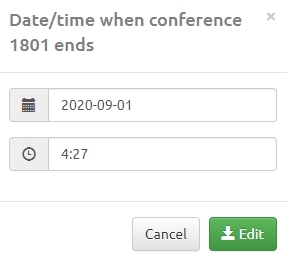
In the modal window, set the new date and time and confirm by clicking Change.
Participants list (+ DTMF)
The participants list includes a settings menu that allows adding participants, changing the number of displayed participants, filtering by status, enabling additional information, changing list view mode, and performing bulk actions. Information is updated in real time.
A context menu is available by clicking a participant. When the participant is inactive, the following actions are possible:

- Call – calls the participant
- Send invitation – if the participant has an email and the server is configured for email notifications
- Delete – removes the participant from the conference
- Open Participant properties by clicking the participant avatar:
Settings in this modal apply only to this participant in this conference and do not affect base subscriber settings, except codecs and connection modes (items 5–8).
- Watermark – edit the participant’s name tag. Use the minus sign to hide or change it.
Examples:
-
If you enter “-”, the watermark disappears for this participant in the layout and list, while others remain unchanged.
-
If you enter “- ” (minus + space), the watermark disappears in the layout but remains in the list.
-
Another use case with captions enabled: show first name, last name, and position, but show the position only during captions. Use “ - ” (space minus space) between last name and position.
- Channel – set the participant’s bandwidth
- Resolution – set the maximum resolution
- FPS – frames per second
- Codecs – select codecs
- H.264 High Profile – enable high profile
- Send content in main stream – for participants without H.239 support
- Negotiate media streams before answer – server and terminal negotiate codecs before the call is answered
- AGC – automatic gain control
- Play DTMF – set DTMF sequence before calling; format
ppp1234#(p = delay, 1s after answering) - Play DTMF to all – send DTMF to all participants
- Hide participant in layout – exclude participant from automatic layout positions
- Allow presentation – enable/disable participant presentation
- Audio volume to participant and Audio volume from participant – set levels
- Layout – tab for editing the participant’s personal layout.
When the participant is active:
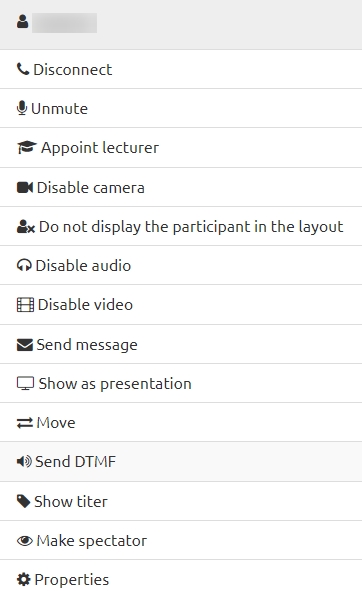
- Disconnect – disconnects the participant and moves them to inactive status
- Mute microphone – disables outgoing audio
- Set as lecturer – assigns the participant as lecturer (yellow border)
- Turn off camera – disables outgoing video
- Hide in layout – participant remains connected but is not shown in layout
- Mute audio – disables incoming audio to participant
- Disable video – disables incoming video to participant
- Show participant – places participant on a reserved layout position
- Send message – opens message window with participant preselected
- Show/Hide screenshot – displays participant screenshot next to their name
- Show as presentation – shows participant video as presentation
- Move – move participant to another active conference
- Send DTMF – opens a modal to send DTMF signals
- Show caption – displays a caption for the participant
- Make spectator – toggles spectator mode (see “Spectators” feature)
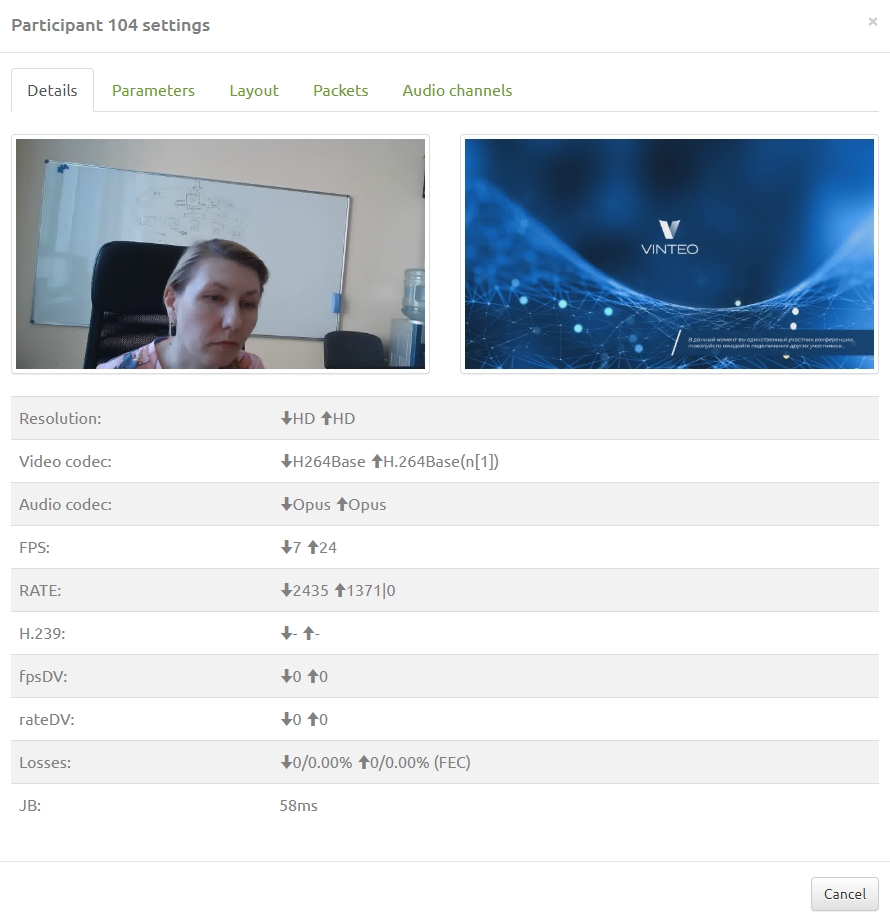
- Properties – opens a technical information window (resolution, codecs, FPS, bitrate, losses, jitter buffer, etc.) and allows adjusting audio levels on the Parameters tab.
Group participant control

You can control multiple participants at once. When one or more participants are selected, a group control panel appears with buttons:
- Enable – adds selected participants to the conference
- Enable microphone – turns on microphone for selected participants
- Enable camera – turns on camera for selected participants
- Enable audio – enables audio for selected participants
- Enable video – enables video for selected participants
- Show/Hide screenshot – toggles screenshots for selected participants
If Reverse actions is enabled, the buttons perform the opposite actions.
Participant status is displayed in several modes:
- Tiles (hover to see status):
A lock icon indicates RTP encryption.
-
Rows (status is always visible, additional parameters appear when Additional information is enabled):
-
Personal layout indicator in the row (enable in participant properties by selecting “Use selected conference layout” and choosing any layout on the Layouts tab):
- Compact list – shows IP address and registration status:

Connection statuses
Standard statuses show:
- Light green – participant is connected
- Dark green – participant is presenting
- Light blue – current lecturer
- Yellow – watching webcast or requesting the floor
- Gray – added but not connected
- Black – microphone is muted

- Connection time:

- After disconnection, time is counted and the name replaces the IP address:
- Video resolution and direction arrow indicate stream direction; a dash means no video stream. Other statuses are displayed similarly.
- Video codecs used
- Audio codecs used
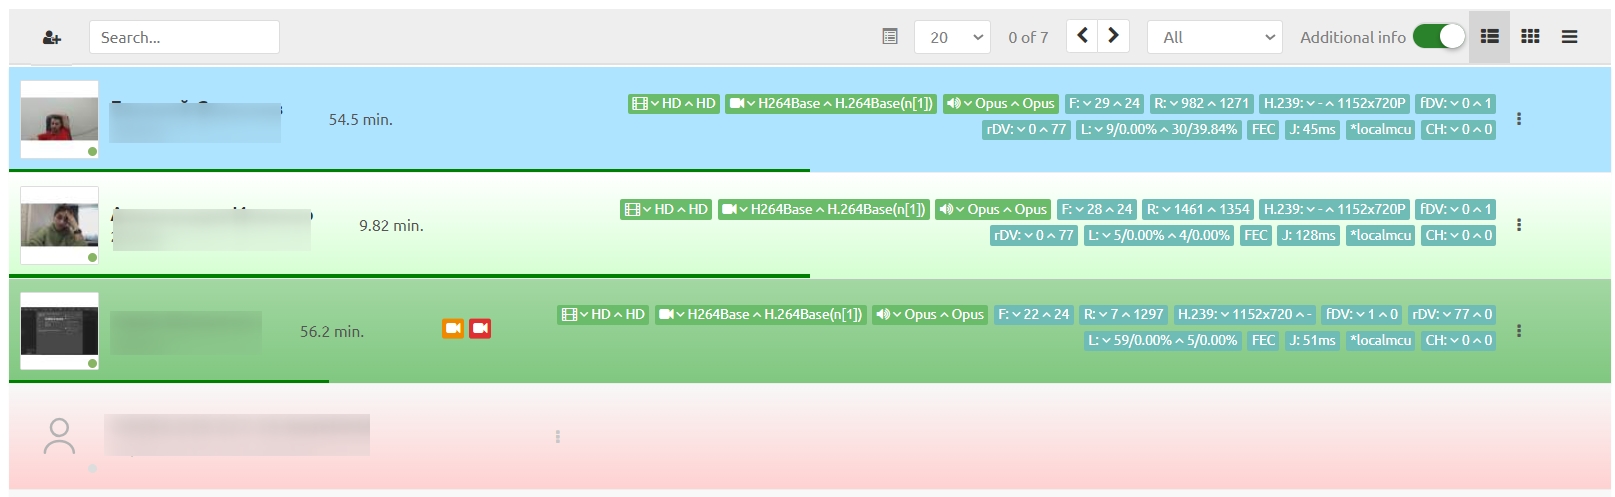
Extended statuses show:

- FPS in video streams
- Current bandwidth used by main video stream
- Forward error correction
- Overhead (additional traffic for packet recovery)
- Content stream status (H.239, BFCP)
- Content FPS (H.239, BFCP)

- Bandwidth used by content stream (H.239, BFCP)
- Packet loss count and percentage for video streams

- Adaptive jitter buffer value (ms) – higher value means higher delay
- Server address (for cascaded connections)

Audio channel information:

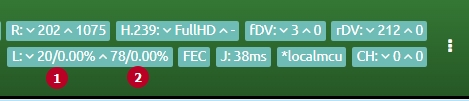
Loss indicator
The loss indicator shows incoming and outgoing losses. For each direction, total lost packets and instant loss percentage are displayed. A lightning icon appears on the participant’s screenshot for high losses.
To check packet loss, enable Additional information and choose extended view.

Loss information is exchanged via RTCP Receiver Reports (RR) every 2–3 seconds. RR contains:
- Cumulative number of packets lost – total lost packets since connection
- Fraction lost – loss fraction since the previous RR
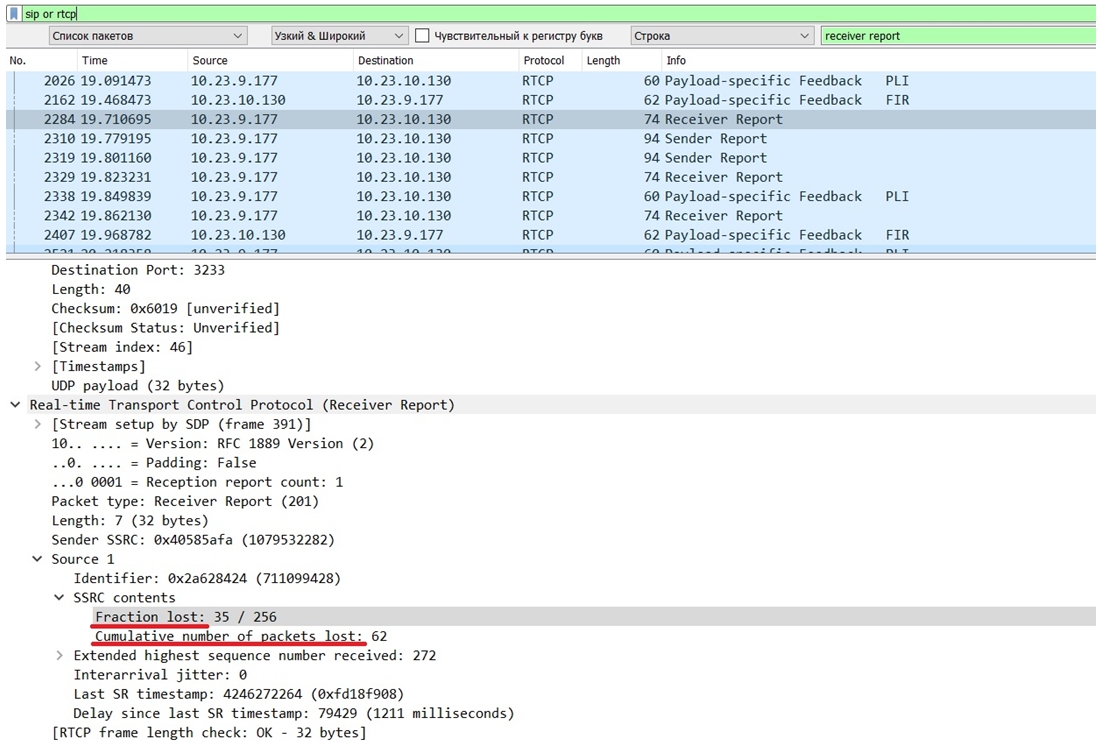
These values are shown in the loss indicator:

Incoming (1) and outgoing (2) losses are shown separately.
The values are recalculated each time an RR is sent or received: incoming losses are calculated by the server, outgoing losses by the client.
Appendix 1
Available layouts
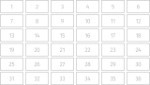
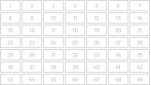
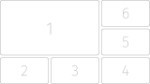
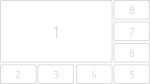
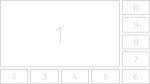
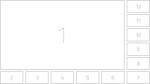
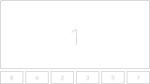
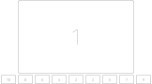
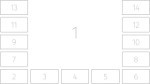
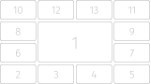
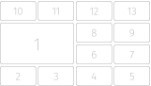
There are 38 different layouts, supporting 1 to 49 participants on one screen. In addition to the layout type, you can set the video resolution for the selected layout. Usually the resolution is chosen to match most participants or the highest resolution of any connected participant.
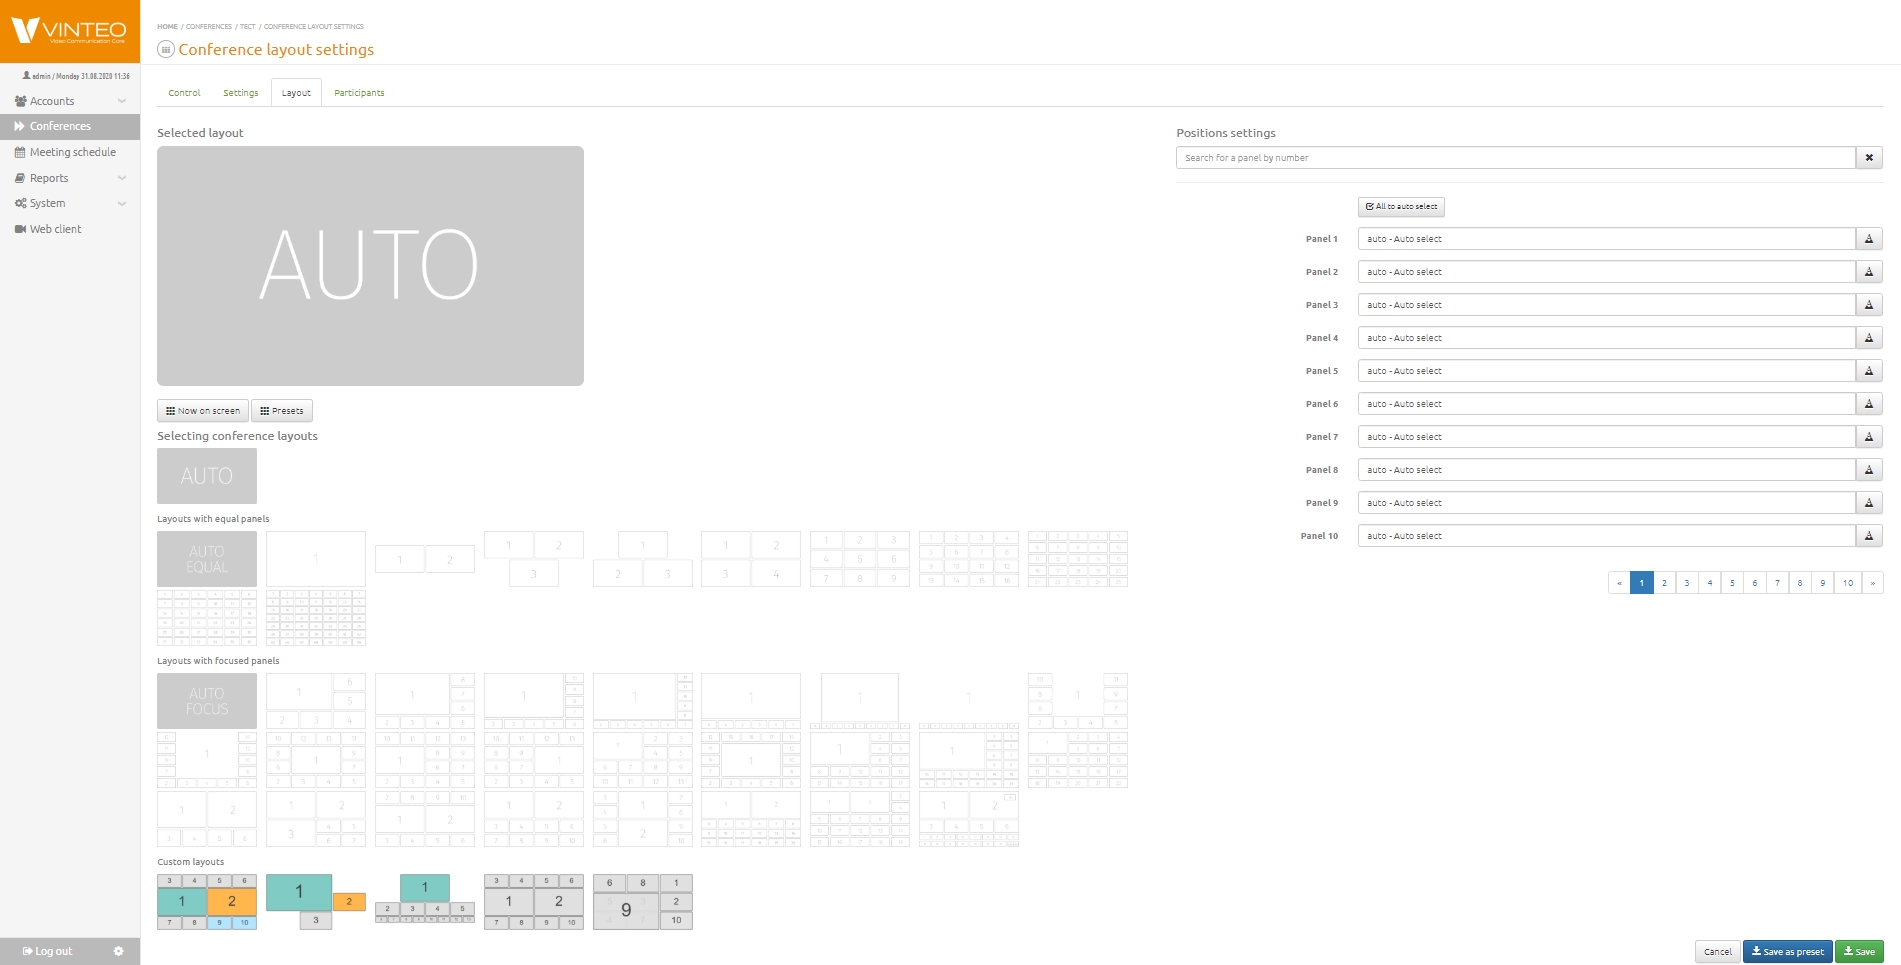
Layout table

|
Auto layout mode (automatic mosaic and panel placement) |
|---|---|
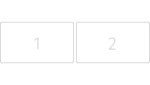
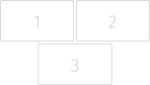
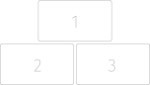
| LAYOUTS WITH EQUAL PANELS | |

|
Auto layout mode with equal panels |

|
Mosaic mode with 1 participant panel |
|
Mosaic mode with 2 participant panels |
|
Mosaic mode with 3 participant panels |
|
Mosaic mode with 3 participant panels |
|
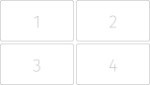
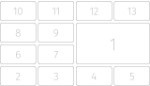
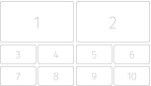
Mosaic mode with 4 participant panels |
|
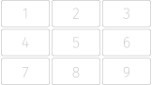
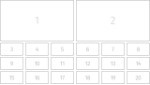
Mosaic mode with 9 participant panels |
|
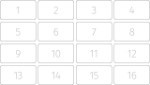
Mosaic mode with 16 participant panels |
|
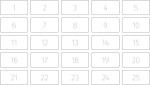
Mosaic mode with 25 participant panels |
|
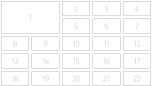
Mosaic mode with 36 participant panels |
|
Mosaic mode with 49 participant panels |
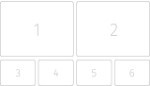
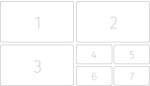
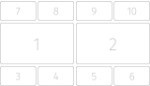
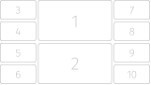
| LAYOUTS WITH FOCUSED PANELS | |

|
Auto layout mode with focused panels |
|
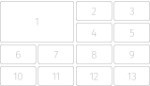
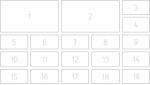
Mosaic mode with 6 panels (1 focus panel in the top-left corner) |
|
Mosaic mode with 8 panels (1 focus panel in the top-left corner) |
|
Mosaic mode with 10 panels (1 focus panel in the top-left corner) |
|
Mosaic mode with 12 panels (1 focus panel in the top-left corner) |
|
Mosaic mode with 7 panels (1 focus panel centered above others) |
|
Mosaic mode with 10 panels (1 focus panel centered above others) |
|
Mosaic mode with 10 panels (1 focus panel centered as background) |
|
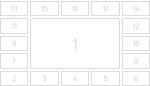
Mosaic mode with 14 panels (1 focus panel centered as background) |
|
Mosaic mode with 13 panels (1 focus panel centered) |
|
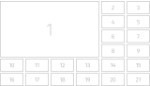
Mosaic mode with 13 panels (1 focus panel on the left) |
|
Mosaic mode with 13 panels (1 focus panel on the right) |
|
Mosaic mode with 13 panels (1 focus panel in the top-left corner) |
|
Mosaic mode with 17 panels (1 focus panel centered) |

|
Mosaic mode with 17 panels (1 focus panel in the top-left corner) |
|
Mosaic mode with 21 panels (1 focus panel in the top-left corner) |
|
Mosaic mode with 22 panels (1 focus panel in the top-left corner) |
|
Mosaic mode with 6 panels (2 focus panels) |
|
Mosaic mode with 7 panels (3 focus panels) |
|
Mosaic mode with 10 panels (2 focus panels) |
|
Mosaic mode with 10 panels (2 focus panels) |
|
Mosaic mode with 10 panels (2 focus panels) |
|
Mosaic mode with 20 panels (2 focus panels) |
|
Mosaic mode with 19 panels (2 focus panels) |
|
“Demonstration” mosaic mode |