

Settings page
This configuration page is divided into seven groups of settings.
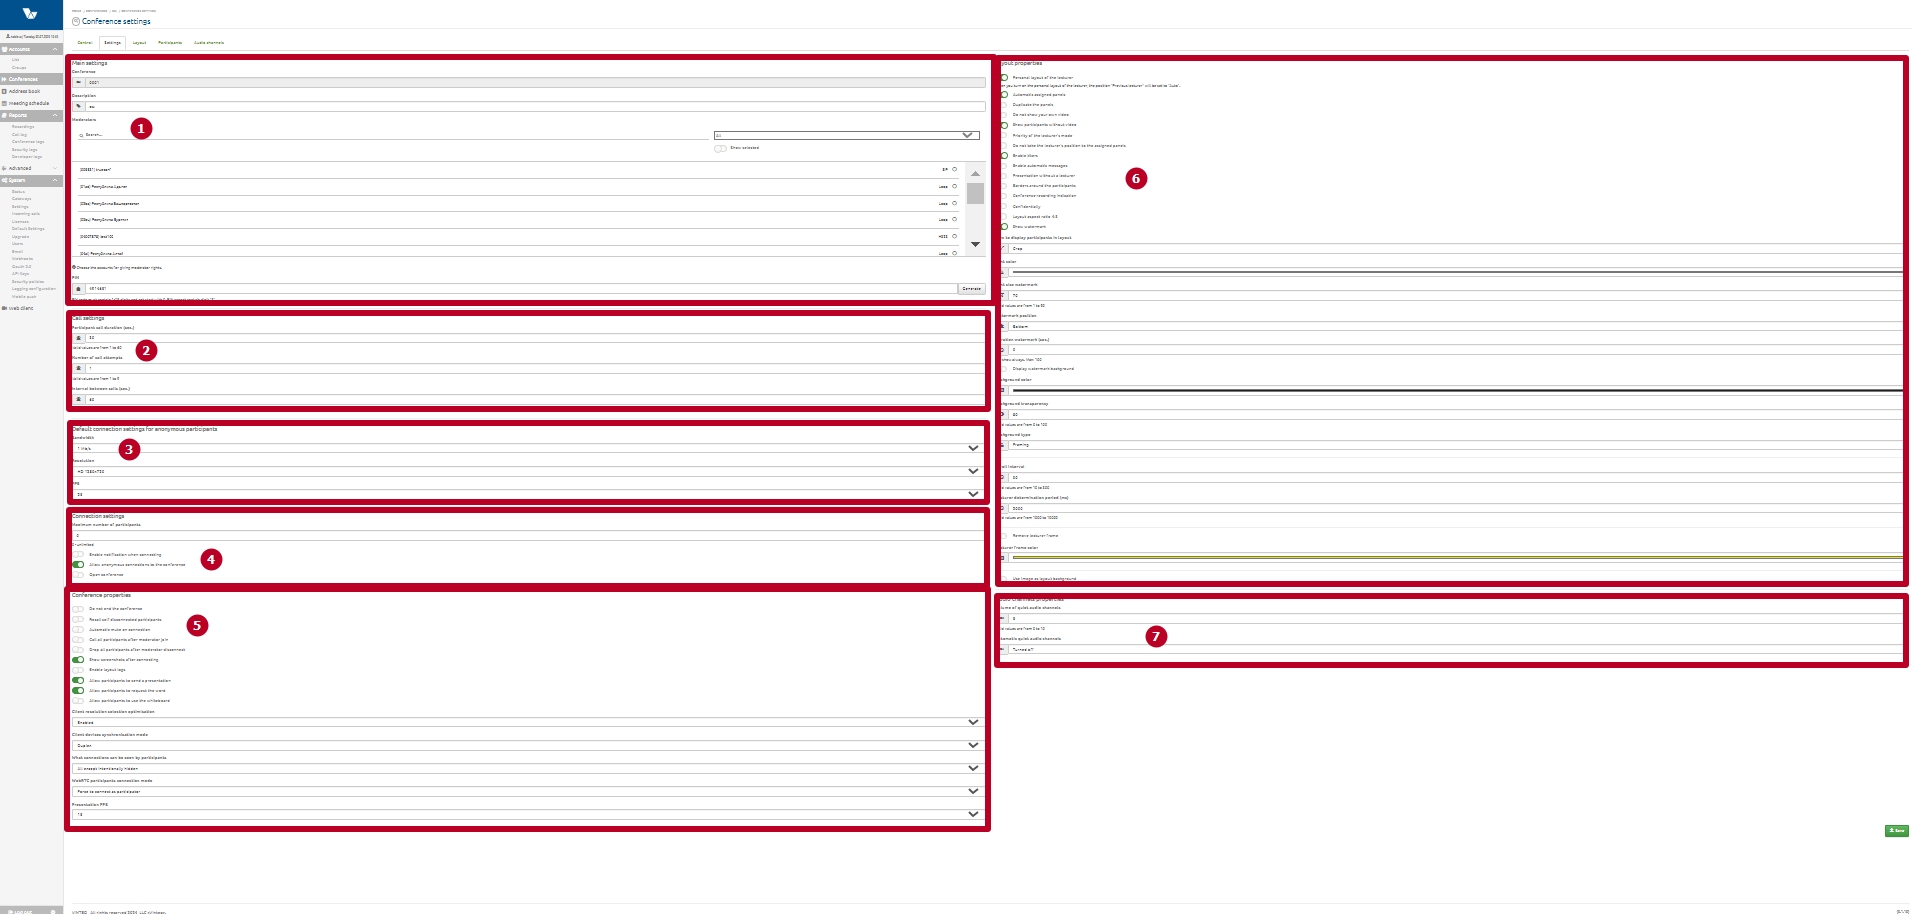
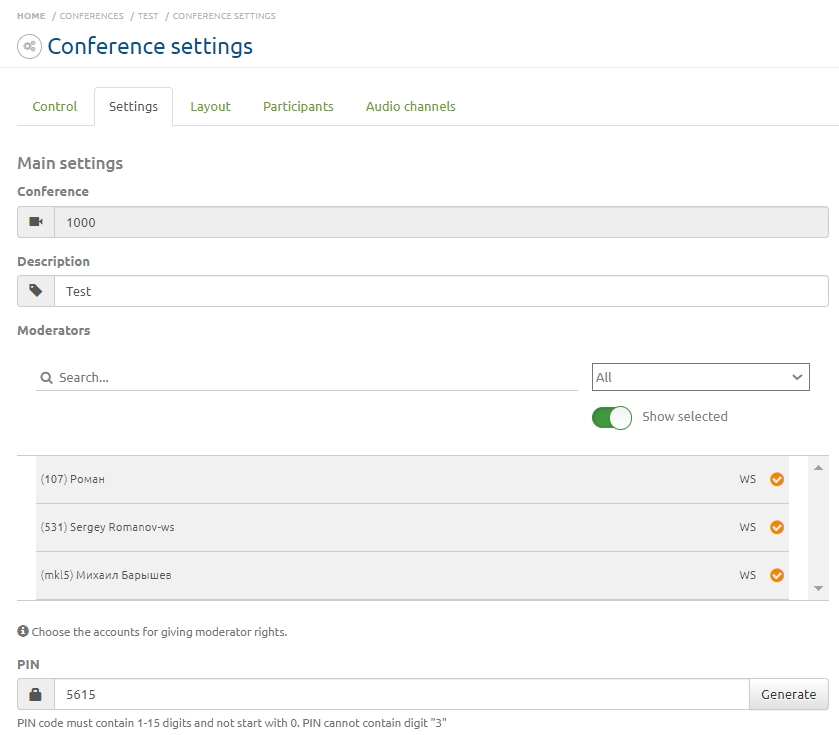
General
– Conference – the number of the conference being configured;
– Description – a thematic description of the conference;
– Moderators – allows assigning conference moderators from the server subscriber list; only subscribers visible to the moderator in the Address Book are available in the list;
– PIN code – sets the conference PIN for anonymous participants. The PIN can contain 1 to 15 digits. The digits 0 and 3 cannot be used. If the PIN field is left empty, the conference room will be closed for all participants except those added by an administrator or moderator.
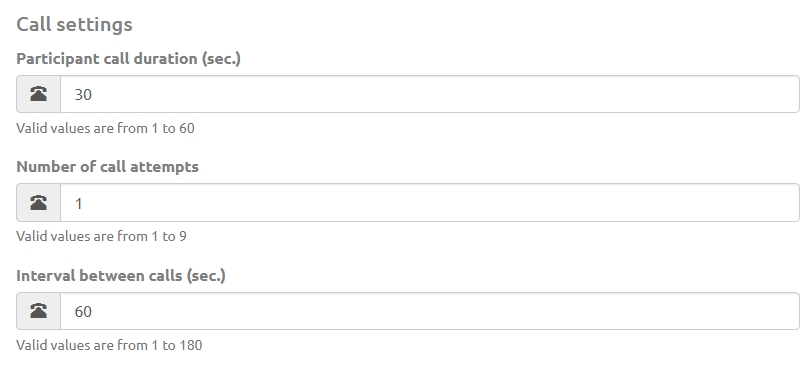
Call Settings
– Participant call duration – sets the time interval in seconds during which the server will call participants;
– Number of call attempts – sets the number of call attempts if the participant is busy or not answering;
– Interval between calls – defines the interval between call attempts.
Default Connection Settings for Anonymous Users
These parameters apply to self-joining anonymous participants in an open conference.
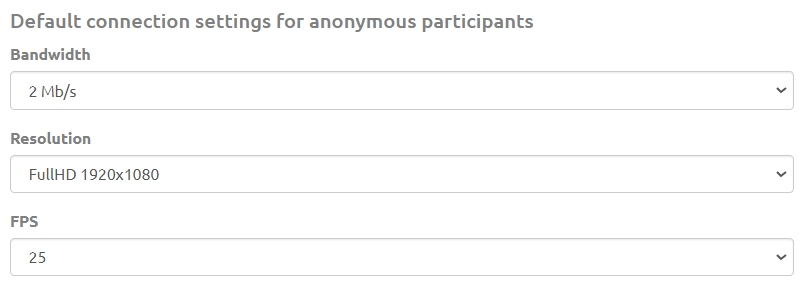
– Channel width – maximum bandwidth for participants;
– Resolution – maximum resolution for participants;
– FPS – maximum frame rate for participants.
Connection Settings
The Maximum number of participants field allows setting the maximum allowed number of active participants (connections) to avoid system overload.
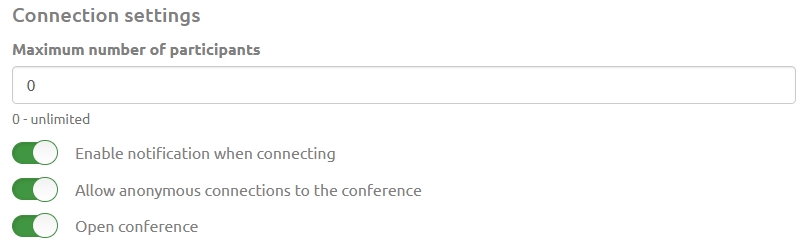
– Enable connection notification – notifies participants about the start of the broadcast and their connection to the conference; can be used when a participant is in a waiting state before the broadcast starts or when they are the only participant in the conference;
– Allow anonymous connections to the conference – allows joining the conference without entering a PIN code;
– Open conference – allows anonymous users to join without entering a PIN code.
Conference Properties
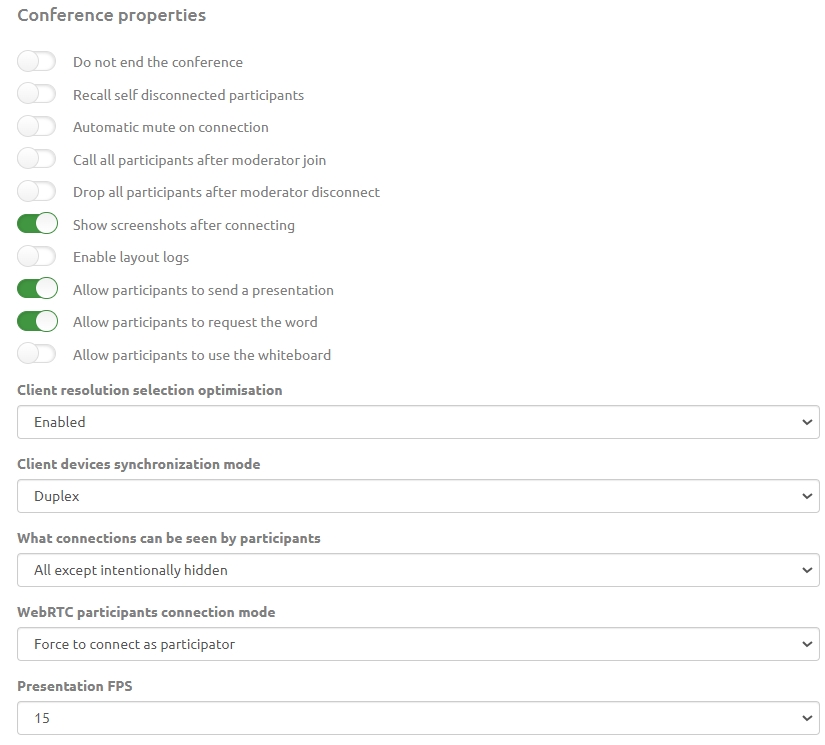
– Do not stop the conference – keeps the conference running continuously;
– Call back disconnected participants automatically – automatically calls participants who were disconnected due to connection loss;
– Microphone off on connection – disables the microphone for all called participants on the server. The microphone can only be enabled by the administrator/moderator;
– Call participants when a moderator joins – automates the calling process. If enabled, the server will automatically call all participants once a moderator joins the conference. If no moderator is connected, the server will deny connections for regular participants;
– Disconnect participants when the moderator leaves – automates conference termination. When the last moderator disconnects, the server will automatically disconnect all regular participants. The server will disconnect all participants if there is no moderator in the conference;
– Show screenshots after participant connection – takes a screenshot of the participant’s video stream when they first connect;
– Enable layout logging – logs participant layout positions;
If this setting is disabled, the server will override the start of incoming presentations from participants. The override is implemented by starting a presentation stream from the server to the participant and then stopping it after one second. Use this setting with caution when connecting to other servers in cascade mode.
– Allow participants to request the floor – enables participants to request the floor; requires Vinteo Desktop version 3.17.2 or higher. Detailed functionality is described in a separate article.
– Allow participants to use the Whiteboard – enables the Whiteboard feature in the conference;
– Do not show the screensaver “You are currently the only participant” – disables the screensaver that displays when the participant is the only one in the conference;
– Presentation FPS – a dropdown setting that limits the presentation frame rate.
At the bottom of the page there is a setting for optimizing client resolution selection to reduce network load and resource usage.
The setting has three modes: Enabled (default), Minimal, and Disabled.
When Enabled, the setting controls the resolution sent from the client to the server.
Minimal optimization should be used when resources are sufficient, but server and network load should be reduced without lowering image quality. This mode is also recommended when frequent lecturer changes occur during participant dialogue.
If Disabled, participants will connect with the resolution set in their own settings.
More details about this setting in the video:

The WebRTC participant connection mode setting and the Spectators feature are described in a separate article.
“Which connections are visible to regular participants” setting
This setting affects participant visibility in Vinteo Desktop.
The default value is “None”, meaning no participants will be displayed in the Participants tab in Vinteo Desktop. Typically, “All, as moderator” is selected so that all participants are shown, or “All except hidden” is selected.
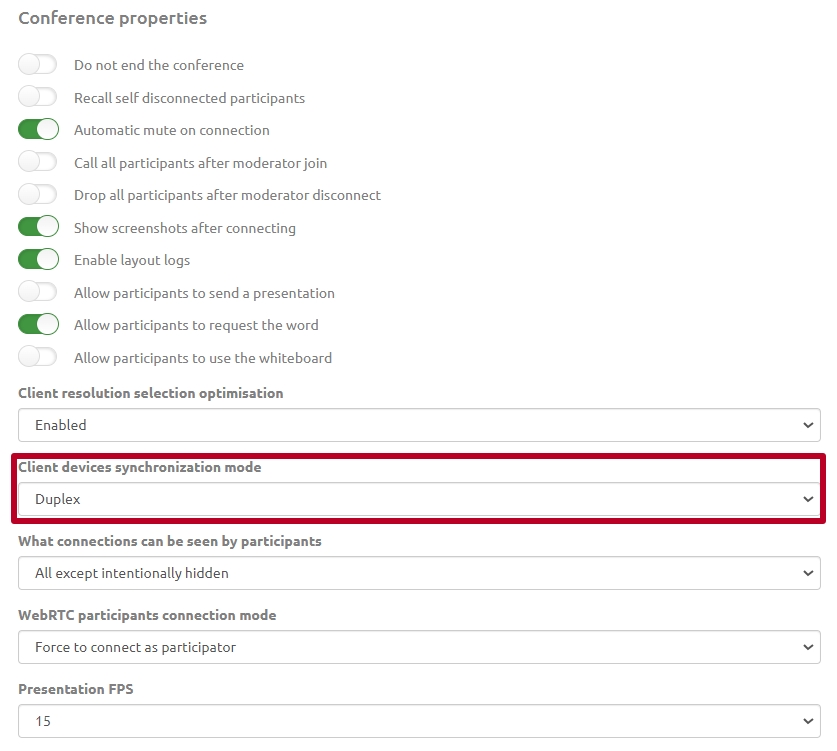
Client Device Synchronization Mode
This feature synchronizes the state of participants’ cameras and microphones between the client and the server, providing additional peripheral control.
It is located in the conference settings at the bottom of the Conference Properties block. Select “Duplex” to activate the feature and click the save button at the bottom of the page.
“Spectators” Feature
Spectators are participants who join using a browser or Vinteo Desktop without additional server load and are not shown in the conference layout, but they can view the conference and presentations.
In the web interface, a spectator row is indicated by an eye icon and highlighted in light blue.
This feature helps implement different conference scenarios and reduce server load and network traffic.
The Spectators feature is located in the conference settings at the bottom of the Conference Properties block.
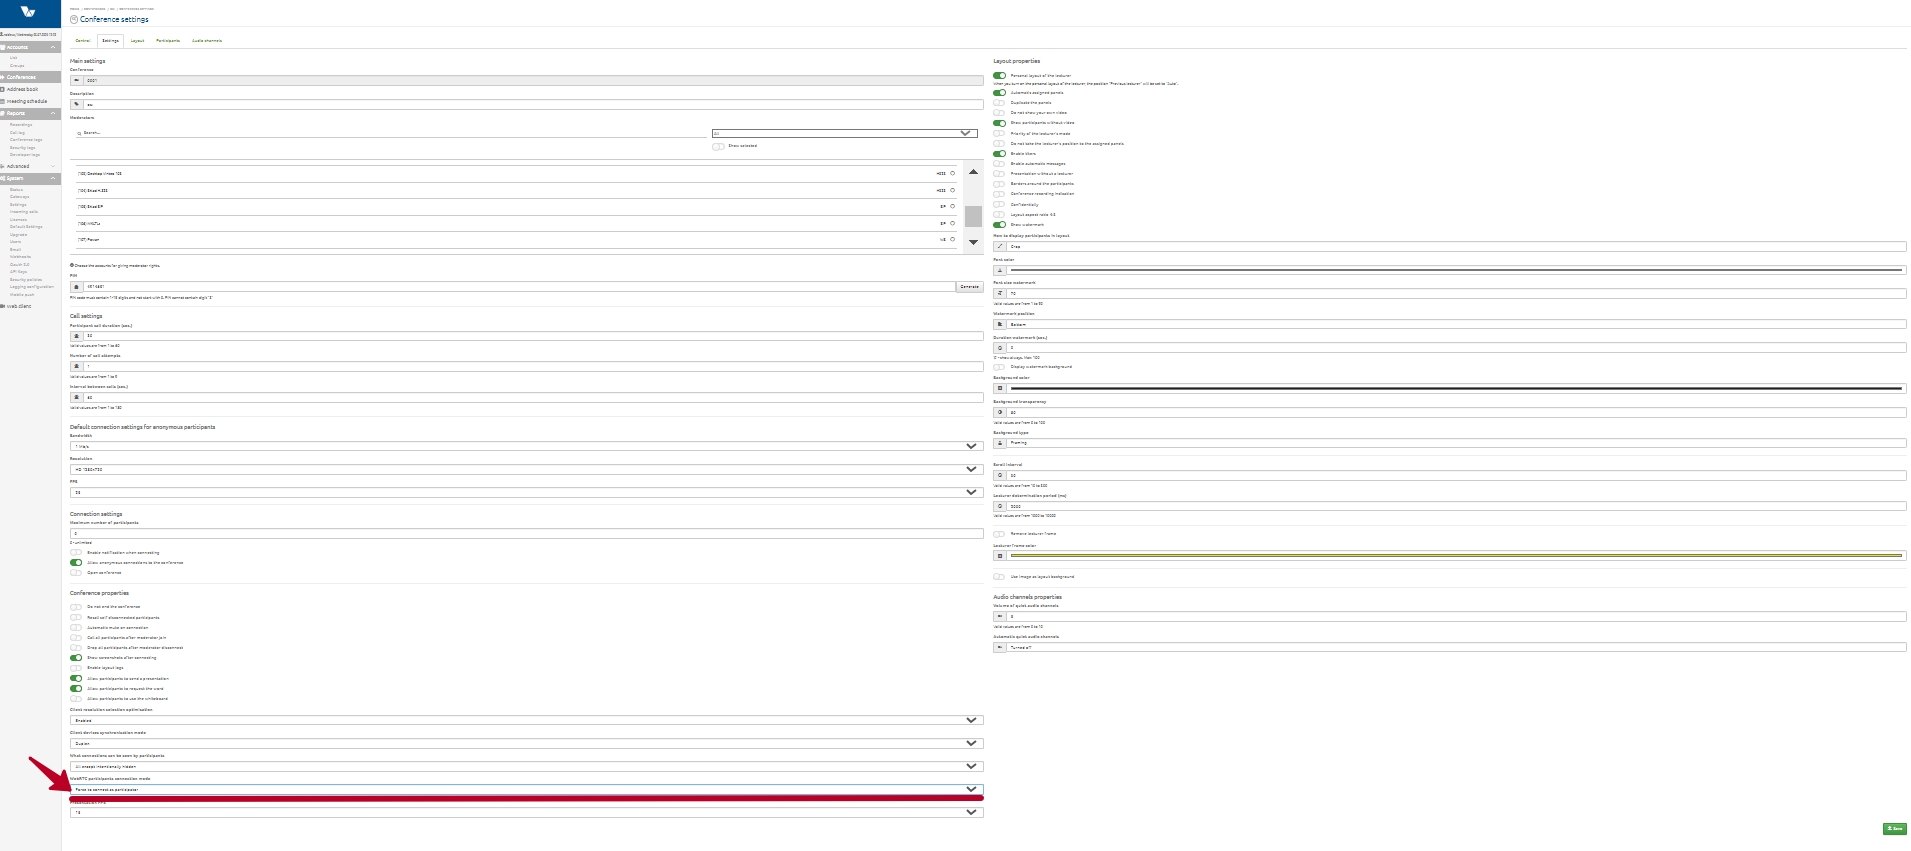
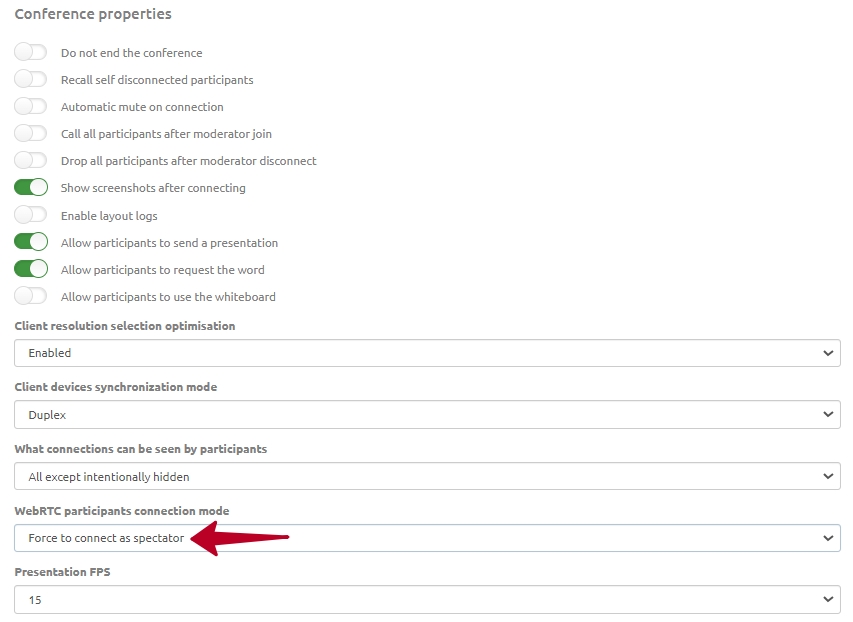
The WebRTC participant connection mode dropdown has three options:
- Force connect as participant
- Client choice
- Force connect as spectator
Force connect as participant
This option connects the user as a participant regardless of their peripheral status. All participant features will be available.
Client choice
If the connecting user has both camera and microphone off, the system will classify them as a spectator. If at least one device is on (camera or microphone), the system will classify them as a participant. The system will also switch a spectator to participant if they start presenting. This setting is suitable for broadcasts or when resource saving is required.
Force connect as spectator
The user is connected as a spectator regardless of device status. An eye icon appears next to their name. They cannot switch to participant mode themselves.
This option is suitable for educational conferences, webinars, and similar events.
The first participant to join the conference will be assigned the role of participant regardless of settings.
A video stream can act as a participant if it is connected first. This allows other users to join as spectators.
Admin control interface
An administrator/moderator can manage spectators and switch them to participants and back.
To make a spectator a participant, choose “Make participant” in the participant’s context menu. Similarly, you can make a participant a spectator.
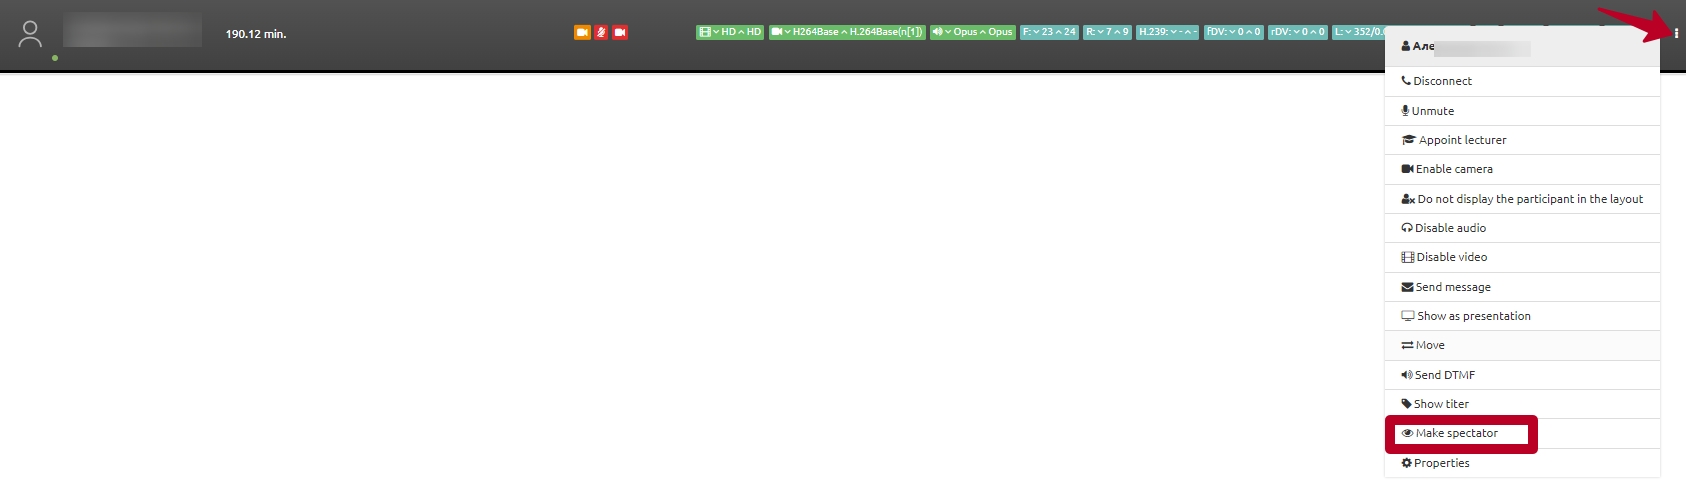
You can also select a spectator or participant and click the “Make participant” button at the top right.

You can enable the Reverse action switch and click the eye icon button “Make spectator”.

We recommend setting “Force connect as participant” because it does not affect other settings, and the administrator can still change any participant to a spectator.
Layout Properties
– Personal lecturer layout – allows assigning a fixed individual layout to one or more participants recognized as lecturers by the system. This is useful for meetings where multiple participants speak alternately;
When this mode is enabled, the Previous lecturer position is set to Auto.
– Automatically assigned panels – allows participants to occupy panels assigned to other participants before those participants connect;
– Panel duplication – duplicates the participant assigned as lecturer on the main layout panel;
– Do not display own video – excludes the participant’s video from the main layout; each participant receives a personal layout;
Enabling Do not display own video automatically disables Automatically assigned panels and Panel duplication. Multilayer layouts will not be available.
– Show participants without video – allows displaying participants without video in the main layout;
– Lecturer priority mode – sets Layout One as the priority and disables personal layouts. If enabled, in lecturer mode all participants except the lecturer will see the lecturer in full screen, while the lecturer will see the layout;
– Do not occupy lecturer position for assigned panels – prevents duplicating a participant assigned to another panel on the lecturer panel. This setting does not apply when the lecturer is defined by voice or assigned manually, or when the Lecturer mode is enabled in the Conference Management page;
– Enable captions – enables animated graphic captions for participants who become lecturers;
Caption logic: A caption appears on the participant that the server recognizes as the lecturer (assigned by the administrator or active by voice in automatic mode).
– Enable automatic messages – displays text messages on the conference screen over participant images:
– when participants connect or disconnect;
– when recording starts or stops;
– when presentation source connects or disconnects;
– when web streaming starts or stops.
– Presentation without a presenter – a setting that allows you to define how the presentation is displayed to participants who have the additional presentation video stream disabled or are unable to receive content in an additional stream. This setting also affects how the presentation appears in the conference recording and in the web broadcast (if a personalized layout is not configured for them). When the option is disabled, a panel with the presenter’s video appears in the top-right corner of the presentation. When the setting is enabled, only the presentation image is displayed without overlaying the presenter.
– Participant borders – each participant except the active one is highlighted with a black border;
– Recording indication – when recording is enabled, a thin red border appears around the participant image;
– Confidential – displays a confidentiality warning on the screen;
– Layout aspect ratio 4:3 – builds the layout in a 4:3 aspect ratio. Useful when most participants use 4:3 connections;
– Show watermark – enables or disables participant name captions in the layout;
– Participant display mode – sets how participant video is scaled: fit, crop, or stretch;
– Text color – sets the watermark text color (default: white);
– Watermark font size – sets the watermark font size (default: 40);
– Watermark position – two options: Standard (margin from bottom borders) or Bottom (fixed to bottom borders);
– Watermark display time (sec.) – duration of watermark display for each speaker change, lecturer change, layout change, or participant repositioning. Default is 0, meaning the watermark is displayed continuously;
– Show watermark background – enables or disables background behind watermark text (default: off);
– Background color – watermark background color (default: black);
– Background transparency – watermark background opacity (default: 80);
– Background type – two types: Frame (background size depends on text size) or Full width;
– Scroll period – interval in seconds for rotating participants not placed in the mosaic (default: 30s);
– Lecturer hold period – time during which the lecturer cannot be replaced after being assigned (milliseconds, default: 3000ms);
– Remove lecturer border – disables the lecturer border;
– Lecturer border color – sets the lecturer border color;
– Use image as layout background – allows adding a background image to the layout. Supported formats: jpg or png. Images larger than 3840×2160 are not recommended, as they may not display correctly.
Audio Channel Properties
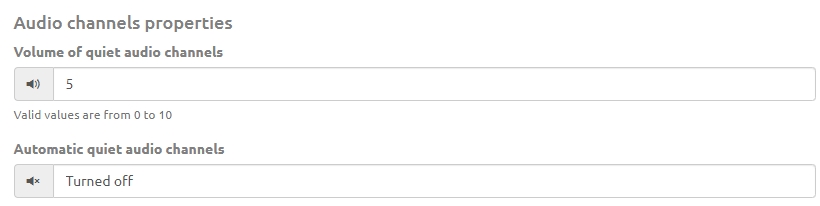
This block allows adjusting the volume of quiet audio channels when the Quiet channel checkbox is enabled for a participant in the Conferences section.
If Automatic quiet audio channels is enabled, the settings apply to the entire conference. Volume can be set from 0 to 10 (recommended: 5).
In the Automatic quiet audio channels field, you can choose the application mode: to a specific language group, to an interpreter audio channel, or disable the feature.