

Vinteo Web Client Settings
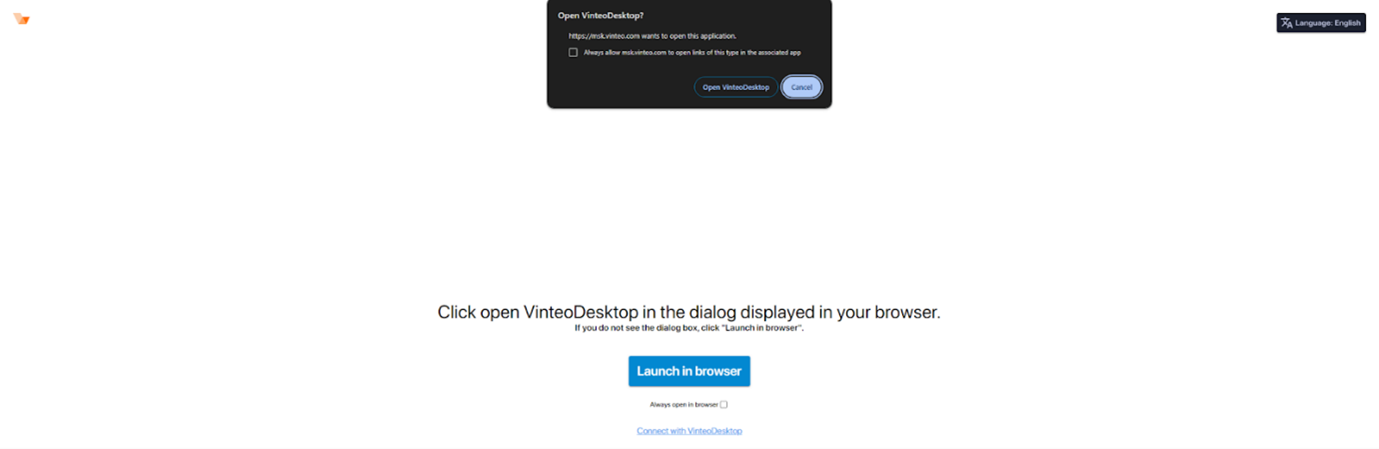
After following the link from the email invitation to a video conference, the browser will show a dialog offering either to open the link in the “Vinteo Desktop” application or to continue working in the browser. You must click the “Open in browser” button.
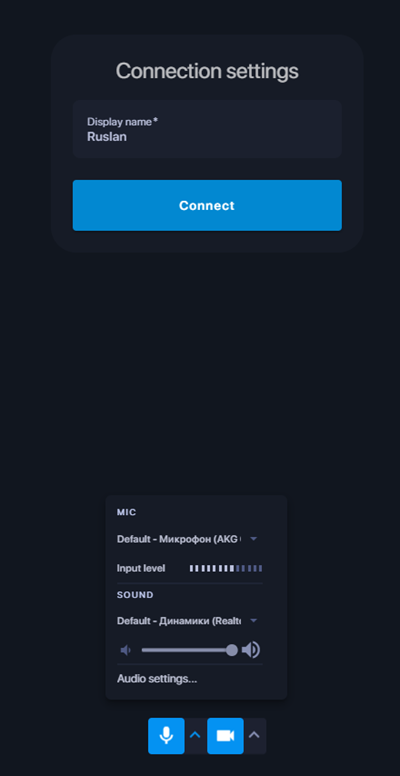
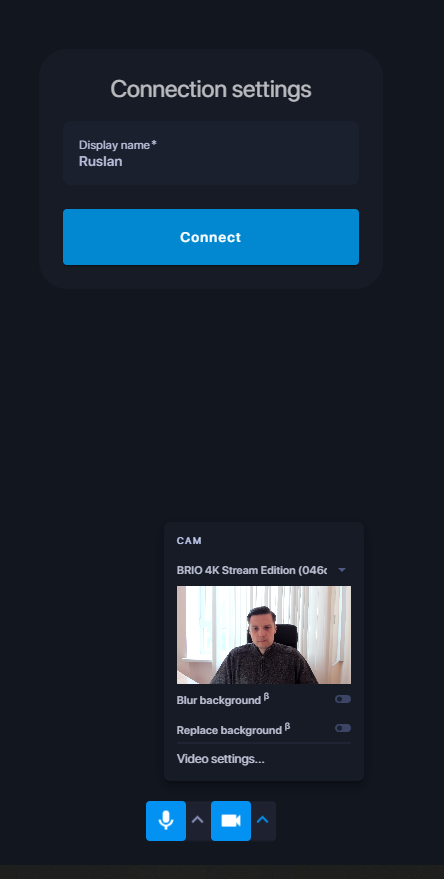
After launching the web client, you need to configure it by entering your name and, if necessary, selecting a microphone and camera.
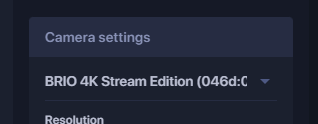
The camera settings also include background blur, background replacement with an image, and other options.
The numbered items in the picture correspond to the steps of the algorithm:
- When following the invitation link, the conference number will already be filled in;
- Enter the name/nickname that will be displayed in the conference watermark; place the call. If you have credentials for authorization, proceed to the next step;
- Select the “Authorization” option as shown in the picture;
- Enter the subscriber number or login (if LDAP authentication is used);
- Enter the password. After successful authorization, the “Call” button will change color from gray to blue;
- This settings block depends on the user’s needs;
- Device settings allow you to configure capture and playback devices and upload an avatar image, which will be displayed in the conference instead of video when the camera is off.
Click the “Call” button.
Solutions for issues with both the web client and the desktop client are described below in the “Errors and Solutions” section. A detailed guide on how to use the Vinteo web client is available at the following link.
Errors and Solutions
Various situations may occur when working with the web client that prevent normal operation. Some of them can be resolved by the client itself, which will notify you, but there are errors that require your participation, which the client will also indicate. Below are examples of situations and their solutions.
Situation 1
No webcam or microphone found in the system
Web client response
When launched, the web client will switch you to the “Device Setup” tab, automatically set the modes to “No camera” and “No microphone”, and display the following message: “No available webcams or microphones or no browser permissions to use devices.”
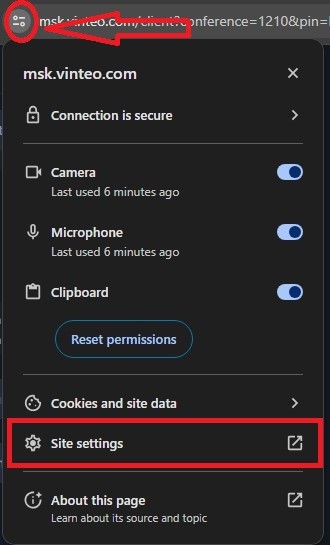
You have several options for further action, but first you need to manually grant the web client permission to access the camera and/or microphone in the browser, as this is a mandatory requirement for it to work. You can reach the permissions settings page for this site in two ways: a short route and a longer route, which is useful if the page has already been closed.
Short route
Without leaving the web client page or the server home page, click the lock icon (if the server has valid certificates) or the warning icon indicating an unsecured site, located before the address bar, and select “Site settings.”
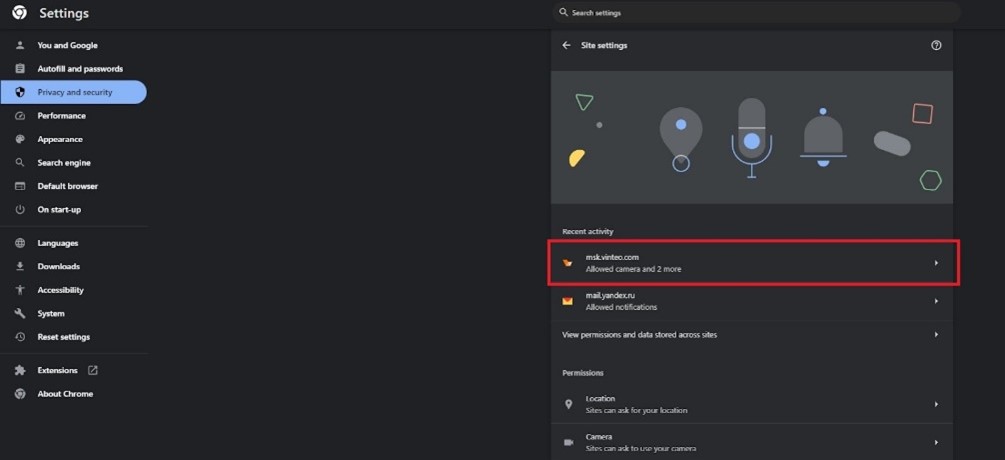
Long route
Path: “Settings” → “Privacy and security” → “Site settings” → “View permissions and data stored across sites”, then click the entry with the server address.
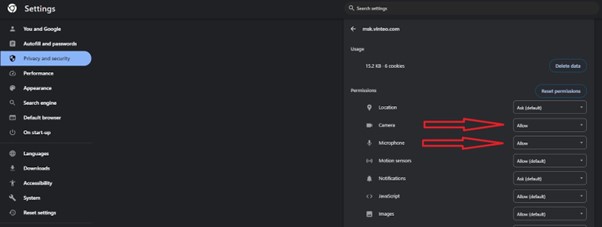
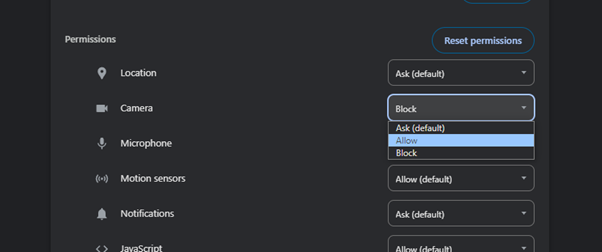
In both routes above, you will reach the security settings page for the site, where you must grant permissions for the microphone and/or camera and close the settings page. After that, reload the server home page or the client page to apply the rules.
Below are options for what to do once microphone and/or camera permissions have been granted in the browser:
- Close the warning and continue without a webcam and microphone. Other participants will see only a placeholder image, similar to the selected avatar; you will still be able to hear the conference and share presentation content if needed.
- Close the warning and select your desktop as the video source. The desktop will be sent to the conference as the main video stream and will still work with presentations.
- Close the warning and set your avatar, which will be displayed instead of the default placeholder when there is no video source or when the video is intentionally turned off. Desktop sharing and presentation streaming remain available.
- Close the browser and install the Vinteo Desktop (VD) application. VD does not require browser permissions for access. Simply enter the server address in the “Connection address” field, and if you have an account, log in. In the dialing field, enter the conference number; if there is a PIN, append it with a hash, e.g., 1000#1234, and place the call.
- Request that the conference be broadcast to you and ask for the broadcast link — there will be no issues with microphone or camera.
Situation 2
Microphone and/or camera exist in the system, but access was denied in the browser during the first launch (Chrome)
Web client response
The web client will switch you to the “Device Setup” tab, automatically set the modes to “No camera” and “No microphone”, and display the message: “No available webcams or microphones or no browser permissions to use devices.” This message is the same as when the camera and microphone are absent.

There is one solution:
In the browser settings, grant permission to use the microphone and/or camera for this site. Click the lock icon or the warning icon to open quick security settings and allow access to one or both devices.
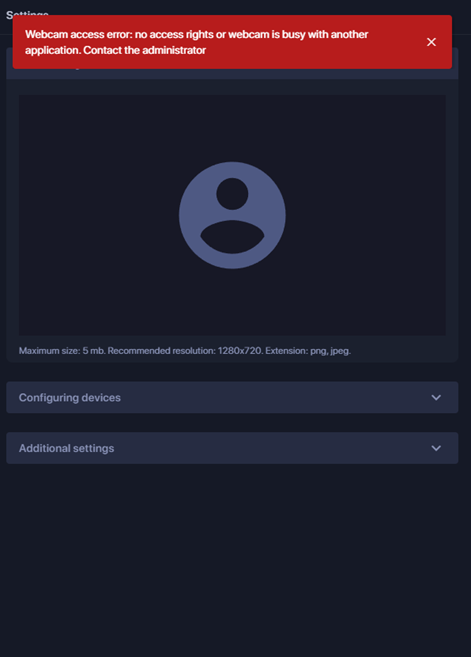
Situation 3
The webcam is assigned but currently used by another application
Web client and VD response when only one webcam is available
The web client will switch you to the “Device Setup” tab, automatically set the mode to “No camera”, and display the following message:

There are two options:
- Close the warning and continue without a camera;
close the warning, minimize the browser or VD to the taskbar (VD can remain open, it will restore camera and microphone automatically), find and close the application using the camera, and reopen the browser. The selected camera will be restored and you can continue working.
Web client response when multiple video sources are available
In the example, the “HD Webcam” is assigned as the primary source, while the “M1000 UHD Camera” (available in the system) is the secondary source. When launched, the web client will switch to the “Device Setup” tab, automatically switch to the second source, and display the following message:
There are two options:
- Close the warning and continue working with the second video source;
- Close the warning, minimize the browser to the taskbar, find and close the application using the camera, and reopen the browser. The selected camera will be restored and you can continue working.
How to find the application using the camera or microphone:
- For Windows 10: “Settings” → “Privacy” → “Camera” or “Microphone”;
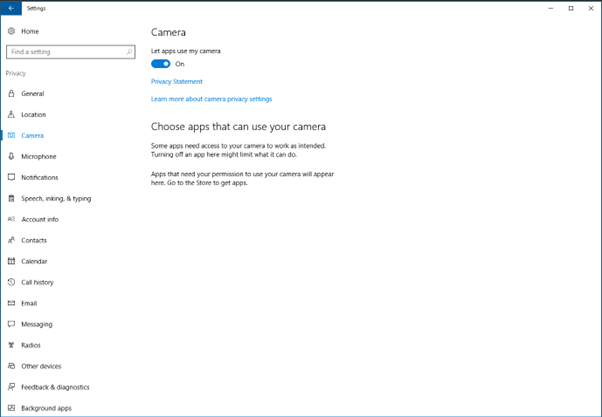
- For Windows 11: “Settings” → “Privacy & security” → “Camera” or “Microphone”.
Situation 4
Access to the webcam is denied in the OS
Web client response
The web client will switch you to the “Device Setup” tab, set the modes to “No camera” (you must manually set “No …”) and display the following message:
Possible solutions:
- Close the message and continue without a camera and/or microphone;
- Close the message, enable microphone and/or camera access in the OS privacy and security settings, and continue working.
To grant camera and microphone access in Windows OS:
- Windows 10: go to “Settings” → “Privacy” → “Camera” or “Microphone”
- Windows 11: go to “Settings” → “Privacy & security” → “Camera” or “Microphone”
On this page, verify both the global permission for device access and permissions specifically for the video conferencing client.