

Settings
On the Settings page you can find:
* firewall settings to block access to SIP and H.323 ports from the local network;
* network interface and routing parameters;
* anonymous user connection settings;
* SIP and H.323 settings;
* address translation parameters;
* diagnostic utilities;
* server power management;
* the “Allow to make group calls” toggle — a parameter for WS accounts that allows participants in a Vinteo Desktop conference to select several contacts from the address book and call them, as well as add participants during a call from the contact list, thereby creating temporary conferences.
To change settings, you must end all conferences; the new settings will be applied after one minute.
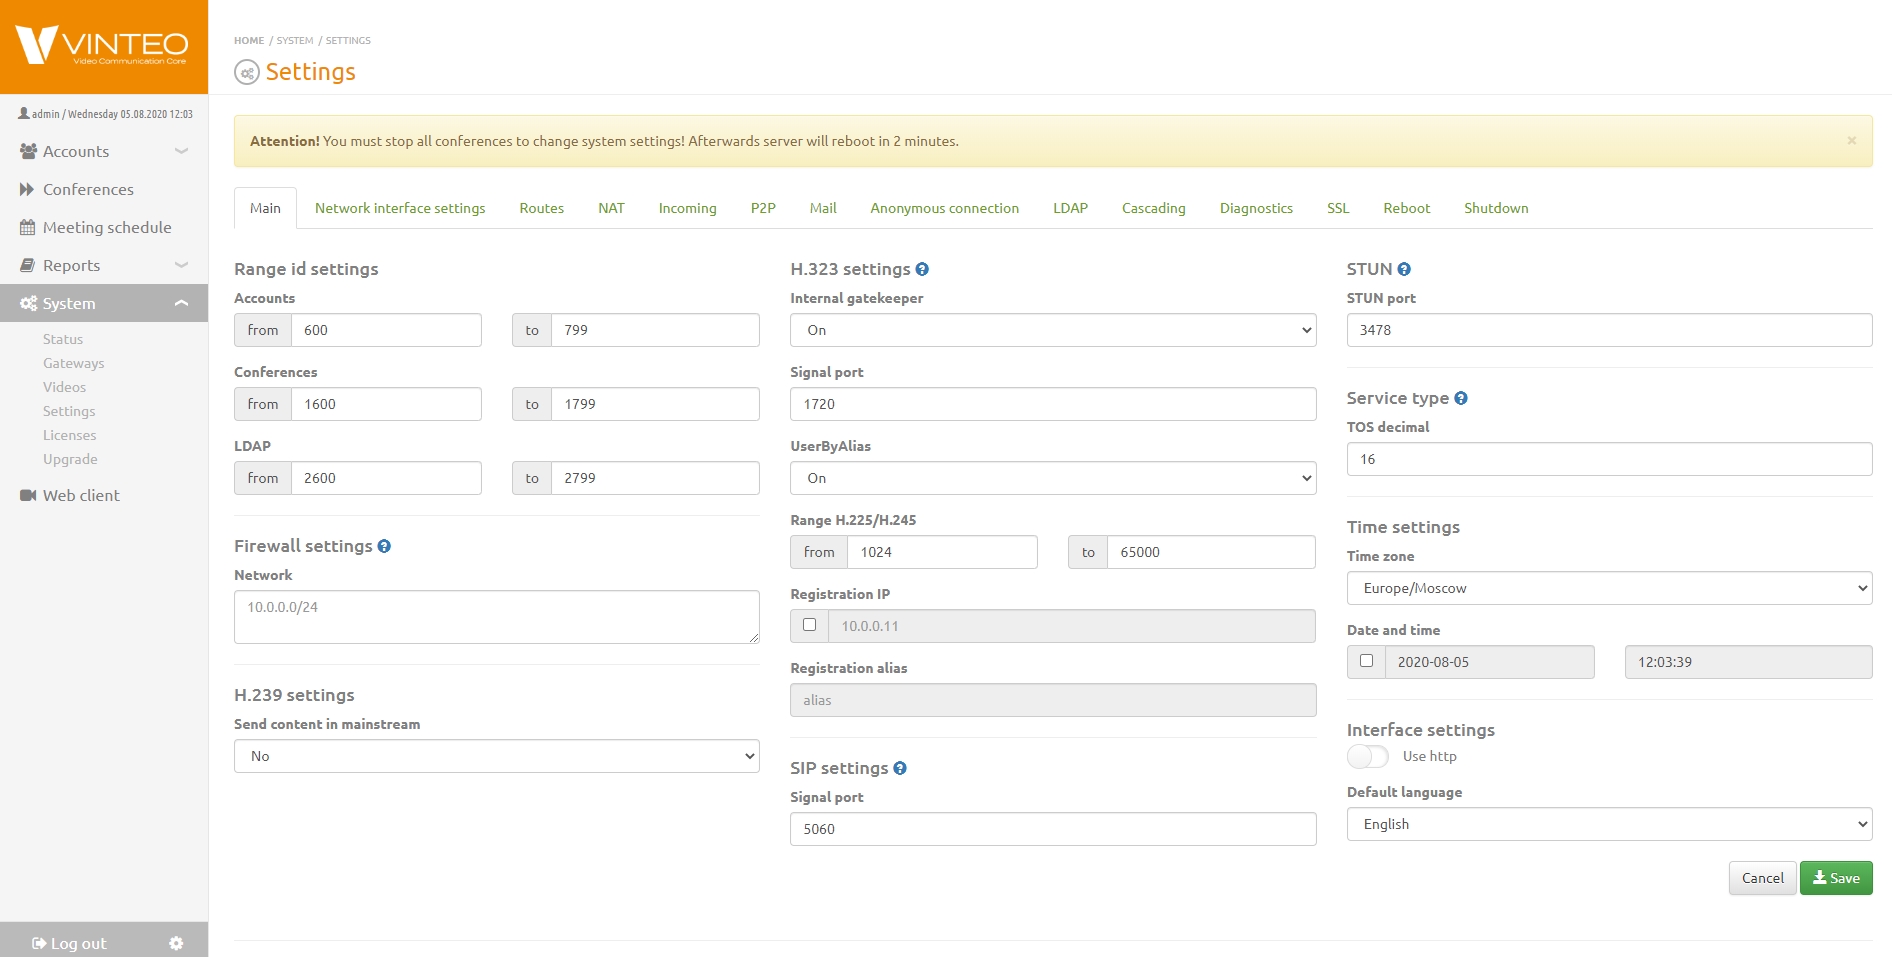
Main
On the Main settings tab you can change:
* firewall settings to block access to SIP and H.323 ports from the local network;
* SIP settings, ToS – signaling port;
* time and interface settings – default language;
* H.239 settings – allows enabling/disabling “Send content in the main stream” as a common mode for the server.
Number Range Settings
Number range settings are required to define the numbering plan of the VINTEO server. The ranges will be used by the system for automatic creation of new accounts and conferences or as a recommended number when manually creating these entities. You can manually create an account or conference with a number outside the range.
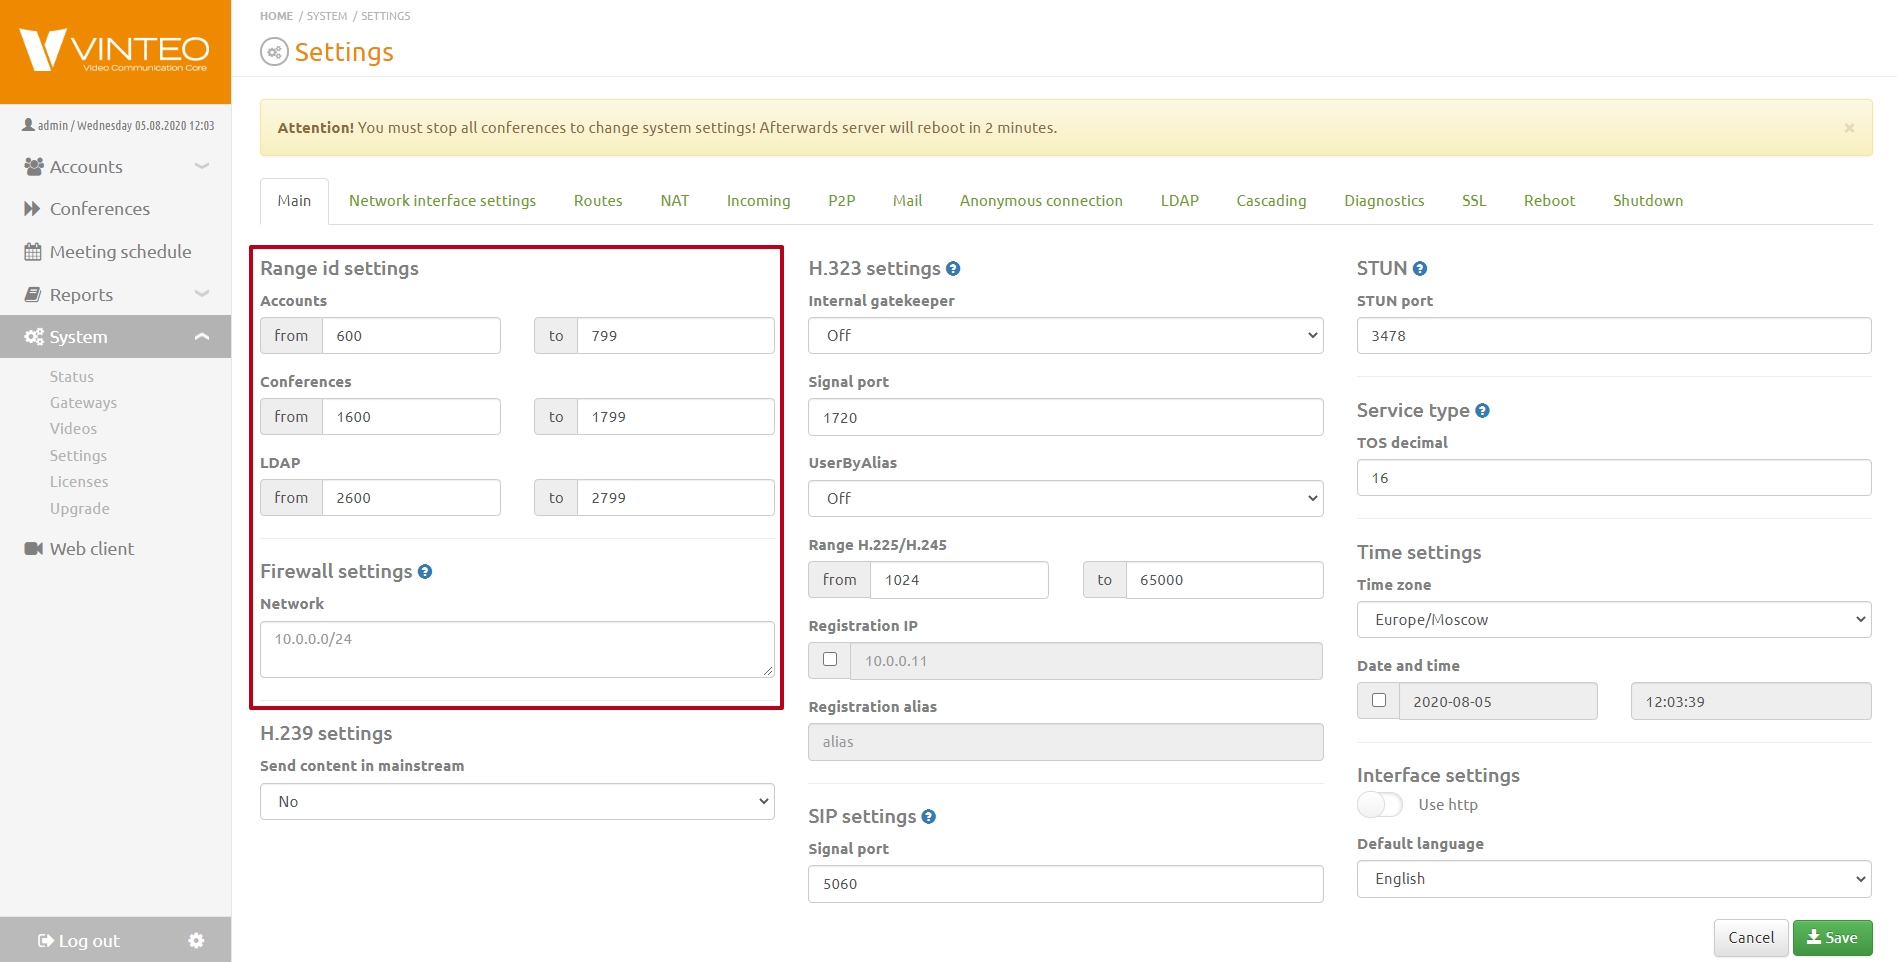
Firewall Parameters
Firewall parameters work as a “whitelist” of access. If the list is empty, access is allowed from all networks visible to the server. If the list contains a single address or subnet, access will be allowed only from that subnet. For correct operation of WS accounts, you must add the network 127.0.0.1/32.
Trusted Proxy Addresses
In the “Trusted proxies” field you can list subnets of trusted proxy servers in the format xx.xx.xx.xx/xx. By default, the field is empty. When subnets of trusted proxy servers are specified, the web/API should consider all “x-forwarded-*” HTTP headers sent by a proxy server from that network. This is necessary to correctly determine the IP address of a WebRTC connection.
H.239 Settings
“Send content in the main stream” — toggles the server operation mode where the received second stream is sent to the main stream.
Other Settings
“Allow to make group calls” — enables/disables the permission for all WS-type accounts to make “Add-Hoc” calls. An account with this permission can turn a point-to-point call into a conference by inviting other participants from their address book.
SIP Parameters
Contains the field for setting the SIP signaling port.
Type of Service
This field is used to define the level of Quality of Service, even if the network is overloaded with other traffic.
For a more detailed description, see the marking section.
Time Settings
Allows changing the time zone, date, and time on the server.
Default Language Settings
Here you can change the language of the waiting screens and voice prompts for entering the lobby, an empty conference, etc. Available languages:
* Russian;
* Dutch;
* English;
* French;
* Spanish;
* German.
There is also a toggle between secure HTTPS sessions and insecure HTTP sessions.
Domain Name Settings
In this field you can specify the server address used for conferences. After specifying the domain name, the server will be accessible only via this address.
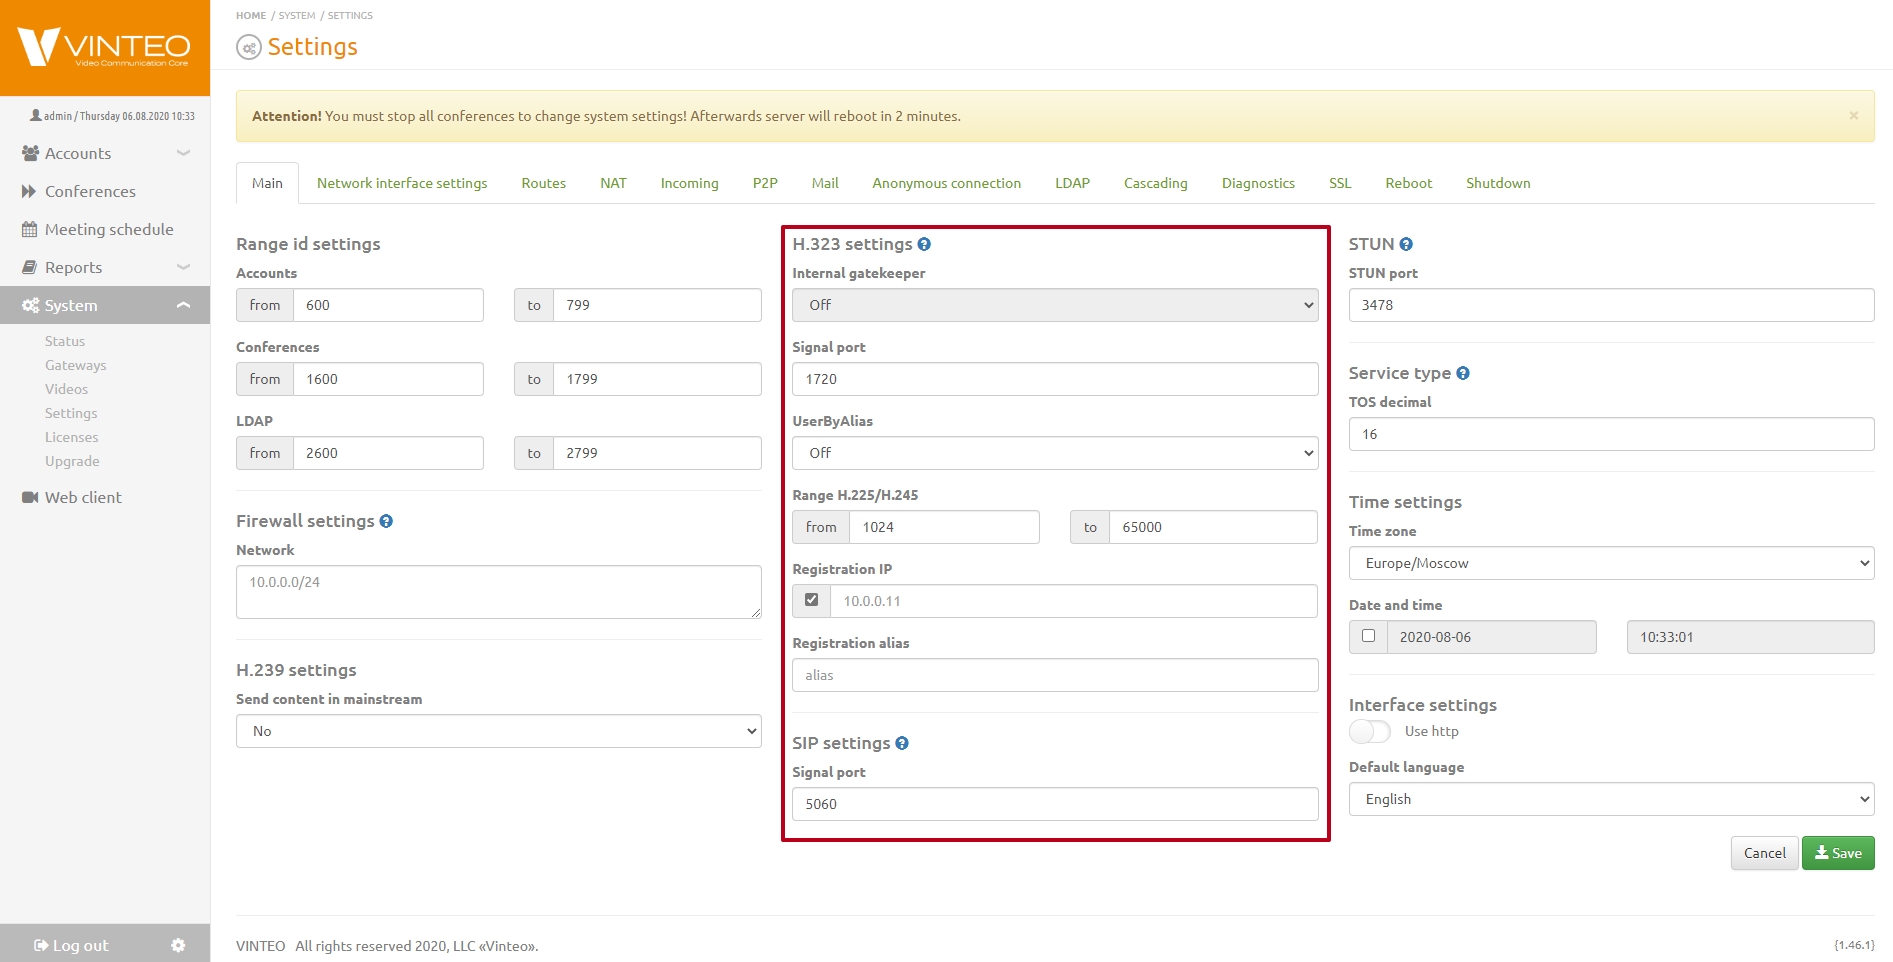
H.323 Parameters
On the “H.323 Parameters” tab you can find the following settings:
* “Signaling port” defines the port number for H.323 signaling;
* “Port range for H.225/H.245” defines the port range for H.225/H.245 protocols;
* UserByAlias — toggle for calling H.323 subscribers by their assigned number in the subscriber list;
* gatekeeper settings allow enabling/disabling the built-in gatekeeper: internal or external.
Changing H.323 signaling ports requires setting the same values on other devices.
Network Interface Parameters
Contains interface parameters and is configured in the standard way. The first network interface is “External” and is configured by filling in the fields:
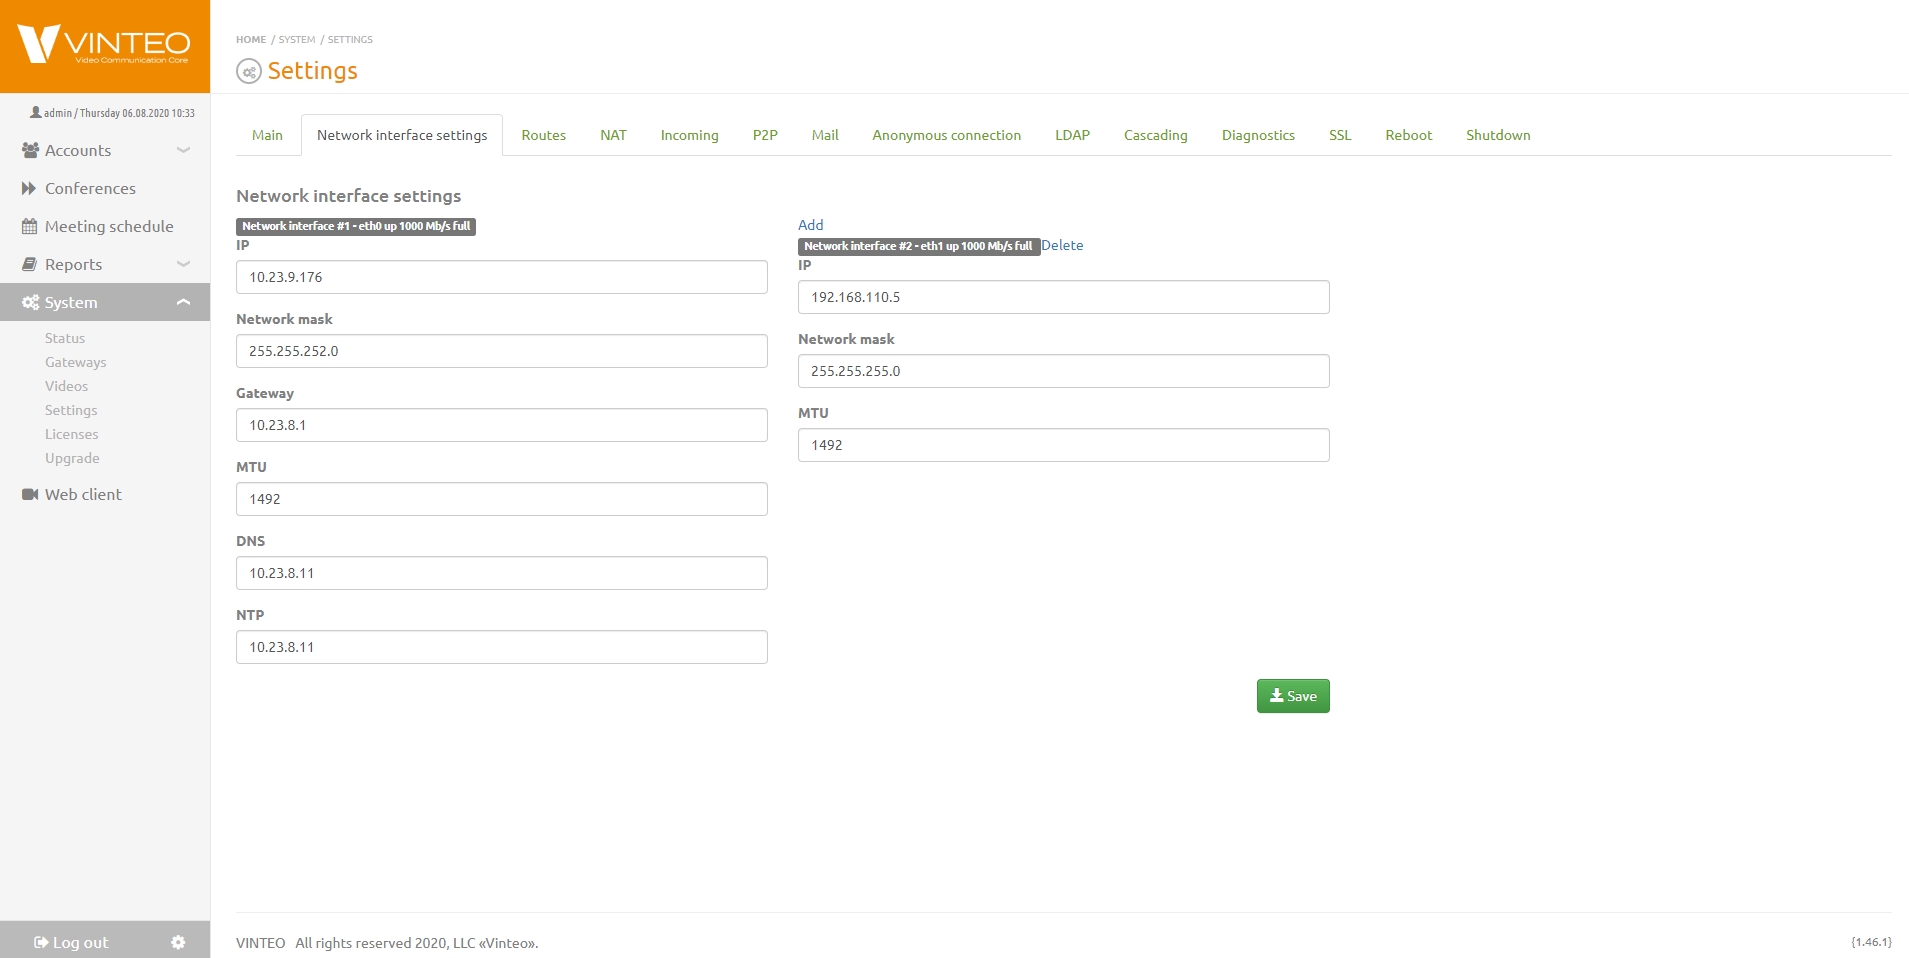
* IP – address in IPv4 format;
* Mask – value in XXX.XXX.XXX.XXX format;
* Gateway – the gateway address of the network in IPv4 format;
* MTU – the maximum transmission unit size that can be sent by the protocol in one iteration;
* DNS – DNS server address in IPv4 format;
* NTP – time server address in IPv4 format.
* Subsequent interfaces have settings for IP, “Mask”, and MTU.
After any network settings changes, all routes added on the “Routes” tab will be deactivated.
When using two or more network interfaces, it is recommended to use the first interface eth0 for external access, and the second interface for local network clients. Routing between local and external clients is configured on the “Routes” tab. When adding an interface, you must restart the server after saving the settings. After reboot, the second interface should have the status Up.
Routes
Contains a table with information about routes available to the server and allows adding static routes.
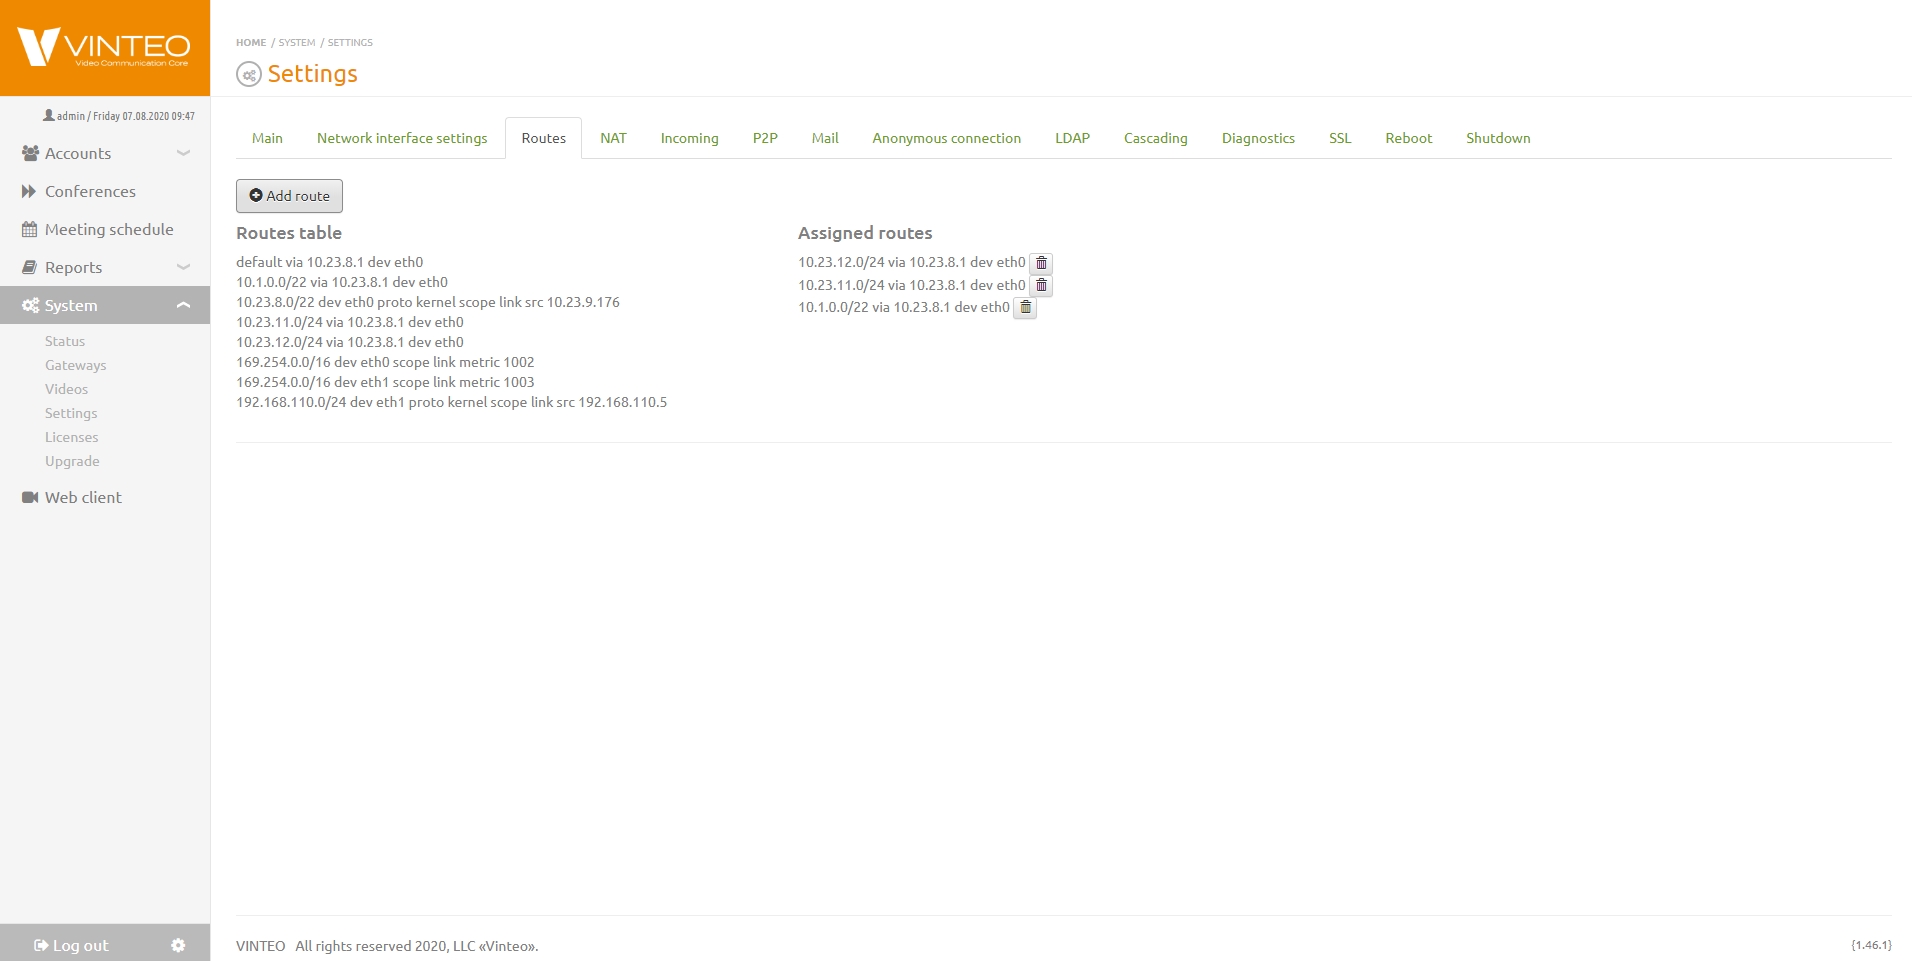
Adding new routes allows defining network interfaces for routing to specified networks. To add a new route, click the “Add” button on the “Routes” tab. In the modal window, specify the following parameters:
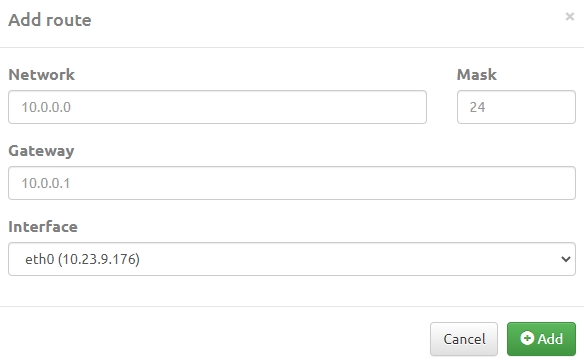
* Network – the route destination network;
* Mask – prefix length in bits;
* Gateway – the gateway address for this destination in IPv4 format;
* Network Interface – the interface to which the network device providing access to this destination is physically connected.
NAT
Contains network address translation parameters for cases where the server is located behind a border network device and does not have its own external address. Access is provided by configuring a DMZ zone or by adding signaling and RTP ports to the NAT device table.
NAT configuration can be done for only one NAT address. Along with the NAT address, a range of local networks is configured for which the server will send the local IP in signaling. Connections from other addresses (not included in the configured local networks list) will receive the address specified in the “External IP” setting. Due to this logic, the setting applies only to the eth0 interface, which has the default route configured; only it can be correctly hidden behind NAT.
To configure, fill in the following fields:

* External IP – the network address of the border device providing NAT to the local network;
* Local networks – a list of network addresses or subnets that are local to the server;
If “External IP” is specified, you must enter the addresses of your local networks in this field so that external IP substitution is not performed, as shown in the example (192.168.0.0/255.255.0.0). One network per line. Do not use CIDR.
* SIP and H.323 items – protocols used when connecting remote subscribers.
STUN Settings
STUN server address used by the SIP UA on the server side. When the server operates in closed networks or with a public IP, STUN client configuration for an external server is not required; by default the built-in server (127.0.0.1 and port 3478) is used. If the server is behind NAT, to ensure proper operation of WebRTC clients, you must specify an external STUN server address and port.
RTP Parameters
Specify the start and end ports of the range used for RTP traffic from the server side.
ICE Servers List
List of ICE servers that will be used by client applications.
[
   {
       "urls": "stun:stun.vinteo.com:3478"
   }
]
P2P
Contains parameters for recording point-to-point video calls. Here you can enable or disable recording using a toggle, select the recording resolution, set a video greeting to be shown to the caller waiting for an answer, and enable/disable autoplay of the video in case of long waiting time or short greeting length.
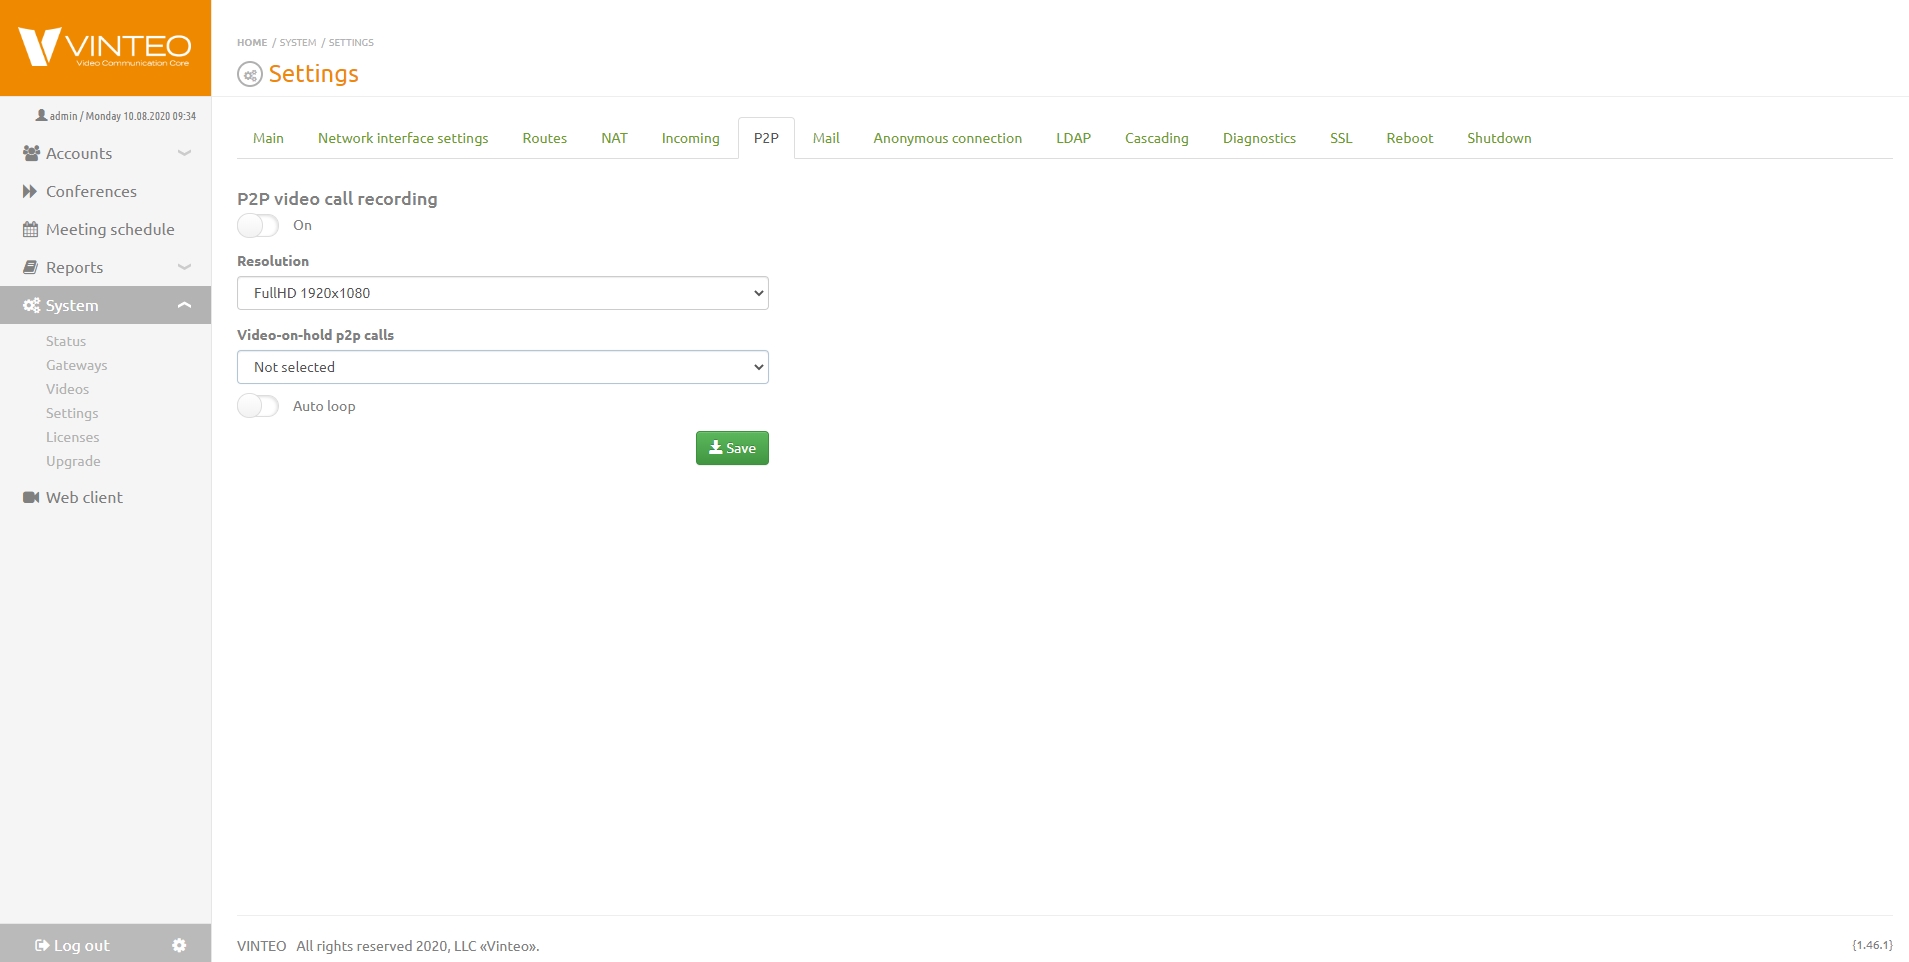
The toggle “Proxy Websocket client P2P calls” helps reduce server load because when this toggle is enabled, signaling traffic goes through the server, while the multimedia stream goes directly between participants.
When this toggle is enabled, recording of P2P calls is not possible.
Anonymous connection
Contains parameters for connecting anonymous participants to a conference. The settings include:
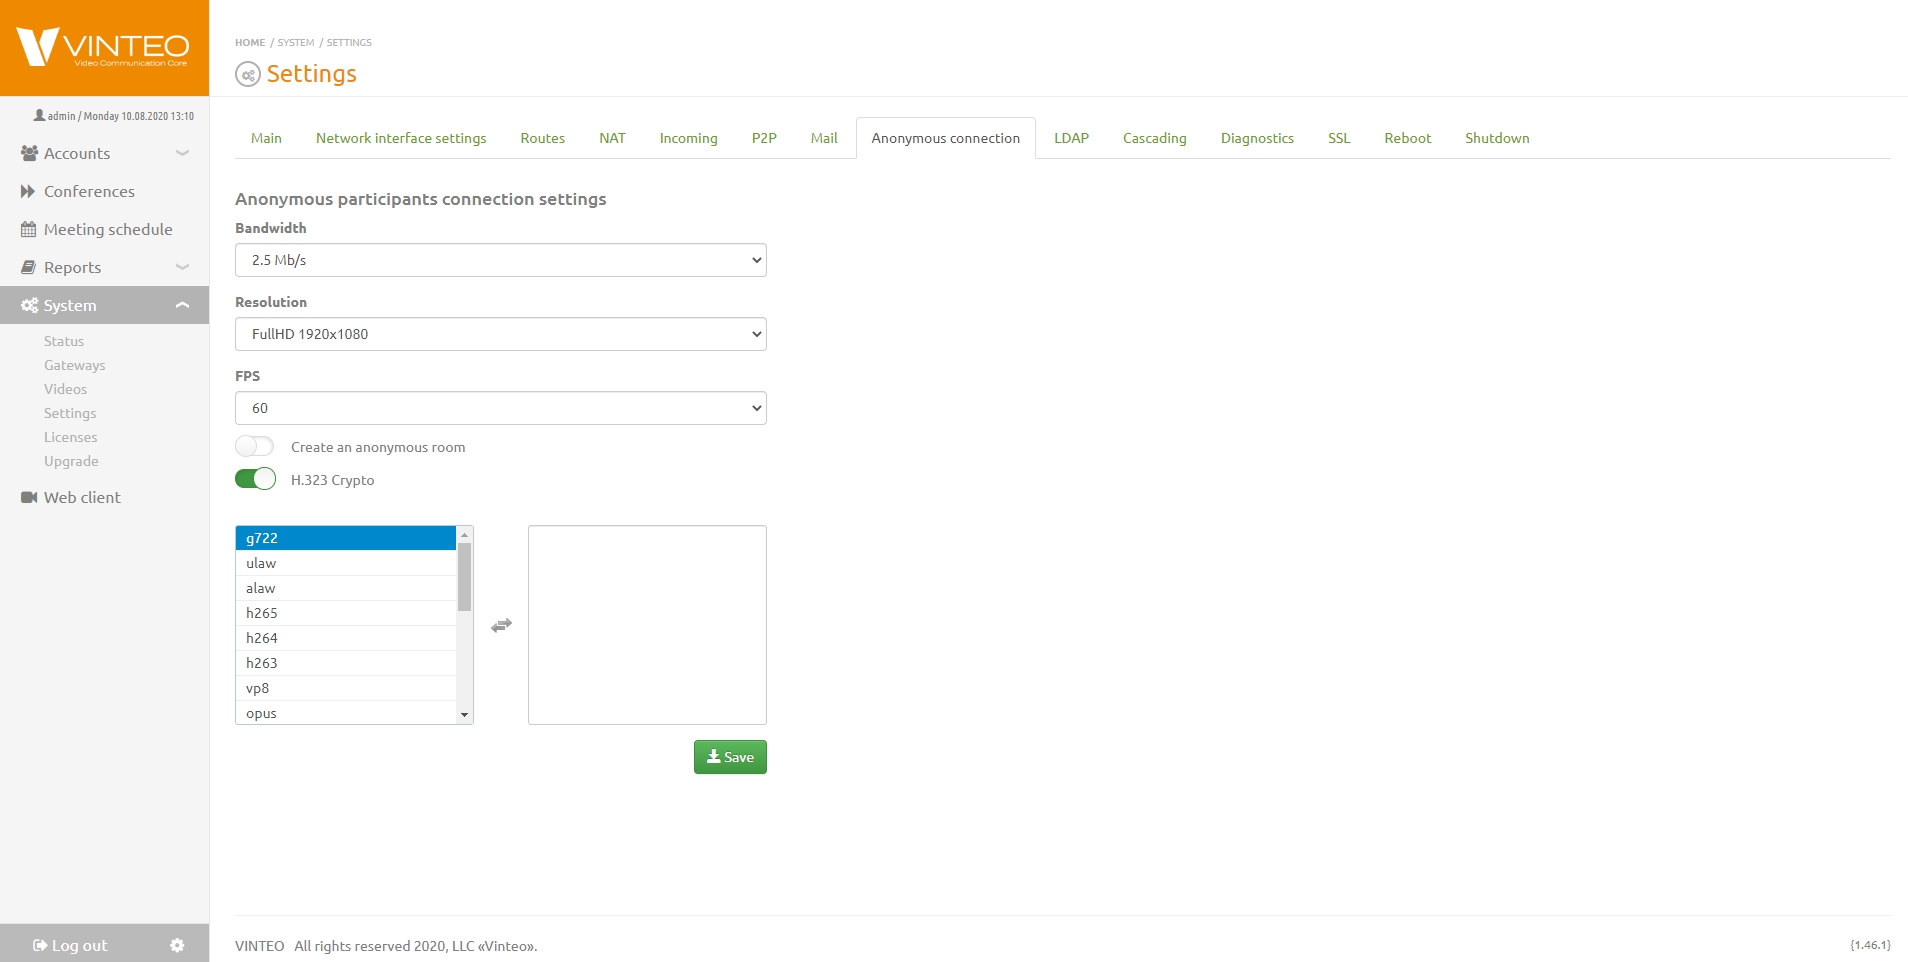
* “Bandwidth” – data transfer rate;
* “Resolution” – video resolution for the connection;
* FPS – frames per second;
* “Create an anonymous room” – automatically creates a temporary room if it does not exist; there is no management for such room;
* H.323 Crypto – a toggle allowing the use of the H.323 standard for video transmission;
* “RTP filtering” – a toggle providing additional server protection.
* This feature prevents connections from sending additional media streams from the same media port to the server;
* “Allow anonymous connection to the server” – allows anonymous calls;
* “Allow anonymous connections to auto attendant” – allows moving a participant to a conference from the auto attendant when calling a non-existent number or a disabled conference number;
* “Allow anonymous connections to call accounts” – enabling this toggle allows anonymous participants to call registered conference participants;
* “Codecs” – allowed codecs. If nothing is added to the right column, default codecs are applied.
Default codec list for H.323 connections
* g7221_48_32
* g7221_32_32
* g7221_24_32
* g7221_32
* g7221_24
* g7221_16
* g722
* ulaw
* h264
* h263
* h261
Default codec list for SIP/WS connections
* g7221_48_32
* g7221_32_32
* g7221_24_32
* g7221_32
* g7221_24
* g7221_16
* opus
* g722
* ulaw
* h264
* h263
* vp8
SNMP settings
In this tab, you can configure the operation of the communication protocol that allows monitoring managed network devices, including the video conferencing server.
There is a toggle to connect the SNMP server. Then you must specify the subnet from which it will be accessible and enter the corresponding value in the “Community” field.
Now you can view telemetry including load information, running conferences, number of used licenses, number of participants, broadcasts, recordings, etc., from your VCS servers in one place.
LDAP
This tab allows automatically adding accounts using user data from the LDAP directory structure. There are several conditions for correct import of user data:
- A sufficient range of numbers for LDAP accounts must be allocated in the numbering plan (see the “LDAP” parameter on the “Main” tab);
- LDAP records with empty userPrincipalName or email attributes will not be imported; Only one server can be connected.
The tab contains the following parameters for connecting to the LDAP server:
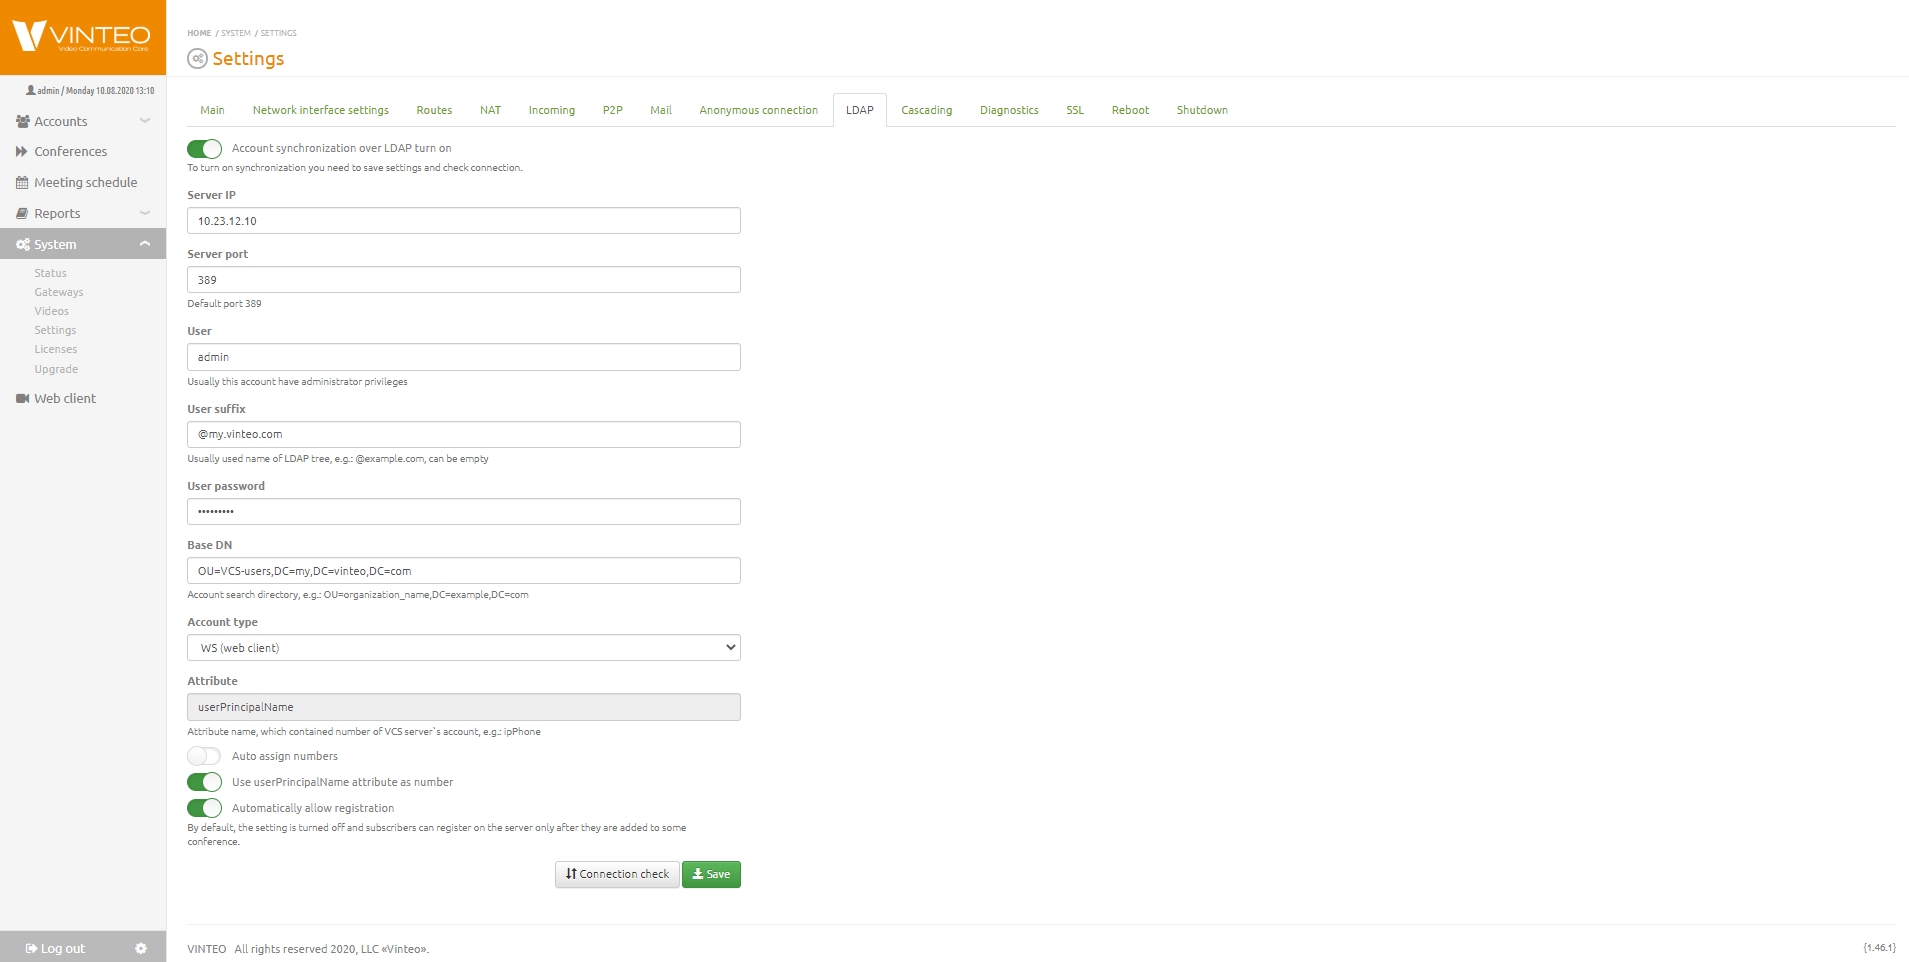
* “Server IP” – field for specifying the server IP address;
* “Server port” – field for specifying the server port, default 389;
* “Schema” – selection of the schema for the server to work with LDAP;
* “Encryption” – selection of the encryption protocol;
* “User” – field for specifying the user login;
* “User password” – field for entering the password;
* “User suffix” – field for entering the user suffix. If the suffix is left empty, the “User” field must contain the UserPrincipalName including the domain, and for authentication in the web interface and VinteoDesktop, imported AD users must enter UserPrincipalName including the domain. If this field is filled in, the domain does not need to be added during authentication;
* Base DN – field for specifying the directory in which account search will be performed, for example: OU=organization_name, DC=example, DC=com;
* “Account type” – drop-down field where you can choose WS type for the web client and Loop for Skype for Business;
* “User number attribute” – field for specifying the name of the attribute where the account number is stored, e.g., ipPhone;
* “Assign numbers automatically” – toggle allowing automatic assignment of numbers to accounts;
* “Use userPrincipalName as number” – toggle that allows using this attribute as the account number;
* “Automatically allow registration” – toggle that allows accounts to register on the server before being added to a conference. By default, this setting is off, and accounts can register only after being added to a conference.
These three toggles are available only for WS-type accounts.
To test the connection, fill in the connection parameters, click “Save” and then “Check connection”. After the connection is verified, enable the toggle for synchronizing accounts via LDAP (above the fields).
Algorithm for selecting WS-type users by the server: (&(objectCategory=person)(!(useraccountcontrol=514))(!(useraccountcontrol=66050))(mail=*))
Redundancy
Several conditions must be met to enable server redundancy:
- A backup server of equivalent power to the primary server;
- Both servers must have a second FastEthernet (FE) interface connected to each other;
- Identical firmware versions;
- Licenses with the required number of video/audio ports and redundancy for the primary server, and a license with redundancy only for the secondary server.
Then perform the following steps in the given order:
- On the Primary server, in the “Redundancy” section under “Settings”, after activating the license, enter the future IP address of the secondary server’s second interface;
- On the Secondary server, in the same section, enter the future IP address of the primary server’s second interface;
- In the “Network interface parameters” of the Primary server, add the second interface with the IP address specified in the Secondary’s redundancy settings;
- Reboot the Master to bring up the second interface;
- Perform the same settings on the Secondary server, assigning the second interface the IP address specified in the Master’s redundancy settings;
- Reboot the Secondary;
After rebooting, the Master server will wait for a response on the second interface from the Secondary about its readiness. The Secondary, after rebooting and confirming readiness, will clone the Master configuration onto itself and will no longer be accessible via the first FE interface. The Secondary will monitor the Primary through the second interface, periodically synchronizing. If the Primary stops responding, the Secondary will bring up the first interface with the same IP address as the Primary, along with the same number of licensed ports, conferences, and users. Information about successful synchronization will be displayed on the Primary server’s main page.
If the connection between the Primary and Secondary servers is lost, the license time will be limited to 72 hours. This time is allocated for troubleshooting. If the issue cannot be resolved within this time, you must contact Vinteo technical support before the license expires. If the connection is restored before the 72 hours elapse, the previous license countdown is resumed.
Cascading
VINTEO server implements capacity expansion of the video conferencing system by increasing the number of ports, communication channels, and distributing load between multiple servers. To use this feature, multiple VINTEO servers with the same software version are required.
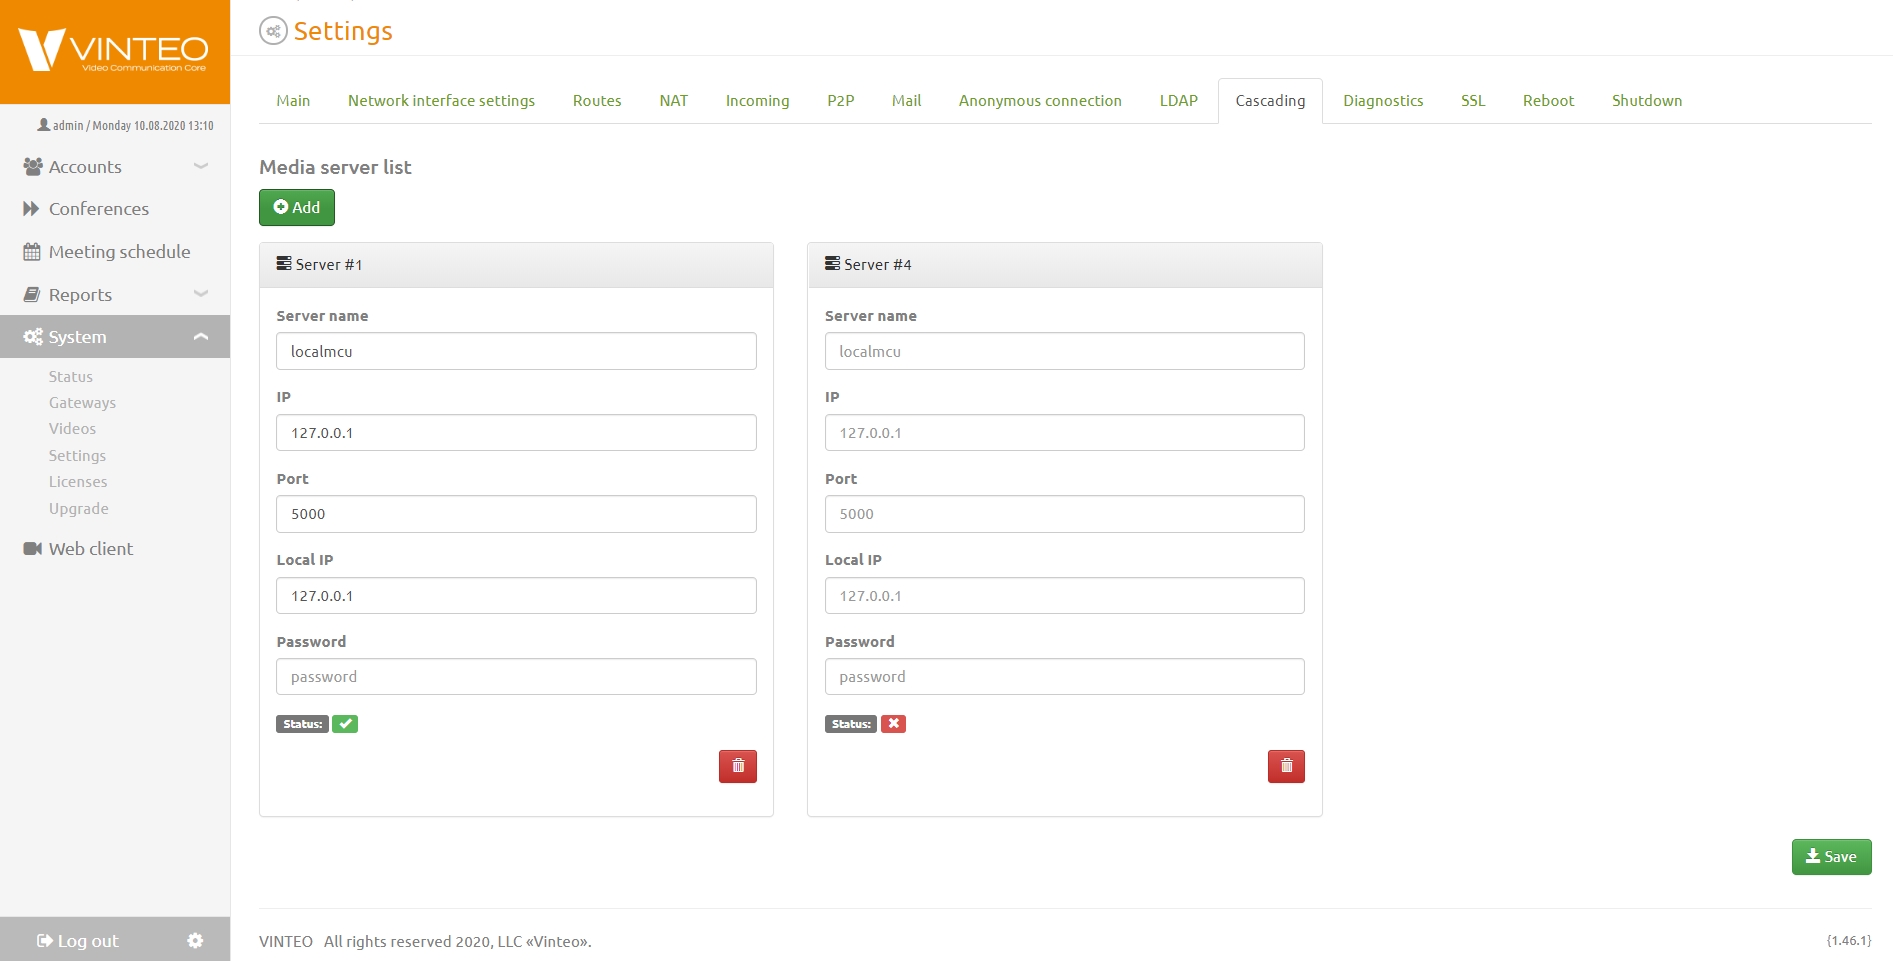
The current server is designated as “Server #1”; deleting it will remove the media server role. To add cascade servers, click “Add” and fill in the remote server parameters:
* Server name – name for identifying the server in Latin characters;
* IP – server IP address in IPv4 format;
* Port – listening port for incoming connections on the remote server;
* Local IP – the leading server’s IP address in IPv4 format;
* Password – administrator password of the remote server.
Correctness of the settings and cascade operability can be verified by going to the main server configuration window; additional statistics tabs with the names of connected servers will appear. Operational logic:
- The leading server acts as a central gateway for conference participants;
- Participants are then distributed across the cascade; the label “localmcu” indicates connection to the leading server;
- The leading server forms the layout; when assigning a participant from a secondary server, automatic transfer to the leading server occurs;
- The leading server balances participants between servers based on the total load on each server.
Diagnostics
Contains various standard network tools for checking and diagnosing network issues and problematic calls.

Field for entering the IP address of the server to check connection speed and quality, and obtain packet loss information.

Field for obtaining trace data.
Connection issue diagnostics tab. To correctly capture a dump of a problematic call:

Stop all unrelated running conferences; there should be as few calls as possible on the server!
- Click the Start button;
- Make a call to/from the server — from the server to an endpoint device of a subscriber or to a neighboring server for about a minute;
- End the call;
- Stop recording by clicking the Stop button;
- Download and save the dump to your PC by clicking Export.
After that, it can be sent to technical support upon request or analyzed independently.
Tab for recording and saving logs.
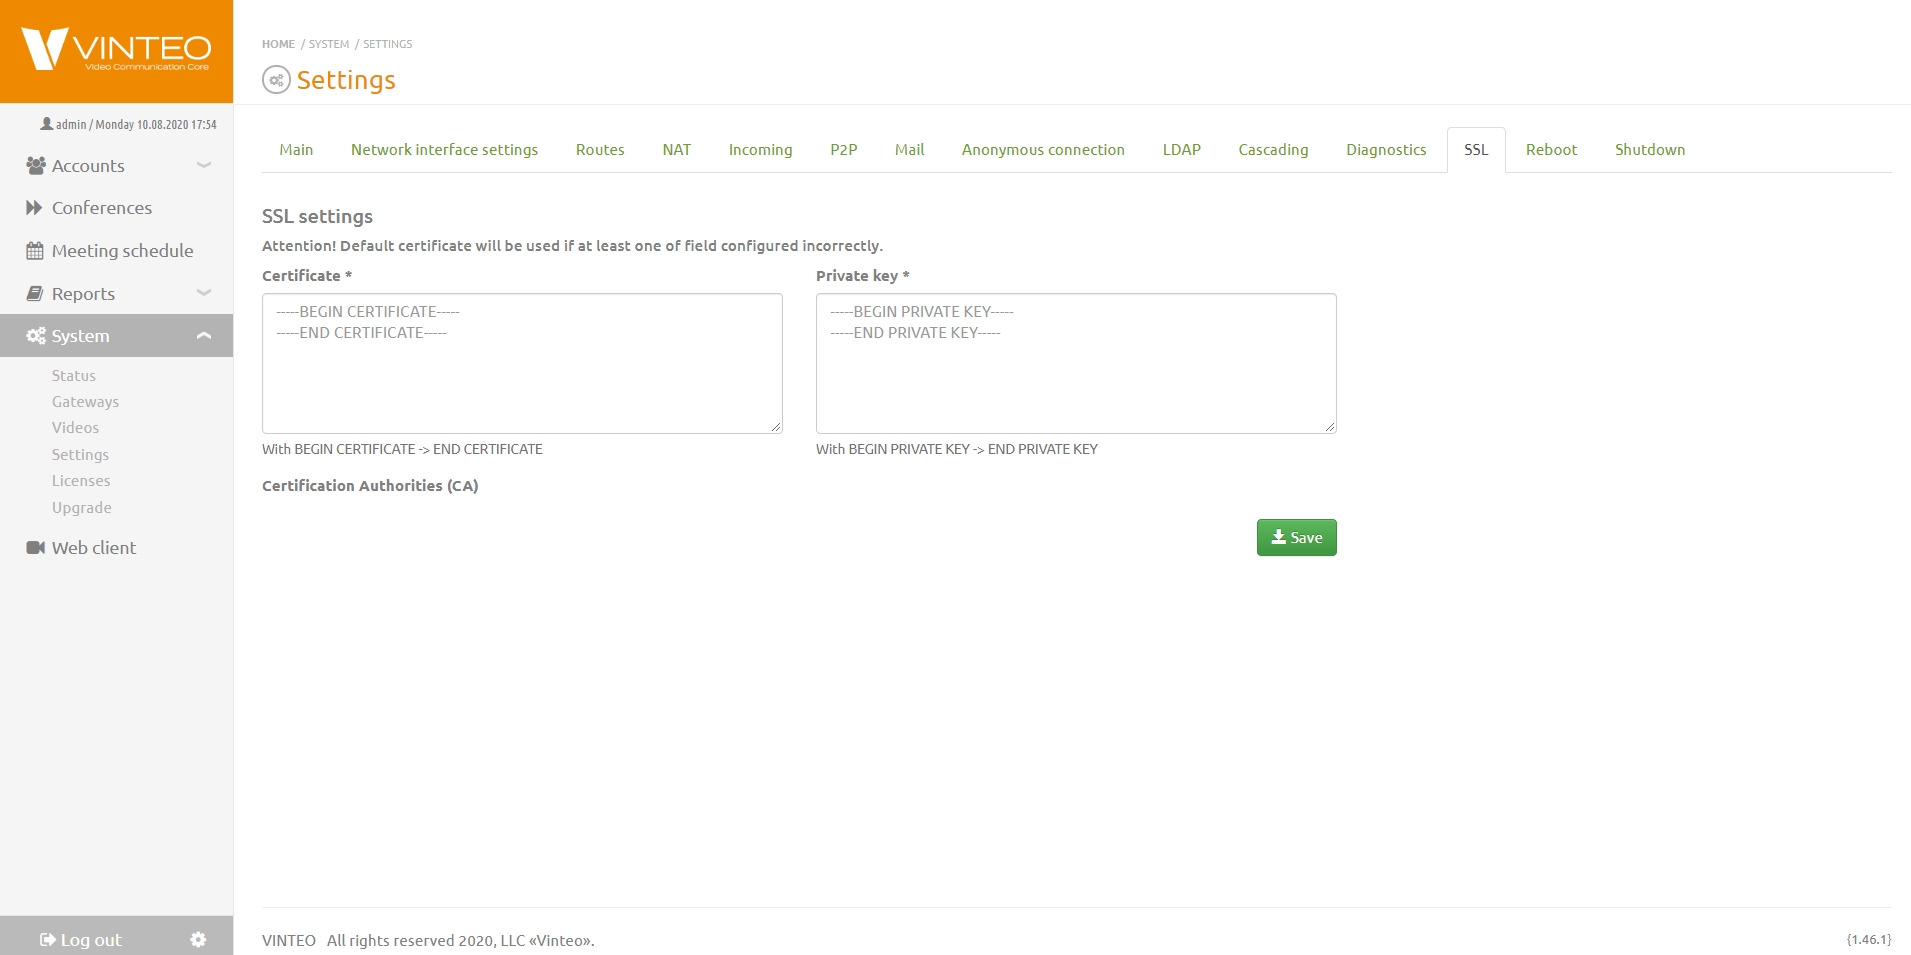
SSL
VINTEO supports installing an SSL certificate into the built-in web server. When you receive a new certificate, you will have a set of files:
- Private key;
- The certificate itself;
- Possibly intermediate certificate authority certificates;
- Root certificate authority certificate.
In the “Certificate” field you must paste the certificate chain, i.e., the combined contents of the certificate file (item 2) and the intermediate CA certificate files (item 3).
In the “Private key” field you must paste the contents of the private key file (item 1).
If the certificate is issued by a non-public certificate authority, you must paste the contents of the root CA certificate file (item 4) into the “Certification Authorities (CA)” field.
For public CAs, this field can be left empty. To complete the setup, click “Save”.
Reboot
To reboot, go to this tab and confirm the reboot in the modal window by clicking “Reboot”.
Shutdown
To shut down, go to this tab and confirm the shutdown in the modal window by clicking “Shutdown”.